Gourmet Peanut Butter and Jelly Grain Bread Sandwich
Make this Gourmet Peanut Butter and Jelly Grain Bread Sandwich in just 45 minutes! A delightful combo of whole wheat flour and oats for a healthy treat. Perfect for families!

- about gourmet peanut butter and jelly grain bread sandwich
- master the art of gourmet peanut butter and jelly grain bread sandwich
- your new favorite gourmet peanut butter and jelly grain bread sandwich
- health & nutrition highlights
- recipe at a glance
- master ingredient list
- foolproof cooking steps
- expert kitchen wisdom
- perfect presentation
- storage & make - ahead
- creative variations
- expert faq solutions
- complete nutrition guide
- Recipe Card
about gourmet peanut butter and jelly grain bread sandwich
peanut butter and jelly sandwiches have a nostalgic charm that dates back to the early 1900s, becoming a staple in american households, this delightful combination of creamy peanut butter and sweet jelly on bread has been enjoyed by kids and adults alike for generations, the gourmet twist we’re adding with our grain bread elevates this classic favorite into something truly special, by using wholesome ingredients like whole wheat flour, oats, and flaxseed meal, you not only indulge your taste buds but also nourish your body .
this recipe stands out because it combines comfort food with health benefits, imagine biting into a sandwich that’s not just tasty but also packed with fiber, protein, and essential nutrients. you’ll be amazed at how simple ingredients can come together to create such an enjoyable dining experience all while sticking to healthier choices .
master the art of gourmet peanut butter and jelly grain bread sandwich
the culinary heritage behind the peanut butter and jelly sandwich is rich, it reflects various cultures coming together; peanuts originated in south america, while jam - making has roots in europe, with its fascinating origin story tied deeply to american culture during world war ii when soldiers were given rations including peanut butter this sandwich symbolizes convenience amidst hardship .
today, this beloved dish enjoys modern - day popularity as families seek quick yet nutritious meals, the gourmet version we're exploring gives new life to an old classic by emphasizing quality grains instead of plain white bread, so whether you're packing lunch for your child or indulging yourself after a long day at work, this grain bread sandwich serves as both comfort food and healthy sustenance .
your new favorite gourmet peanut butter and jelly grain bread sandwich
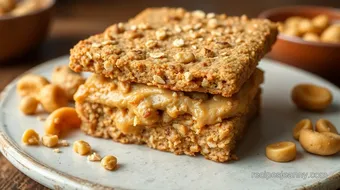
get ready for unique flavor combinations. the crunchiness of rolled oats paired with smooth peanut butter creates texture that dances on your palate while sweetness from the jam ties everything together perfectly it’s pure bliss in every bite. plus ahem don’t worry about messing things up; we’ve got foolproof techniques here that'll make anyone feel like a pro chef.
our expert - tested method ensures consistent results every time you bake the grain bread from scratch, and hey, if you think baking takes too much time they say "time flies when you're having fun," right ? well, i promise these sandwiches are worth every minute spent prepping them. we’ll share some handy tips along the way that can help cut down prep time without sacrificing taste or quality .
health & nutrition highlights
now let's talk health because who doesn’t want delicious food that's good for them ? our gourmet peanut butter and jelly grain bread sandwiches boast key nutritional benefits like ample fiber from whole grains which supports digestive health. plus the protein content found in peanut butter keeps you feeling fuller longer so those mid - afternoon cravings don’t stand a chance.
for those with dietary considerations such as gluten sensitivity or nut allergies (yikes.), we've included simple substitutions earlier on like almond or cashew spreads instead of traditional peanut butter everyone deserves to enjoy these yummy sandwiches. additionally with mindful ingredient choices you'll find wellness advantages creeping their way into your daily meals too : balanced nutrition facts mean less guilt when indulging.
recipe at a glance
so what are we working with here ? let’s break it down :
- total preparation time : just about 15 minutes plus baking time.
- skill level required : easy - peasy – even novice cooks can nail this one.
- serving size details : this recipe makes two hearty sandwiches perfect for sharing (or devouring solo no judgment here.)
- cost efficiency : using pantry staples means cost - effective eating without skimping on flavor or nutrition.
there you have it a tantalizing introduction to our deliciously wholesome gourmet peanut butter and jelly grain bread sandwich recipe. get ready to impress friends (and yourself) as you dive into cooking this all - time favorite snack turned gourmet delight today.
master ingredient list
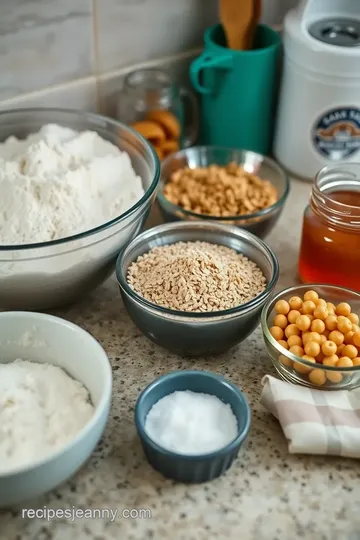
premium core ingredients
when making a gourmet peanut butter and jelly grain bread sandwich, the quality of your core ingredients matters, here’s what you’ll need :
-
whole wheat flour (1 cup) : look for whole wheat flour that is finely milled for a smooth texture, check the expiry date to ensure freshness; fresher flour has better flavor and nutritional value .
-
oats (1/2 cup) : rolled oats are preferred as they bring a chewy texture to your bread, ensure they are labeled “gluten - free” if necessary, especially if you have gluten sensitivities .
-
flaxseed meal (1/4 cup) : choose freshly ground flaxseed meal for maximum health benefits, store it in an airtight container in the fridge to keep its oils from going rancid .
-
baking powder (1 tsp) & baking soda (1/2 tsp) : opt for aluminum - free baking powder for a cleaner taste, always check both agents' dates; expired ones can lead to flat bread.
-
salt (1/2 tsp) : use sea salt or kosher salt for added flavor depth it's amazing how much difference this little ingredient can make.
-
honey or maple syrup (3 tbsp) : for sweetness, honey adds moisture while maple syrup is great if you're going vegan. choose organic options when possible .
-
peanut butter (1/4 cup) : whether creamy or crunchy depends on your preference. look for natural brands with minimal additives just peanuts and maybe a bit of salt will do.
-
water (3/4 cup) : fresh tap water works just fine here, but filtered water can enhance flavors slightly .
signature seasoning blend
while peanut butter and jelly might steal the show, adding some signature seasonings can elevate your grain bread sandwich experience :
-
consider mixing in spices like cinnamon and nutmeg into your dry ingredients, just 1/2 teaspoon each can add warmth without overpowering the classic flavors .
-
fresh herbs like rosemary or thyme could be interesting additions too. just chop finely and blend them into the dough they’ll boost aroma significantly .
smart substitutions
if you’re missing something from that premium list above or just want to try something new here’s where smart substitutions come in handy :
-
for whole wheat flour, almond flour works well but may alter texture slightly; just combine half with another type of flour to maintain structure.
-
in place of oats, try quinoa flakes they provide similar nutrition yet unique flavor profiles .
-
if you’re out of honey/maple syrup completely ? agave nectar is a suitable alternative but use it sparingly since it's sweeter than most syrups.
kitchen equipment essentials
to whip up these sandwiches seamlessly, you'll need some essential kitchen tools :
must - have tools
- mixing bowls : a set of various sizes helps when combining wet/dry ingredients .
- measuring cups/spoons : accurate measurements equal consistent results.
- spatula : great for leveling off batter in pans.
recommended appliances
- oven : preheating ensures even baking; don't skip this step.
- stand mixer : if you’ve got one lying around it makes mixing easier but isn’t necessary .
helpful gadgets
- loaf pan : a standard size works perfectly here. silicone loaf pans are easy to release baked goods from too .
home alternatives
if you're low on equipment :
- use any oven - safe dish as long as it holds shape during baking it doesn’t have to be fancy.
pro ingredient tips
choosing high - quality ingredients leads directly to delicious results so here are my pro tips :
selection secrets
when buying nuts/seeds like flaxseed or rolled oats always aim organic whenever feasible the taste difference is worth it.
quality markers
look at packaging labels closely; avoid anything filled with preservatives that'd compromise healthiness over time even tiny amounts matter long - term health - wise.
storage solutions
keep unopened packages stored cool/dry until ready - to - use while opened items should go straight into labeled jars/fresh bags kept tightly sealed away from sunlight/moisture sources a little care goes along way towards freshness retention throughout their lifespan…
money - saving tips
buy bulk wherever possible. it not only saves money but also cuts down on unnecessary packaging waste which we should all strive towards minimizing nowadays anyway we're all about saving our planet too right ?.
and there ya go with everything you needed laid out nicely you'll create an amazing gourmet peanut butter and jelly grain bread sandwich before ya know it while feeling good about using quality stuff without breaking bank either… happy cooking friends..
foolproof cooking steps
essential preparation steps
1, mise en place : this french term means "everything in its place ." before you start cooking, gather all your ingredients and tools, for our gourmet peanut butter and jelly grain bread sandwich, have your whole wheat flour, oats, flaxseed meal, baking powder, baking soda, salt, honey (or maple syrup), peanut butter, and water ready on the counter, don’t forget measuring cups and spoons.
1, prep techniques : measure each ingredient accurately this is key for a successful bake. use a spoon to scoop flour into your measuring cup instead of packing it down; it keeps the bread light, when dealing with sticky ingredients like honey or peanut butter, lightly grease your measuring cup with oil to help them slide out easily .
1, time management : allocate about 15 minutes for prep before baking time begins, while the oven preheats at 350°f (175°c), use this window to mix your dry ingredients first so everything’s organized when you blend in the wet ones .
1, organization tips : keep your workspace tidy as you go this helps maintain focus and sanity. clean up spills right away and keep a trash bowl nearby for quick disposal of wrappers or scraps .
professional cooking method
1, step - by - step process : start by mixing dry ingredients : whole wheat flour, oats, flaxseed meal, baking powder, baking soda, and salt in one bowl; combine wet ingredients honey (or maple syrup) with peanut butter and slowly add water in another bowl until smooth .
1, temperature control : ensure that the oven is fully preheated before placing the loaf pan inside it’ll help develop that lovely golden crust we all crave.
1, timing precision : bake for 25–30 minutes but set a timer for 25 minutes first to check on it then every oven behaves differently. look for a lightly golden top; if a toothpick comes out clean when inserted into the center that’s how you know it's done .
1, success indicators : the bread should be firm but springy when pressed gently on top after removing from the oven a little dance of joy will ensue here.
expert techniques
1, professional methods : don't rush mixing the goal is just to combine without overworking gluten which can lead to dense bread. gently fold wet into dry until no dry spots remain; lumps are totally okay.
1, critical steps : once baked perfectly (remember that toothpick test.), let it cool in the pan for about 10 minutes before transferring to a wire rack cooling too long can leave it soggy at bottom .
1, precision points : slice only once completely cooled the moisture needs time to redistribute throughout so every bite stays soft rather than crumbly .
1, quality checks : taste - test as you go. a little dab of dough won’t hurt you don’t want bland sandwiches after all.
success strategies
1, troubleshooting tips : if your dough seems too thick or crumbly during mixing ? add extra water one tablespoon at a time until it reaches desired consistency it should feel moist but not sticky .
1, quality assurance : to ensure delicious results every time not only check freshness of ingredients but also consider using natural sweeteners rather than processed options they enhance flavor beautifully.
1, perfect results guide : experimenting with different jams ? oh boy. raspberry jam gives delightful tartness while strawberry adds sweetness you do you boo.
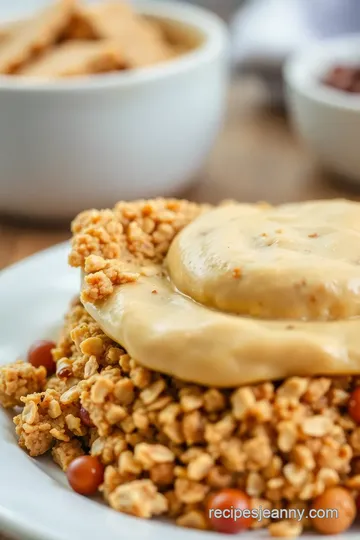
1, final touches : assemble sandwiches right before serving; spread generous amounts of peanut butter followed by jelly between slices don’t skimp here folks because who wants sad sandwiches ?
follow these foolproof cooking steps closely while keeping things relaxed & fun in kitchen you’ll whip up an amazing gourmet peanut butter & jelly grain bread sandwich that delights taste buds every time. enjoy every bite knowing you've nailed this recipe like a pro chef would.

expert kitchen wisdom
when it comes to baking bread, a little expert insight can go a long way, first off, always measure your ingredients accurately using weight is often more reliable than volume, professional bakers swear by this. if you want that perfect rise, let the dough rest properly before baking; don’t rush it. another pro tip ? use room temperature water when mixing with the dry ingredients for better consistency .
and here’s a kitchen secret : if your dough seems too dry, just add a splash of water gradually until it's right, it's all about finding that sweet spot where everything combines beautifully without turning into a sticky mess. trust me; you'll thank yourself later .
perfect presentation
now let's talk about making those sandwiches pop visually because we eat with our eyes first, right ? when plating your gourmet peanut butter and jelly grain bread sandwich, stack them at an angle on the plate, this little twist makes everything look fancier like you're hosting a brunch.
for garnishes, fresh berries or edible flowers can elevate your dish's presentation effortlessly, a sprinkle of powdered sugar over the top also adds that cute touch (and who doesn't love some sweetness ?), serve alongside colorful fruit slices to create an inviting tableau that begs to be devoured.
storage & make - ahead
here’s where things get practical : if you want these sandwiches ready for busy days ahead, they’re totally make - ahead friendly. store any leftover sliced bread in an airtight container at room temperature for up to three days or in the fridge for longer freshness .
for freezing leftovers (which is great if you’ve made a big batch), wrap each sandwich tightly in plastic wrap and then place them inside freezer bags, when you’re ready to indulge again, simply remove from the freezer and let thaw at room temp or reheat slightly in the microwave a quick 15 - 20 seconds should do it without making them soggy.
creative variations
the beauty of this recipe lies in its versatility. feeling adventurous ? mix flavors by swapping out traditional peanut butter for almond butter or even sunflower seed spread if allergies are on your radar .
seasonal twists work wonders too; think pumpkin spice pb during fall or coconut cream with tropical jams in summer. you might also explore regional variations like using spicy jalapeño jelly for something unique that'll surprise taste buds all good fun.
expert faq solutions
got questions ? i’ve got answers. one common concern folks have is whether their bread will turn out dense if yours does seem heavy after baking, consider reducing flour next time while adding moisture through extra oats or flaxseed meal .
if you're struggling with spreading cold peanut butter evenly across fresh - baked bread that's tricky business try warming it up slightly in the microwave first, it’ll become smooth and easy - peasy.
lastly, remember : practice makes perfect. even seasoned bakers encounter hiccups along their journey it’s part of what makes cooking so delightful (and sometimes hilarious.) .
complete nutrition guide
let’s break down what you get nutritionally from these scrumptious sandwiches because health matters too. each serving offers approximately 300 kcal packed with around 10g protein thanks to those wholesome grains and nutty goodness .
as far as benefits go whole wheat flour brings fiber which helps digestion while flaxseed acts as an omega - 3 powerhouse boosting heart health, pairing this recipe within balanced meals allows flexibility according to dietary needs so feel free enjoying guilt - free indulgence anytime.
in terms of portion guidance the recommended serving size involves two generous sandwiches per sitting but adjust based on hunger levels since everyone’s appetite differs from day - to - day .
so there you have it a comprehensive guide filled with expert wisdom tailored just for you as well as tasty variations awaiting exploration beyond basic recipes.
Gourmet Peanut Butter and Jelly Grain Bread Sandwich Card
⚖️ Ingredients:
- 1 cup whole wheat flour
- 1/2 cup oats (rolled or quick)
- 1/4 cup flaxseed meal
- 1 tsp baking powder
- 1/2 tsp baking soda
- 1/2 tsp salt
- 3 tbsp honey (or maple syrup for vegan)
- 1/4 cup unsweetened peanut butter (creamy or crunchy as per preference)
- 3/4 cup water
- (approximately 4 tbsp) Peanut Butter, to taste for filling
- (approximately 4 tbsp) Jelly or Jam of choice, to taste for filling
🥄 Instructions:
- Step 1: Preheat your oven to 350°F (175°C).
- Step 2: In a large mixing bowl, combine whole wheat flour, oats, flaxseed meal, baking powder, baking soda, and salt.
- Step 3: In another bowl, mix together the honey and peanut butter until smooth. Gradually add in the water until well combined.
- Step 4: Pour the wet mixture into dry ingredients and gently mix until just combined – do not over-mix.
- Step 5: Lightly grease a loaf pan with cooking spray or line it with parchment paper. Pour your batter into it and level out with a spatula.
Previous Recipe: Bake Peanut Butter Joyful Grain Bread Sandwich
Next Recipe: Toast Whole Grain Peanut Butter Delight