Easy Peanut Butter Cups
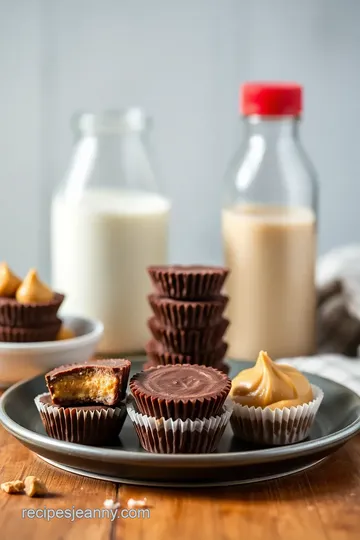
Ready to satisfy your sweet cravings? Discover my Easy Peanut Butter Cups - Delicious Treats that blend creamy peanut butter with rich chocolate. Perfect for sharing!

Sweet Tooth Satisfaction: Why Easy Peanut Butter Cups - Delicious Treats Are a Must-Try
Oh my gosh, have you ever had that moment when you're craving something sweet, and nothing hits the spot like chocolate and peanut butter? i remember sitting on my couch late one night, mindlessly scrolling through snack ideas, when i stumbled upon the infamous easy peanut butter cups - delicious treats .
I thought to myself, “why not make my own?” and let me tell you, once i whipped those babies up, my life changed! whether you’re at home, entertaining friends, or just want to indulge in some guilt-free indulgence , this recipe has got you covered.
Now, these little gems didn’t just pop into existence. the roots of chocolate peanut butter cups can be traced back through time, but they truly hit the mainstream in the 1920s with the birth of a certain candy company.
Today, they are a staple in the world of homemade chocolate treats . and get this—this recipe is as easy as pie (or should i say, cake?).
Seriously, it takes just about 55 minutes from start to finish, and you'll impress anyone who tries them.
So, What’s on the Menu?
You might be wondering just how much effort it takes to satisfy your sweet cravings. you’ll only need 15 minutes of active prep, a quick 10 minutes to melt some chocolate, and then about 30 minutes of chilling time to allow those lovely layers to set.
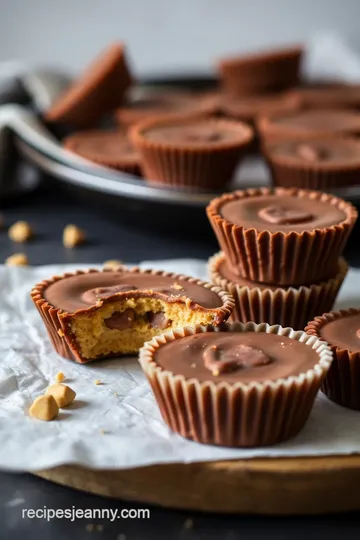
It's so simple! not only is it an easy chocolate recipe, but you'll be left with around 12 chocolate-covered snacks that are perfect for sharing—or not.
No judgment here if you decide to eat them all yourself!
Now, let’s break it down a bit on cost. you can whip these up without breaking the bank. the ingredients are quite basic: peanut butter, chocolate chips, and maybe a dash of coconut oil if you’re feeling fancy.
You can put these together for under 10 bucks, making them one of those cheap chocolate dessert ideas that feels so luxurious.
Honestly, who wouldn’t want to indulge in such decadent dessert ideas without spending a fortune?
The Good Stuff: Why You Need These in Your Life
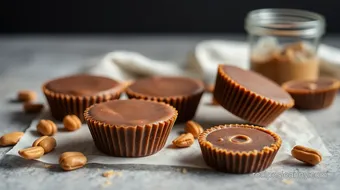
Now, let’s talk benefits. first off, these easy peanut butter cups offer some decent health perks! peanuts are a wonderful source of protein and healthy fats.
Pair that with some quality chocolate, and you’ve got yourself a satisfying snack that doesn’t make you feel completely terrible about indulging.
Plus, it’s a no-bake peanut butter dessert —i mean, hello, absolute win for kid-friendly cooking ! don't you just love it when cooking doesn't turn into a full-on kitchen disaster?
These beauties shine at parties, or as a surprise treat for the kids after school. i’ve found that serving them atop a plate of fresh fruit can make them feel a touch gourmet, too! and the best part? these satisfy those pesky sweet cravings without the guilt that often comes with store-bought sweets.
When it comes to versatility, the flavor variations for desserts are endless. you can swap out creamy peanut butter for crunchy, drizzle some melted white chocolate on top for flair, or even dive into darker chocolate for that rich, soothing taste.
If friends are coming over, don’t be shy; these gourmet peanut butter cups will steal the show at any gathering!
So, are you ready to roll up your sleeves and create these creamy peanut butter sweets? trust me, they taste even better than they look.
Grab that muffin tin, and let’s get down to the nitty-gritty—here’s what you’ll need.
Essential Ingredients Guide
When you're whipping up some easy peanut butter cups - delicious treats , knowing your ingredients inside and out can really take your treats from good to absolutely amazing .
Let’s break down the essentials all the way from core components to handy substitutions.
Premium Core Components
First, let’s talk about quality ingredients . for the best chocolate peanut butter cups, stick with 1 cup (175g) of semi-sweet chocolate chips.
Look for brands that say “100% cacao” on the label. that's your cue for chocolate heaven!
If you’re measuring out 2 tablespoons (30ml) of coconut oil, opt for extra virgin . it’s got a lovely flavor that’ll add a bit of zing to the chocolate layer.
Now, as for storage, keep your chocolate in a cool, dry place, and it can last up to 1 year ! score, right?
Freshness tip: always check food expiration dates and resist the urge to use granulated sugar with clumps! Trust me, the texture totally matters.
Signature Seasoning Blend
Now, seasoning isn’t usually the star of the show with chocolate peanut butter cups, but it does play its part.
When it comes to herb pairings , vanilla extract is a must — definitely add in 1 teaspoon (5ml) for that warm, comforting taste.
And if you’re feeling adventurous, sprinkle a little bit of sea salt on top before serving! it’s the ultimate sweet and salty snack experience.
Looking for alternatives? Try adding a sprinkle of cinnamon to the peanut butter mixture for a warm twist, especially during fall. Now that’s a decadent dessert idea !
Smart Substitutions
We all have those moments when we’re missing an ingredient or two. no worries! you can swap out the coconut oil for your usual vegetable oil, or even skip it altogether if you want.
It won't be as smooth, but who says we can't be a little rebellious in the kitchen?
And if you're lacking semi-sweet chips? Use milk chocolate, or if you feel fancy, dark chocolate works beautifully, too.
Of course, those with dietary restrictions will appreciate that 1 cup (250g) of creamy peanut butter can be replaced with sunflower seed butter for a nut-free version.
Yep, kid-friendly cooking can taste good for everyone!
Kitchen Equipment Essentials
You won't need a fancy chef's kitchen to whip up these homemade chocolate treats. a simple microwave-safe bowl or double boiler will do just fine for melting that chocolate.
Just two minutes, and voila!
Grab yourself a muffin tin lined with paper liners. This makes life easier when you're digging them out after they’re chilled. Total game-changer!
Now, for the final touch: parchment paper. Seriously, use it if you can—cleaning up is a breeze afterward.
I remember once trying to freestyle it without parchment paper and ended up wrestling with my muffin tin. What a mess! So pro tip: keep it simple and save your sanity.
Final Thoughts
With these essentials in your back pocket, you'll be all set to create those no-bake peanut butter desserts that’ll have everyone raving.
Trust me, once you've got the hang of it, you'll be eager to explore all sorts of flavor variations for desserts!
So, are you ready for the step-by-step? buckle up, 'cause you're about to make some guilt-free indulgence that's perfect for parties or just that late-night craving.
Let’s dive right into how to craft your easy peanut butter cups !
Unlocking the World of Professional Cooking: Step Up Your Game
Let’s chat about professional cooking methods . when you’re in the kitchen, the magic often lies hidden in the preparation and execution.
And oh boy, do i remember when i first realized how important it was! there was this one time i tried to whip up homemade chocolate treats , thinking i could wing it.
Spoiler alert: it didn’t work out as planned. let’s not make the same mistakes together, shall we?
Essential Preparation Steps: Getting Your Act Together
So, first thing’s first: mise en place . you might be like, “what’s that?” well, it literally means “everything in its place.
” chop, measure, and set aside all your ingredients before you even think about turning on that burner. trust me, it makes a world of difference.
I can’t tell you how many times i scrambled for ingredients while my chocolate was burning. not cool.
Now, let’s talk time management . set a timer. seriously. just like when i’m making my own chocolate peanut butter cups , i time each step.
So, if you’ve got to melt chocolate for about 10 minutes on low or have to wait 30 minutes for your treats to chill, keep track of it.
And organization? think of it as your battle plan. ever opened your fridge and wondered where your peanut butter went? keep your area tidy, so you're not running around like a headless chicken.
Finally, don’t ignore safety . hot pots or sharp knives? keep ‘em at bay. always have a fire extinguisher nearby, just in case things get wild in the kitchen.
Step-by-Step Process: Follow the Recipe
Let’s get down to brass tacks. Here’s a clear-cut way to tackle your culinary masterpieces.
- Prep Your Space : Make sure you have everything handy.
- Watch Your Temperatures : While melting chocolate, stick to a low heat . Overheating can ruin it.
- Timing is Everything : Keep your chill periods precise. Reserve 10 minutes to set the first chocolate layer before adding peanut butter.
- Visual Cues : Watch for that shiny, smooth finish on your melted chocolate. If it looks dull, it’s not ready.
Expert Techniques: Level Up Your Skills
Okay, so you want to master those professional methods? here’s a pro tip: quality checkpoints . anytime you think your mix is off, stop and taste it.
You don’t want to serve up something not quite right. if your peanut butter’s too thick, add a bit of coconut oil to lighten it up.
And if you run into a roadblock? no stress! a little troubleshooting goes a long way. it happens to the best of us.
Maybe your chocolate seized—don’t panic! add a teaspoon of coconut oil and warm it up again.
Success Strategies: Make It Work
Ready to avoid rookie mistakes? focus on those quality assurance tips. use high-quality chocolate ; it's worth a little extra cash.
If you’re looking for cheap chocolate dessert ideas , remember that a little splurge can keep you from needing to bake again (because believe me, burnt cookies are no fun).
Always keep your sweets cool. for example, those easy peanut butter cups - delicious treats i adore stay best when chilled.
Want to get a head start? make-ahead options are clutch—just whip them up on sunday, and you have treats all week.
Wrap-Up and What’s Next?
In all honesty, professional cooking isn’t about fancy techniques or expensive gadgets. it’s all about solid prep, organization, and, of course, having fun! you’ll find that once you nail down these basics, even no-bake peanut butter desserts become a walk in the park.
When you’re ready, don’t forget to explore some additional information to deepen your cooking skills and keep that sweet tooth satisfied.
Whether it’s experimenting with fancy nut butter confections or diving into kid-friendly cooking , the kitchen is your playground! happy cooking!
Additional Recipe Information for Easy Peanut Butter Cups - Delicious Treats
Pro Tips & Secrets
Oh my gosh, can i let you in on some pro tips that’ll make your easy peanut butter cups even better? first off, when melting the chocolate, use the best chocolate for melting .
High-quality chocolate makes all the difference, trust me. i mean, nobody wants a sad, clumpy chocolate layer, right? for a smoother chocolate experience , add a little coconut oil.
It’s totally optional, but it gives that beautiful, shiny finish.
If you’re a busy bee, i feel ya! to save time, make a big batch of these yummy goodies and pop them in the fridge.
Whenever you get that sudden sweet tooth satisfaction , you’ll be ready to go. you might even want to mix in some quick and easy treats like crushed pretzels or sprinkles before you chill them.
That sweet and salty combo is a killer flavor enhancement!
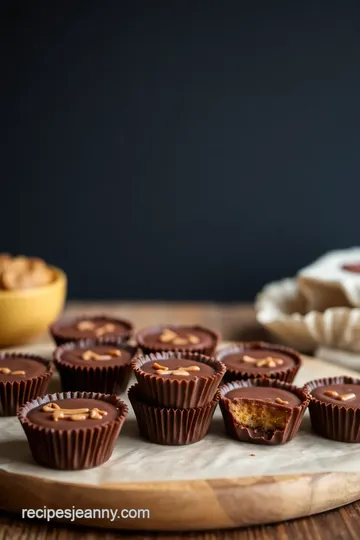
And don’t forget about presentation! when you scoop out the peanut butter filling, leave a little chocolate exposed on the edges.
It makes them look so much more gourmet and fancy, but really, it’s just a little trick to impress your friends.
Perfect Presentation
Now, let’s chat about plating techniques for your peanut butter cups. once they’re set, how about arranging them on a colorful plate? you could even layer them with some fresh fruit or nuts, adding color and texture to the spread.
Garnish ideas? try a sprinkle of sea salt on top for that extra flair. or, get wild with a drizzle of melted white chocolate to give your homemade chocolate treats that wow factor.
Trust me, the visual appeal makes them not just tasty, but stunning!
Storage & Make-Ahead
After you’ve indulged in these creamy peanut butter sweets , you might wonder how to keep them fresh. store your peanut butter cups in an airtight container in the fridge.
They’ll last about a week, but let’s be real; they won’t last that long!
If you want to make-ahead, go for it! get the chilling method for desserts down and prepare them in advance.
Just remember, when it's time to eat, you can quickly pop them in the microwave for just a few seconds if you like your chocolate a bit gooey.
Creative Variations
Feeling adventurous? There are so many creative variations for these little delights. Want a nut-free treat? Swap peanut butter for sunflower seed butter or even a chocolate hazelnut spread .
How about seasonal twists? infuse a bit of pumpkin spice for fall or peppermint for the holidays. honestly, the possibilities are endless.
You can even combine chocolate-covered snacks with your favorite candy bar, turning these into a fun diy candy idea!
Complete Nutrition Guide
I can’t stress enough how good these peanut butter cups are, not just for your tastebuds but also your soul (okay, maybe that’s a stretch, but you get my point!).
Each cup has about 145 calories, which is not bad for a guilt-free indulgence . they pack in healthy fats from the peanut butter and even have a bit of protein.
Just keep in mind any dietary considerations you may have. if you're watching your sugar intake, you can use natural sweeteners, like honey or maple syrup, to replace the powdered sugar.
It’s all about finding what works for you!
Expert FAQ Solutions
Got questions? Let’s tackle some common ones. If your chocolate doesn’t melt smoothly, try using a double boiler instead of a microwave. This method gives you more control.
If you're wondering why your cups didn’t set well, it’s likely because they need more chill time. so, hang tight and let them chill a little longer! honestly, once you nail this recipe, it’ll be one of your go-tos for family-friendly recipes .
Conclusion
In the end, making easy peanut butter cups - delicious treats is just as fun as eating them. remember that cooking shouldn’t be a chore; it should be a delightful experience.
Don’t hesitate to get creative and make these cups your own! you're gonna love how simple it is to create satisfying sweet cravings at home.
So go ahead, enjoy these confections, and share them with your loved ones. happy snacking!
Easy Peanut Butter Cups Card
⚖️ Ingredients:
- 1 cup (175g) semi-sweet chocolate chips
- 2 tablespoons (30ml) coconut oil (optional)
- 1 cup (250g) creamy peanut butter (unsweetened)
- 1/2 cup (50g) powdered sugar
- 1 teaspoon (5ml) vanilla extract
- 1/4 teaspoon (1g) salt (optional)
🥄 Instructions:
- Step 1: Line muffin tin with paper liners or silicone molds.
- Step 2: In a microwave-safe bowl or double boiler, combine chocolate chips and coconut oil. Microwave in 30-second intervals, stirring until smooth.
- Step 3: Spoon a small amount of melted chocolate into each liner, spreading to cover the bottom. Refrigerate for about 10 minutes to set.
- Step 4: In a mixing bowl, combine peanut butter, powdered sugar, vanilla extract, and salt. Mix until well-combined and smooth.
- Step 5: Remove the muffin tin from the refrigerator. Spoon a generous amount of the peanut butter mixture on top of the hardened chocolate.
- Step 6: Pour the remaining melted chocolate over the peanut butter layer, ensuring it covers completely.
- Step 7: Return the tin to the refrigerator for an additional 20 minutes, or until the chocolate is fully set.
- Step 8: Once set, carefully remove peanut butter cups from the tin and enjoy!
Next Recipe: How to Make Amazing Melted Sugar Salted Caramel Sauce at Home