Bake Classic Cheesecake
Craving something divine? Let me share my grandma's secret for the perfect bake classic cheesecake: rich & creamy delight that will wow your taste buds!

- A Slice of Nostalgia: Why Cheesecake Matters
- Cheesecake 101: Sweet Origins and Modern Love
- Why This Cheesecake Rocks
- Celebrating the Good Times
- Essential Ingredients Guide for a Perfect Cheesecake
- Professional Cooking Method: Mastering the Art of Bake Classic Cheesecake
- Pro Tips & Secrets for Baking Fine Cheesecakes
- Recipe Card
A Slice of Nostalgia: Why Cheesecake Matters
You ever bite into a dessert that just takes you back? for me, it’s cheesecake . oh my gosh, every slice brings me right back to family gatherings, holiday dinners, and that one infamous birthday party where i might’ve eaten more than my share—sorry, aunt lisa! there’s something about a rich and creamy slice of cheesecake that brings people together.
It’s like a tasty hug from your oven.
So, let’s dive into the world of baking cheesecakes. when i say “bake classic cheesecake: rich & creamy delight,” i mean the kind that has you dreaming of dessert all day long.
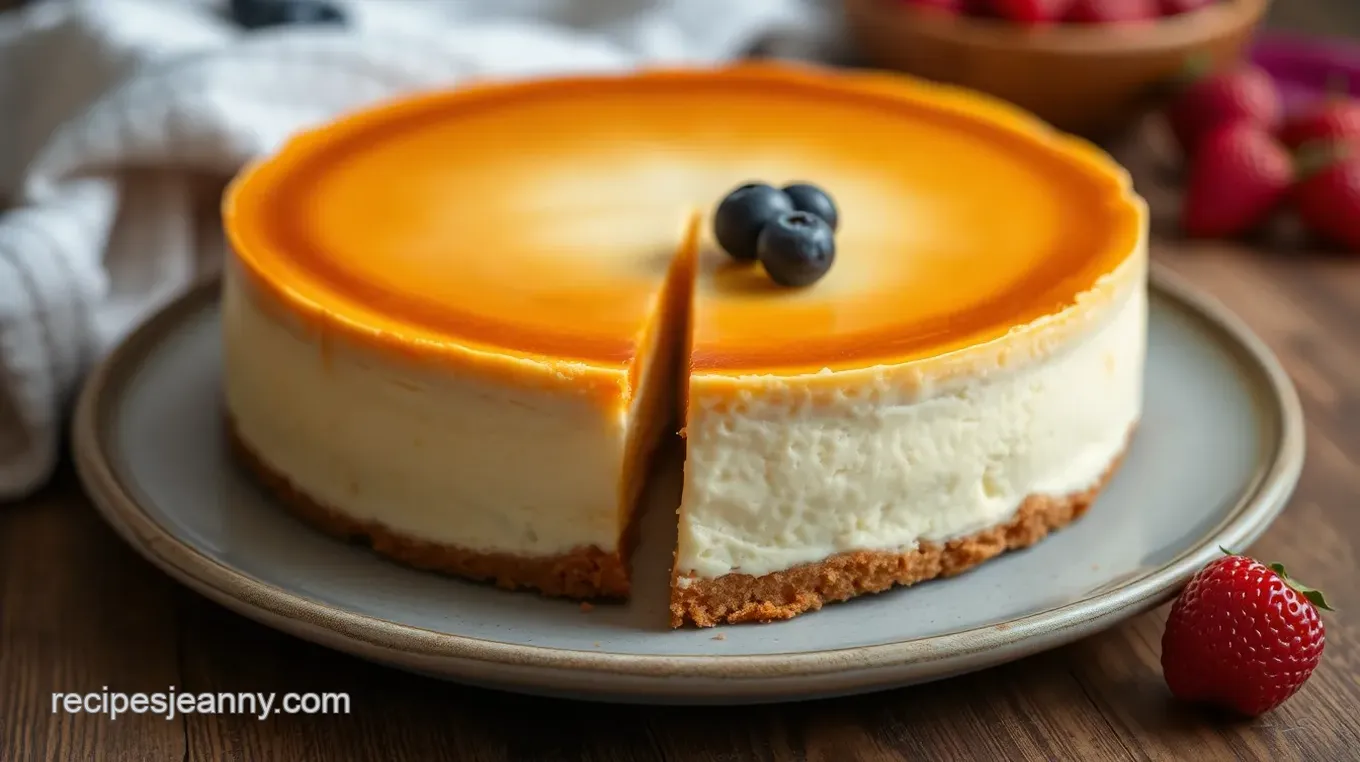
This cheesecake is the perfect blend of creamy cheesecake filling, a buttery graham cracker crust , and just the right hint of sweetness that balances it out nicely.
Cheesecake 101: Sweet Origins and Modern Love
Cheesecake isn’t just any dessert; it has a storied history that’s pretty fascinating. originally, it goes back to ancient greece.
Believe it or not, they used to serve it to athletes during the first olympic games! fast forward to new york in the 1920s, and you’ve got what we know as the classic new york cheesecake .
Today, it’s a fan favorite and shows up at weddings, birthdays, and every dessert table you can imagine.
Now, you might think, “how hard can this be?” the truth is, while it requires some patience, it’s not rocket science.
We’re talking about a medium-level baking adventure. the hands-on time is about 15 minutes, but then you’ll need a good chunk of time to chill, which we’ll get to.
In total, plan for about an hour and a half, plus at least four hours of chilling—this isn’t a last-minute dessert, friends!
And let’s not forget about the cost. ingredients like cream cheese and sugar won’t break the bank, and the yield? you’ll be serving 10 to 12 slices.
Perfect for a party or just for those moments when you want to treat yourself (you deserve it!).
Why This Cheesecake Rocks
Let’s talk benefits, because this cheesecake has plenty! first off, it’s a crowd-pleaser. seriously, invite your friends over, serve this, and you’ll have them raving about it for days.
Plus, you can swap in all sorts of toppings like fruit or chocolate that’ll take it from ordinary to extraordinary.
Now let’s address the nutritional side. sure, it’s a rich creamy dessert , but it can be enjoyed in moderation.
It’s made with traditional cheesecake ingredients and offers some protein thanks to the cream cheese. and if you’re feeling adventurous with cheesecake flavor combinations, don’t hesitate to substitute ingredients based on your favorite taste profiles! easy swaps can make it lighter or even more decadent.
The beauty of homemade dessert recipes like this is versatility; the sky's the limit on how you want to dress it up.
Want a sweet and tangy cheesecake ? toss on some citrus. feeling more chocolatey? go for a chocolate drizzle. treat it like a canvas and express yourself.
Celebrating the Good Times
This cheesecake isn’t just for tuesdays. it shines on special occasions, too! birthdays, holiday gatherings, or just because you’re in the mood for something fabulous.
You can whip it up for a party dessert recipe or even take it to a potluck. and if you really want to astound your guests, think about making it a festive cheesecake serving by decorating with seasonal fruits or a sprinkle of nuts.
But here’s a little tip from someone who's burnt out a few cheesecakes in the past: to prevent cheesecake cracks , cool it slowly in the oven after baking.
It makes a world of difference, i promise!
So, ready to dive into the journey of creating your own slice of heaven? The next thing we’ll tackle is gathering those ingredients. So let’s get to it!

Essential Ingredients Guide for a Perfect Cheesecake
Alright, cheesecake lovers! if you’re ready to bake classic cheesecake: rich & creamy delight , let’s dive into the essentials.
This guide will help make sure your cheesecake has that perfect balance of sweet and tangy, all while giving it the right texture.
Trust me, i’ve had my fair share of cheesecake fails—think cracks, and a filling that was more like a brick than a creamy dream.
Let’s avoid those pitfalls together!
Premium Core Components
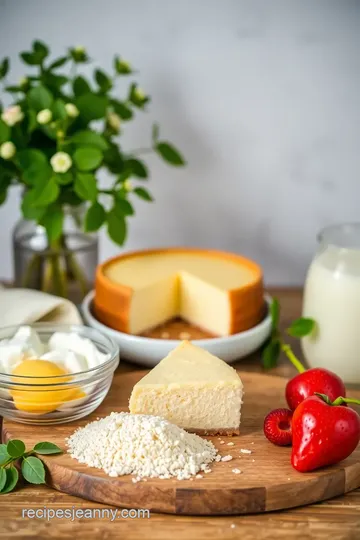
First up, let’s talk about the “premium core components.” When you start cooking, quality ingredients matter. For a classic New York cheesecake, you’ll need:
- 4 (8 oz) packages of softened cream cheese – Look for blocks, not tubs.
- 1 cup sugar – Granulated is your best bet here.
- 4 large eggs – They should be at room temperature, so out of the fridge for a bit!
- 1 cup sour cream – Full-fat gives the best flavor, trust me.
Measurements are important, so remember: 1 cup is about 240 ml . If you're like me and want that precision, a scale can be your best buddy!
Quality Indicators
How do you know what’s good? for cream cheese, you want smooth and creamy—no lumps or weird smells! sugar should be pure white and granulated.
As for the eggs, check for freshness by giving them a little float test in water. if they sink, they’re good to go!
Storage & Freshness Tips
Store opened cream cheese in an airtight container in the fridge, where it’ll last about 2 weeks . eggs? about 3 to 5 weeks in their original carton.
Keep sour cream refrigerated and it’s good for about 2-3 weeks after opening. always check expiration dates!
Signature Seasoning Blend
Now, on to the fun stuff that makes your cheesecake sing: signature seasonings ! a hint of vanilla extract is non-negotiable .
You can throw in some lemon zest for that bright zing! even a spoonful of all-purpose flour can help stabilize the filling, giving it that perfect cheesecake texture .
Herb Selections & Flavor Enhancers
While cheesecake isn’t typically herb-heavy, don’t shy away from experimenting. A bit of orange zest could complement your cheesecake nicely, especially if you're into that sweet and tangy vibe.
Smart Substitutions
Okay, sometimes things don’t go as planned in our kitchens. if you find yourself out of cream cheese, don't panic! greek yogurt can be a decent stand-in for a lighter cheesecake.
And if you’re watching sugar, try monk fruit sweetener instead of regular sugar—it works wonders!
Dietary Modifications
Got gluten issues? No worries! Use almond flour or gluten-free cookies for the crust. Need it dairy-free? Swap the cream cheese with cashew cream . The options are almost endless!
Kitchen Equipment Essentials
Now let’s make sure you’ve got the right gear to whip up that creamy cheesecake. You’ll need:
- A 9-inch springform pan is crucial. It’s all about the easy release!
- Mixing bowls – a big one for the filling and a smaller one for that crust.
- An electric mixer speeds things up, but a good ol’ whisk works if you’re feeling arm-strong.
Preparation Tips
When prepping your crust, smash those graham crackers like they owe you money! a sturdy crust is key to a stable cheesecake.
And don’t forget the water bath —trust me, it prevents cracks!
Storage Solutions
After you’ve baked your cheesecake, let it cool completely before refrigerating it. It likes to chill for at least 4 hours , but overnight is where the magic happens.
Once the cheesecake is all set, get creative with toppings! Whipped cream, fresh fruits, or even a chocolate drizzle could be the cherry on top of your delightful homemade dessert.
So, whether you’re whipping this up for a special occasion or just because you need cheesecake in your life, this guide should have you covered.
Next, we’ll jump into some easy step-by-step baking. get ready to impress everyone with your creamy cheesecake skills!
Professional Cooking Method: Mastering the Art of Bake Classic Cheesecake
When it comes to making a bake classic cheesecake: rich & creamy delight , getting the steps right is crucial.
Seriously, nobody wants a soggy crust or a filling that's more flop than fluff. so, let’s dive into the essentials of professional cooking methods—so we can nail this cheesecake creation.
Essential Preparation Steps
First things first: mise en place . this fancy french term means “everything in its place,” and it's your best friend in the kitchen.
Gather all your ingredients before you start. that way, no last-minute panic when you realize you forgot the heavy cream in the fridge.
Next up, let’s chat about time management . cheesecake is not a quick dish, so be patient! prepping takes about 15 minutes , the baking is roughly 50 minutes , and then chilling? oh yeah, that’s a solid 4 hours minimum , or overnight if you really want the ultimate texture.
After that, keep your workspace organized . it might sound old-school, but trust me, it saves a ton of stress. use measuring cups and spoons—it's the simplest way to ensure you’re not dumping in too much something-something when you should be making a graham cracker crust .
And don’t forget about safety! Always use oven mitts, and remember that hot ovens (like at 350° F ) can be dangerous. So, no skipping those!
Step-by-Step Process
Ready to bake? Great! Let me guide you with clear, numbered instructions:
- Start by preheating your oven to 350° F ( 175° C) .
- For the crust, mix 1 ½ cups of graham cracker crumbs with ½ cup of sugar and ½ cup of melted butter . Press this mixture into the springform pan. Bake for 10 minutes and let it cool.
- Now for the filling: Beat four packages of softened cream cheese until smooth. Then add 1 cup of sugar and 1 tsp of vanilla .
- Incorporate four eggs one at a time, mixing well on low speed after each—this helps avoid pesky air bubbles.
- Next, fold in 1 cup of sour cream . Add 2 tbsp all-purpose flour if you’re feeling fancy and want stability!
- Pour this heavenly mixture over your cooled crust, making sure it’s nice and even. Tap the pan gently to release air bubbles (you want creamy filling, not Swiss cheese!).
- Here’s the trick—place that springform pan in a larger roasting pan and fill it halfway with hot water. This creates a steam bath effect for even baking. Bake for about 50 minutes . Look for a center that’s set but still slightly jiggly.
- Turn off the oven, crack the door, and let it cool for an hour before refrigerating for 4 hours or overnight . Trust me; patience is key to achieving perfect cheesecake texture.
Expert Techniques
To bring your cheesecake to a whole new level, keep these pro techniques in mind:
- Using Room Temperature Ingredients : Ensure everything (cream cheese, eggs, and sour cream) is at room temperature . This helps achieve a smooth filling without lumps.
- Water Bath Wonder : This is critical! It helps prevent cracking. Don’t skip this step if you want to impress people!
- Chill Like a Champ : Letting the cheesecake cool gradually is essential. Sudden temperature changes will ruin that creamy magic.
Success Strategies: Aiming for Perfection
Even the pros make mistakes, so here’s how to avoid common missteps:
- Cracks Be Gone : To prevent cracks, don’t overbeat the mixture, and keep an eye on the baking time.
- Quality Ingredients Matter : Use good quality cream cheese. If you skimp here, you’ll taste it in your dessert!
- Flavor Enhancements : Think about what you can add—like lemon zest for a refreshing twist or chocolate swirls if you're feeling bold.
Wrap-Up
And there you have it! baking a classic new york cheesecake takes some love and care, but the results? totally worth it.
Perfect for parties and celebrations , or even just a wednesday night because you deserve it. now that you're equipped with the professional cooking method, you're ready to create a masterpiece that’ll wow anyone at your table.
Whether it’s topped with fresh fruit or a drizzle of chocolate, you'll be the cheesecake hero for sure!
Stay tuned for Additional Information —it’s coming up, and you won't want to miss it!

Pro Tips & Secrets for Baking Fine Cheesecakes
Oh my gosh, if you want to bake classic cheesecake: rich & creamy delight without a hitch, i’ve got some insider secrets that’ll level up your cheesecake game.
First off, timing is everything, and trust me, you don’t want to rush it. make sure you let the cheesecake cool in the oven after it’s done baking.
This helps with that perfect cheesecake texture and prevents those annoying cracks that make you want to cringe.
Another tip? room temperature ingredients are your best friends! this little trick will guarantee a silky-smooth creamy cheesecake filling every time.
And speaking of smooth, when mixing, go slow with your electric mixer or whisk; you want to blend but not add too much air that can cause cracks later on.
Perfect Presentation That Wows
Listen, we eat with our eyes first, so let’s make your cheesecake a showstopper! when it’s about time to plate, think about using a nice 9-inch springform pan because it won’t just be easy to remove but will look fab, too.
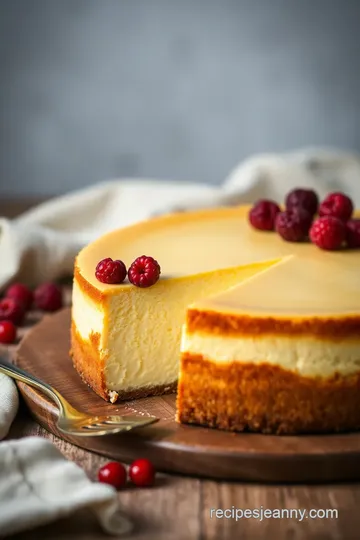
You can get fancy and pipe some fresh whipped cream on top, or for something more colorful, a drizzle of fruit coulis can really pop.
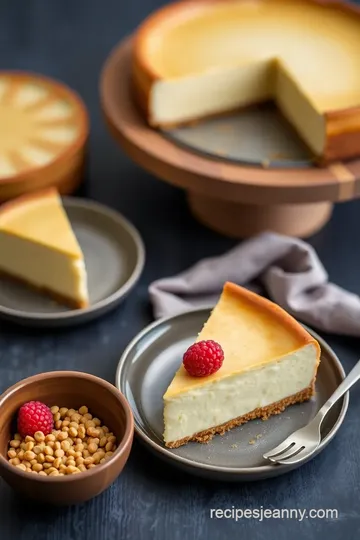
Garnishes like mint leaves or a sprinkle of crushed graham crackers can add that perfect touch. remember, using color combinations in your plates adds visual appeal.
Think white cheesecake, a bright fruit topping, and maybe even a sprinkle of dark chocolate. now that's a dessert that’ll win hearts!
Storage & Make-Ahead Tips
If you're like me and can’t resist a slice (or two) right away, here’s the deal: you can totally make it ahead ! just cover it well with plastic wrap once it’s cooled and popped in the fridge.
Your homemade cheesecake can hang out there for about 4 to 5 days.
Want to keep it long-term? you can actually freeze it! just slice it up, wrap each piece tightly in plastic, then pop those babies in a freezer bag.
When you’re ready for a little slice of heaven, just let it thaw in the fridge overnight . so easy, right?
Creative Variations That Jazz It Up
Now, let’s talk creativity. there’s no rule saying you have to stick with the classic. how about a chocolate swirl cheesecake ? just melt some chocolate and blend it in with your filling.
Or, if you’re feeling fruity, add in some lemon or lime zest for a refreshing finish to your homemade dessert recipes .
For a seasonal twist, think pumpkin during fall or berries in summer! and for those of you worried about sugar, there are alternatives you can use for a lower-carb cheesecake that still packs a flavor punch.
Complete Nutrition Guide
Now, let’s keep it real. it's not just about making it look good. understanding the nutritional information of cheesecake is pretty important if you're counting calories or just want to keep tabs on what’s going into that delicious bite.
With rich cream cheese, eggs, and sugar, yeah, it’s rich in calories, but it also brings some good stuff to the table like protein and calcium.
You just need to keep an eye on portions—aim for that 10-12 servings from the recipe, and you’ll be golden.
Expert FAQ Solutions
Okay, let’s hit on some frequently asked questions while we’re at it. A biggie is about preventing cracks : Always remember to use that water bath—it’s your safeguard against cracks!
Another tip? if you ever find your cheesecake might be too jiggly in the middle while baking, that’s okay! it’ll set as it cools, which is all part of the magic of baking.
Baked cheesecake tips like these can transform your experience from average to chef-level .
Wrap Up with a Sweet Encouragement
So, there you have it. whether it’s your first time trying to bake classic cheesecake: rich & creamy delight or if you’re a seasoned pro, remember to enjoy the journey.
The secret to a happy cheesecake is not just in the ingredients or steps; it’s in the love you put into it.
So gather those friends or family, slice up that cheesecake and make some sweet memories! happy baking!

Bake Classic Cheesecake Card

⚖️ Ingredients:
- 1 ½ cups graham cracker crumbs
- ½ cup granulated sugar
- ½ cup unsalted butter, melted
- 4 packages cream cheese, softened (8 oz each)
- 1 cup granulated sugar
- 1 tsp vanilla extract
- 4 large eggs
- 1 cup sour cream
- 2 tbsp all-purpose flour (optional for added stability)
🥄 Instructions:
- Step 1: Preheat the oven to 350°F (175°C). In a mixing bowl, combine graham cracker crumbs, sugar, and melted butter. Press the mixture into the bottom of the springform pan and slightly up the sides. Bake for 10 minutes, then remove from the oven and let cool.
- Step 2: In a large mixing bowl, beat softened cream cheese until smooth. Gradually add sugar and vanilla, mixing until fully incorporated. Add eggs one at a time, mixing on low speed after each addition. Stir in sour cream and flour until smooth.
- Step 3: Pour the cream cheese filling over the cooled crust. Tap the pan gently to remove air bubbles.
- Step 4: Place the springform pan inside a larger roasting pan, then fill the roasting pan with hot water halfway up the sides of the springform pan. Bake for 50 minutes, or until the center is set but slightly jiggly.
- Step 5: Turn off the oven and crack the door open. Let the cheesecake cool in the oven for 1 hour. Remove from the oven and refrigerate for at least 4 hours (preferably overnight) before serving.
Previous Recipe: How to Bake Nutella Brownie Dessert Delight: 5 Easy Tips for Perfection!
Next Recipe: How to Bake Chocolate Brownies: Decadent & Fudgy for Your Next Craving
