Bake Mini Apple Hand Pies
Looking for a warm treat? Try my Bake Mini Apple Hand Pies | Easy & Delicious recipe! These buttery bites, filled with spiced apples, are irresistible!

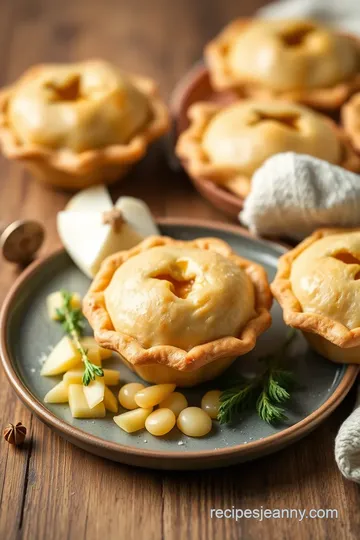
Mini Apple Hand Pies: A Bite-Sized Delight
Have you ever nibbled on something sweet and warm and felt your worries just melt away? oh my gosh, that’s the magic of baked goods, isn’t it? i remember one chilly fall afternoon, i decided to whip up some mini apple hand pies .
The house filled with the cozy scent of cinnamon and sweet-tart apple filling. trust me—we’re talking comfort food at its finest! so, if you’ve been searching for an easy apple dessert that’s as fun to make as it is to eat, then look no further than this apple hand pies recipe .
A Little History with Your Bites
So, what’s the deal with these mini wonders? rooted in classic american desserts, hand pies have been around for ages.
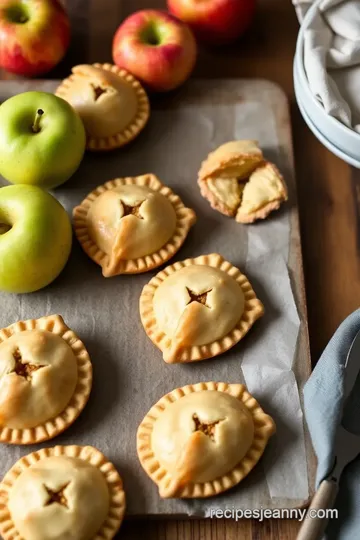
They’re like the cooler cousin of traditional apple pie—just less messy and way more portable! perfect for picnic treats or dessert for parties, they're all the rage in the baking world today.
Seriously, who doesn’t love a bite-sized pie you can hold in your hands? these delightful bite-sized pies make for a fabulous and quick apple recipe that doesn’t require you to break a sweat.
You’re probably wondering, “how much time am i actually looking at?” this recipe is a breeze! with about 15 minutes of active prep , 30 minutes of chilling, and around 20- 25 minutes in the oven , you’ll have these cuties ready in just over an hour.
Financially speaking, they’re pretty easy on the wallet, too—yielding a dozen mini hand pies that’ll impress family and friends without putting a dent in your budget.
Why You’ll Love These Mini Apple Hand Pies
Let’s talk health. sure, we all want our desserts to be delicious, but it doesn’t hurt to have a little nutrition packed in too! these pies use fresh apples, which are full of fiber and vitamins.
Plus, when you fill them with a blend of sweet spiced apple filling , you’re getting that warm, comforting flavor that screams autumn.
What’s even better? you can use different apple pie variations. i love throwing in a mix of tart and sweet apples for a flavor explosion that elevates those heavenly bites.
Pro tip: cool dough before working with it. it makes for a flaky pie crust that adds that delightful texture to every bite.
These homemade hand pies aren’t just great for cozy nights in. They're perfect for special occasions and seasonal desserts . Imagine serving these at a fall gathering—everyone will be raving about them, and they’ll become your go-to crowd-pleaser dessert!
From Dough to Deliciousness
Alright, friends, enough chit-chat! ready to jump into making these gorgeous treats? you’ll be baking mini pies like a pro before you know it.
Gather your ingredients, and get ready to create some magic in your kitchen. whether you're cooking with kids or just want a fun solo project, this recipe is super flexible and oh-so-kid-friendly!
Here’s the rundown: you’ll need some all-purpose flour, chilled butter, and of course, apples (about two medium ones should do).
Once those miniature desserts are in your hot little hands and the aroma has taken over the kitchen, i bet you won’t be able to resist snagging one right out of the oven!
Now, before you rush off to bake, make sure to check out the ingredient list below. You’ll need just a few simple items, and you’ll be well on your way to enjoying your very own gourmet mini pies ! So, let’s roll up those sleeves and get started!
Essential Ingredients Guide for Bake Mini Apple Hand Pies
When it comes to baking those delicious mini apple hand pies , knowing about your ingredients can be a game changer.
Let’s dive into the essentials you need to whip up these bite-sized delights that everyone will rave about at picnics or cozy nights in.
Premium Core Components
First up, let’s talk measurements. for your dough, you’ll need 2 cups of all-purpose flour (~240 grams), 1/2 tsp salt , and 1/2 cup of unsalted butter (113 grams) - chilled, of course.
But don’t fret! if you’re more comfortable with the metric system, just remember that these two measurements go hand in hand.
Next, keep an eye out for quality indicators. for apples, a firm bite is essential. you want them to be crisp and full of flavor.
Look for those that are free of bruises or blemishes. it makes a difference for your sweet apple filling .
Now, about storage: keep your shortcrust pastry chilled until you’re ready to roll it out. butter ? always store it in the fridge, and remember it has a shelf life of about 1-2 weeks .
When it comes to the apples, check their freshness by giving them a little squeeze – they should feel solid, not squishy.
Finally, for selection, always try to use a mix of tart and sweet apples . It makes your pies burst with flavor, and who doesn’t want that in their apple dessert ideas ?
Signature Seasoning Blend
Now, onto the signature seasoning blend for your mini hand pies. you’ve got your cinnamon and nutmeg – classic warmth that makes everything better.
I mean, have you ever met a cinnamon spice dessert that you didn’t love? spice it up with 1 tsp ground cinnamon and 1/4 tsp ground nutmeg for that cozy fall vibe.
Let’s not forget about those herbs, though they may surprise you in a pie! a touch of lemon juice enhances the flavor of the apples.
You’d be amazed at how such a simple addition can take your apple pie variations to the next level.
Smart Substitutions
Sometimes, life doesn’t go as planned, and that’s when smart substitutions come in handy! don’t have brown sugar? go for granulated sugar or even coconut sugar if you want a healthier twist.
Need an easy way out? grab a pre-made pie crust from the store! quick and easy baking? yes, please!
For those dietary restrictions among your circle, consider using puff pastry dough instead of flaky pie crust if you’re looking for a gluten-free option.
Flexibility is everything when it comes to creating those crowd-pleaser desserts, right?
Kitchen Equipment Essentials
Now, let’s not forget the kitchen equipment . you’ll definitely need a rolling pin and baking sheets. if you don’t have a pastry cutter, a fork works just as well for mixing up that buttery dough.
Oh, and parchment paper is a must – nobody wants to deal with stuck pies!
When it comes to prep tips, here’s my advice: chill your dough for about 30 minutes to make sure it’s easier to work with.
You want that flaky pie crust , and the chilled dough technique ensures perfection. i promise, taking the extra time helps the structure hold up during baking – plus, it’s so satisfying!
Wrapping Things Up
So there you have it, your essential ingredients guide to baking those adorable mini apple hand pies ! you’re armed with tips on quality ingredients, seasoning blends, substitutions, and kitchen tools to make it all come together harmoniously.
Just imagine, your kitchen will soon be filled with the scent of warm, spiced apples and buttery pastry—absolute heaven!
Now that we've covered the essentials, it's time to jump into the actual baking process so you can bake mini apple hand pies | easy & delicious .
Grab your ingredients and let’s get rolling (literally)! trust me, you'll be so glad you did!
Bake Mini Apple Hand Pies | Easy & Delicious
Alright, let’s talk about mini apple pies —or as i like to call them, little bites of heaven! these mini apple hand pies are not just adorably tiny; they pack a punch of flavor with that buttery, flaky pie crust and a sweet apple filling that’ll make your heart sing.
Trust me, these treats are perfect for picnics, parties, or just cozying up on the couch with your fave binge-watch.
So, roll up your sleeves, and let's dive into some pro cooking methods to make these beauties shine.
Essential Preparation Steps
Before jumping in, let's chat about mise en place—french for "everything in its place"—which is key when you’re aiming to bake mini pies like a pro.
Gather all your goodies first. you’ll need apples, flour, sugar, and some spices. don’t forget that egg wash technique for a beautiful finish!
Time management is another biggie. have your prep time down to a cool 15 minutes and keep an eye on the clock while baking.
It’s good to break the process into steps, so maybe set a timer for 20- 25 minutes for cooking—especially if you're new to baking.
Nothing's worse than overcooked pies, right?
Now, speaking of organization, i recommend cleaning as you go. don’t let your workspace look like a war zone, or it’ll feel overwhelming.
And please, be mindful of safety—use a sharp knife carefully when slicing apples and keep that oven mitt handy!
Step-by-Step Process
Let’s break this down with clear instructions:
-
Make the dough : combine 2 cups of flour , 1/2 tsp salt , and 1/2 tsp sugar in a bowl.
Cut in 1/2 cup of butter until it looks crumbly. add ice water until it forms a dough, then chill for at least 30 minutes .
-
Prepare the filling : mix 2 cups of sliced apples , 1/4 cup brown sugar , 1 tsp cinnamon , 1/4 tsp nutmeg , 1 tbsp lemon juice , and if you'd like, 1 tbsp cornstarch to thicken it up.
-
Assemble the pies : preheat that oven to 375° f ( 190° c) . roll out your chilled dough and cut circles.
Spoon some filling in the middle, fold over, and crimp those edges.
-
Bake the Pies : Place on a baking sheet and brush with egg wash before sprinkling sugar on top. Bake for 20- 25 minutes until golden brown—keep an eye out; the magic is happening!
-
Cool and Serve : Give them a few minutes to cool—if you can resist!
Expert Techniques
Here’s where the magic happens. using a mix of sweet and tart apples can elevate your filling, creating complex flavors.
Don’t skip that chilling step; it’s crucial for a perfect pie crust . if you’ve got dough scraps, roll ’em out and make extra mini pies.
If they don't turn out perfect right away, no sweat! A pinch of extra cinnamon or a drizzle of caramel sauce can always save the day.
Success Strategies
Here’s a quick rundown of what to avoid:
- Overworking your dough—keep it gentle for that flaky texture.
- Skimping on the cooling time—allow flavors to meld.
- Forgetting to chill your assembled pies for at least 15 minutes .
For stellar results, try to serve these beauties warm. Pair them with vanilla ice cream for decadent goodness, or drizzle some caramel sauce on top. So good!
If you're planning for a gathering, make-ahead options are always a winner. Assemble and freeze before baking for quick, fresh treats!
Additional Information...
So there you have it! easy, delicious, and oh-so-satisfying, these mini apple hand pies are bound to become a beloved go-to in your dessert rotation.
Whether you’re serving them at a party, enjoying as a kid-friendly treat, or indulging in comfort food vibes, they’re sure to delight! get ready to impress with these mini marvels, and brace yourself for the “oohs” and “aahs” from friends and family.
Happy baking, my fellow pie ensoiasts!
Additional Recipe Information for Bake Mini Apple Hand Pies | Easy & Delicious
Pro Tips & Secrets
Alright, let’s spill the beans. Baking these Mini Apple Hand Pies is a breeze, but a couple of tricks can up your game!
First off , when you’re making the dough, keep your butter super chilled . it’s like keeping it cool during a first date—you want it to rise and shine! mix it till it’s crumbly; don’t overwork it or you’ll end up with a tough crust, and nobody wants that.
Time-saving tip: if you’re feeling lazy (we all do), grab some pre-made pie crusts from the store. seriously. they save so much time, and you can still say you made `em yourself! trust me, i did this during a last-minute bake sale and came out looking like a pro.
Flavor enhancement is key. try adding a sprinkle of nutmeg in there too. oh my gosh, that little extra warmth is a game-changer! and when you brush that egg wash on the tops, sprinkle some sugar for those irresistible crispy bits.
Perfect Presentation
Now, let’s talk about how to make these little hand pies Instagram-worthy .
Plating can be simple yet stunning. a white plate makes those golden brown pies pop! arrange them in a fan shape, if you’re feelin’ fancy.
For garnish, a light dusting of powdered sugar or a dollop of whipped cream always does the trick.
Thinking colors? pair your sweet apple filling with some green mint leaves or even a sprig of rosemary. it not only adds flavor but makes your presentation look gourmet.
It’s like dressing up your food for a night out!
Storage & Make-Ahead
Got leftovers? no worries! you can keep your little treasures around. store them in an airtight container for up to 3 days.
They’ll still taste great, but trust me—reheat them in the oven for about 10 minutes at 350° f ( 175° c) to get that flaky vibe back! microwaving? that works too, but they might lose some crispiness.
Make-ahead tip: you can freeze these mini apple pies before baking. simply assemble them and place on a baking sheet.
Freeze until solid, then pop ‘em into a zip-top bag. when you’re ready to bake, just throw ’em in the oven straight from the freezer.
Talk about a win-win!
Creative Variations
Let’s get a little wild, shall we? You can totally switch up the flavor with seasonal fruits. Berries in the summer or pears for that autumn vibe? Yes, please!
Want to get adventurous? spiced apple filling is delightful; toss in some cinnamon and ginger ! not to mention, these sweet little pies are so versatile with dietary modifications.
Need ‘em gluten-free? just swap the flour for a 1:1 flour substitute.
Complete Nutrition Guide
Now, i know we’re all about the yummy flavors, but let’s keep it real. these little beauties come in at about 200 calories a pop.
They pack in some fiber from those apples, and hey, if you swap that sugar for a healthier option, you’re winning.
These are not just apple hand pies; they’re nourishment wrapped in flaky goodness .
Expert FAQ Solutions
So you might have some questions, and that's totally cool.
Common question : “Why isn’t my crust flaky?” Make sure your butter is COLD, like, stealing-it-from-the-fridge cold.
Another tip? If the hand pies burst open while baking, just gently seal them up with some extra dough—it’s a fixable boo-boo!
Encouraging Conclusion
You’ve reached the end of the deep dive, but remember, this is about having fun! whether you go classic with sweet-tart apple combinations or mix in your favorite seasonal fruits, these bite-sized pies are bound to be crowd-pleaser desserts.
So go ahead and bake mini apple hand pies | easy & delicious —your friends and family will thank you.
Who knew cooking could feel so satisfying, right? and don’t forget to show off your creation on social media—you’ll be the star of the dessert table! happy baking, friends!

Bake Mini Apple Hand Pies Card

⚖️ Ingredients:
- 2 cups all-purpose flour (240g)
- 1/2 tsp salt
- 1/2 tsp sugar
- 1/2 cup unsalted butter, chilled and cubed (113g)
- 1/4 to 1/2 cup ice water (60-120ml)
- 2 cups thinly sliced apples (about 2 medium apples)
- 1/4 cup brown sugar (50g)
- 1 tsp ground cinnamon
- 1/4 tsp ground nutmeg
- 1 tbsp lemon juice
- 1 tbsp cornstarch (optional for thickening)
- 1 egg, beaten (for egg wash)
- 1 tbsp granulated sugar (for sprinkling)
🥄 Instructions:
- Step 1: Combine flour, salt, and sugar in a bowl.
- Step 2: Add chilled butter and mix until crumbly (using a pastry cutter or fork).
- Step 3: Gradually add ice water until the dough comes together.
- Step 4: Form into a disk, wrap in plastic, and chill for at least 30 minutes.
- Step 5: In a mixing bowl, combine sliced apples, brown sugar, cinnamon, nutmeg, lemon juice, and cornstarch (if using). Toss gently until apples are well-coated.
- Step 6: Preheat the oven to 375°F (190°C). Roll out the chilled dough on a floured surface to about 1/8-inch thick.
- Step 7: Cut out circles (about 4-5 inches in diameter).
- Step 8: Place a spoonful of filling on one half of each circle. Brush the edges with beaten egg, fold over, and crimp to seal.
- Step 9: Place assembled pies on a parchment-lined baking sheet. Brush the tops with more egg wash and sprinkle with granulated sugar.
- Step 10: Bake for 20-25 minutes until golden brown.
- Step 11: Allow to cool slightly on a wire rack before serving.
Previous Recipe: Why I Love No Bake Pumpkin Pie with Creamy Filling: A Fall Favorite!
Next Recipe: How to Bake Creamy Salted Caramel Cheesecake Delight: A Scrumptious Family Recipe