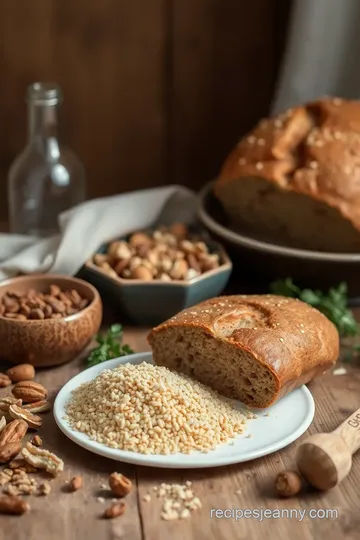
Nutty Wholemeal Bread Recipe
Wondering how to bake wholemeal bread with nutty flavor? This heartfelt recipe comes straight from my family's kitchen, delivering a delicious, wholesome loaf full of texture and taste. Join me in this baking adventure!

- Recipe Overview
- Key Benefits
- Essential Ingredients Guide
- Mastering Professional Cooking Method: The Art of Baking Nutty Wholemeal Bread
- Pro Tips & Secrets for Baking Nutty Wholemeal Bread
- Perfect Presentation: Make Your Loaf Shine
- Storage & Make-Ahead – Keep It Fresh!
- Creative Variations – Shake Things Up!
- Complete Nutrition Guide – Holistic Health
- Expert FAQ Solutions – Clear the Confusion
- Time to Get Baking!
- Recipe Card
Oh my gosh, do you remember the smell of fresh bread wafting through the house when you were a kid? i can still picture my grandma in her cozy kitchen, her hands dusted with flour, happily shaping her famous nutty bread.
It was a total game-changer. that love for a wholesome loaf has stuck with me. and now, i want you to join me on a journey of baking your very own nutty wholemeal bread with nutty flavor .
Seriously, this bread is a game changer!
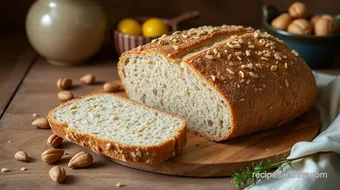
Just picture it: warm, crusty, and full of those crunchy, nutty bits that take every bite to the next level—perfectly acceptable for breakfast or as a snazzy lunch option.
Not only does this bread taste amazing, but it’s also a powerhouse of nutrition. so, grab your apron, and let’s dive into what makes this bread so special!
Recipe Overview
Nutty wholemeal bread has deep roots in traditional baking. its origins can be traced back to artisan breads created by families who valued wholesome, homemade foods.
Fast forward to today, and this recipe stands tall among health-conscious crowds and foodies alike.
It's medium in difficulty —not too shabby for novice bakers, but it will test your patience with a bit of kneading and proofing.
Now don’t sweat it; it’s totally manageable! expect about 20 minutes of active prep time, followed by some chilling-out time while your dough rises.
In total, give yourself around 2 hours from start to finish, as this beauty deserves a little tlc.
When it comes to cost, it’s pretty friendly on the wallet too. most of the ingredients are pantry staples, and with one loaf yielding about 12 slices , it’s a great return on your investment.
Key Benefits
Let’s talk benefits! this nut and seed bread is not just delicious—it's a health fan's dream. wholemeal flour is packed with fiber, protein, and vital vitamins.
Say goodbye to those empty-calorie breads, and say hello to something that can actually energize your day.
This rustic whole meal sandwich bread makes the perfect base for all your favorite sandwiches. try a classic turkey and avocado or go wild with hummus and roasted veggies! it shines on special occasions too—think a cozy brunch or an afternoon garden party.
You know your friends will be asking, “wow, did you really bake wholemeal bread with nutty flavor ?!” plus, it's a fantastic conversation starter when sharing your baking skills!
What separates this nut bread from the rest? the mix of flavors and textures! the combination of nuts and seeds not only adds crunch but also brings a heartiness that plain bread just can’t compete with.
Honestly, it’s like a flavor explosion in your mouth. and if you’re keen on making it vegan or gluten-free, this recipe can easily be adapted.
So there you have it— nutty bread variations that cater to everyone at the table, whether they’re health aficionados or just hungry folks looking for a slice of deliciousness.
Ready to dive into the ingredients? Let’s roll up our sleeves and get started on this amazing nutty wholemeal bread journey! You'll be surprised by how easy it is, and trust me, each bite of your homemade creation will have you grinning from ear to ear!
Essential Ingredients Guide
Alright, friends! if you’re looking to bake wholemeal bread with nutty flavor , there’s a treasure chest of essential ingredients and tips that can elevate your bread game to a whole new level.
Making that perfect loaf is part science, part art, and a little bit of love. let’s break down the basic building blocks!
Premium Core Components
First off, let’s talk about the premium core components you’ll need for a notable wholemeal bread recipe.
You'll want to measure carefully . For baking, precision matters! Here’s a handy reference:
- Wholemeal flour: 2 ½ cups (315g)
- All-purpose flour: 1 cup (125g)
- And don’t forget olive oil or melted butter (1/4 cup)!
When you're shopping for your ingredients, check for quality indicators too. look for wholemeal flour that's dark and earthy in color.
Freshness? make sure the package isn’t dusty and look for a date. store your flour in a cool, dry place , and it should be good for about 6-12 months if unopened.
Signature Seasoning Blend
Now, the magic truly begins when you get to the signature seasoning blend . the nuts and seeds you're gonna add? it's all about combinations! think walnuts, almonds, sunflower seeds, and pumpkin seeds.
They bring that nutty bread flavor that dances on your taste buds!
When selecting herbs, fresh is always best—basil or rosemary dinner party anyone? you can also throw in aromatics like garlic or onion powder for an extra flavor kick.
There’s no wrong way to play with these elements; regional variations can also shine here. what’s a little cumin or caraway among friends, right?
Smart Substitutions
Okay, let’s chat about smart substitutions . maybe you're out of nuts, or someone has a nut allergy. no sweat! just swap in some seeds or even granola for that crunch.
And if you're looking to mod it for dietary needs , gluten-free flour works in a pinch.
In a jam? emergency replacements like applesauce can substitute for some moisture, or a splash of soda can enhance texture.
And with seasonal options like pumpkin seeds in the fall, your whole grain baking will never go out of style!
Kitchen Equipment Essentials
Equip yourself with the right tools. You don’t need fancy gadgets, just some must-have kitchen equipment .
You’ll need:
- A large mixing bowl
- Measuring cups
- A loaf pan
But if you’re feeling adventurous, a rolling pin can help shape that dough for breads or pastries. remember, your bread baking experience can hinge on how you're storing your dough too.
Keep it covered in a warm spot for those rises!
The Wholemeal Bread Adventure Awaits!
So, as you can tell, mastering the art of baking wholemeal bread with nutty flavor is a journey filled with rich flavors and nourishing ingredients .
The combination of warm water, happy yeast, and all those wholemeal flour benefits contributes to a phenomenal loaf that’s not just good for you; it’s delicious too.
You’ll be amazed at how you transform simple ingredients into a wholesome breakfast recipe or a fantastic, healthy sandwich option.
Keep these tips in mind and you'll never feel lost in the kitchen again. Now that we’ve got the essentials down, let’s dive into the step-by-step instructions for this delightful nutty wholemeal bread! Trust me; your taste buds will thank you later!
Mastering Professional Cooking Method: The Art of Baking Nutty Wholemeal Bread
So, you've decided to dive into the wonderful world of baking? awesome choice, my friend! today, we are going to talk about something that warms the heart— nutty wholemeal bread .
Trust me, once you master this, your kitchen will smell heavenly, and your family will think you’re a pro!
Essential Preparation Steps
Let’s kick things off with a bit of prep work, shall we? the first thing to know about cooking is mise en place .
French for “everything in its place,” it means you gather your ingredients ahead of time. for our nut bread recipe, grab 2 ½ cups wholemeal flour , 1 cup all-purpose flour , and all the goodies like mixed nuts and seeds.
Now, time management is key! spend 20 minutes prepping, and get your oven going as you mix up the dough.
It’s a great way to multitask. don’t forget to tidy up your space as you go—an organized kitchen is one happy kitchen!
Also, please remember safety first . When you’re working with hot ovens and sharp knives, pay close attention. It’s better to be safe than sorry!
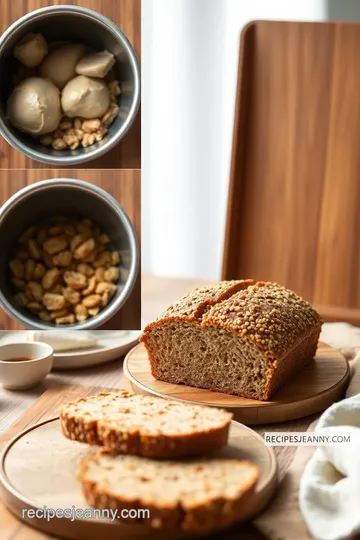
Step-by-Step Process
Now that we’re all set, let’s get baking! Here’s a quick guide to follow:
-
Prepare the dough : combine your wholemeal and all-purpose flour, salt, sugar, and yeast in a bowl. gradually add 1 cup warm water ( 100° f to 110° f) and ¼ cup olive oil .
You want a shaggy dough that’s easy to handle.
-
Knead the Dough : Flour your surface and knead the dough for about 10 minutes until smooth and elastic. Throw those nuts and seeds in at the last moment!
-
First Rise : Put the dough in a greased bowl, cover, and let it rise for about 1 hour . It should double in size. Look for that puffiness—it’s satisfying to see!
-
Shape the Loaf : Punch the dough down (yes, therapeutic!) and shape it into a loaf. Pop it in a greased loaf pan. Let it rise for another 30 minutes .
-
Preheat the Oven : While the dough is rising, preheat your oven to 375° F ( 190° C) .
-
Bake : slide that bad boy into the oven for 35- 45 minutes . you’ll know it’s done when it’s golden brown and sounds hollow when tapped.
Aim for an internal temperature of about 190° f ( 88° c) .
-
Cool : Once it’s out, let your bread cool on a wire rack. Seriously, don’t slice too soon—give it time!
Expert Techniques
Alright, now let's get into some expert tips! make sure your yeast is active; if it’s expired, your bread might flop.
For a perfectly textured loaf, it’s crucial that you knead it well to help with gluten formation.
Don’t you love those times when you almost mess up a recipe but salvage it like a pro? if your dough seems too dry, add a splash more water as you knead.
Or, if it’s too sticky, a sprinkle of flour can work wonders. it’s all about learning and adapting.
Success Strategies
So, what common mistakes should you avoid? don’t skip the rising times! if you rush, you won’t get that lovely airy texture.
And trust me—don’t be tempted to open the oven door halfway through baking. your bread needs that heat!
Want perfect results? pay attention to visual cues. watch the color and smell! and, if you know you won’t eat the whole loaf, slice it up and freeze some for later.
It freezes like a champ!
Additional Information
Now you have a few tricks up your sleeve for baking nutty wholemeal bread with nutty flavor that’s sure to impress.
Enjoy serving it up with butter or using it for scrumptious sandwiches. just think of it as a wholesome breakfast option that’ll boost your energy for the day ahead! baking bread at home isn’t just fulfilling; it’s an experience that warms hearts and creates memories.
So go ahead and give this step-by-step bread recipe a whirl! I can’t wait to hear how your Nutty Wholemeal Bread turns out. Happy baking, my friend!
Pro Tips & Secrets for Baking Nutty Wholemeal Bread
Oh my gosh, if you’re getting ready to bake wholemeal bread with nutty flavor , i’m genuinely excited for you! there’s just something so satisfying about homemade bread, right? here are some of my best tips and little secrets to make your baking experience a breeze and your nutty bread even tastier.
Kitchen Wisdom from My Experience
First off, let’s talk about time-saving techniques . if you’re short on time, consider prepping the dough the night before. you can let it rise in the fridge overnight.
It’ll save you time in the morning and give your bread a fabulous flavor boost, thanks to the slow fermentation.
When it comes to flavor, don't skimp on the nuts and seeds . i usually throw in a mixture of walnuts and sunflower seeds, but feel free to get creative! almonds, hazelnuts, or even chia seeds work great.
Trust me – a nut and seed combination can take your wholemeal bread to new heights!
And presentation? well, you’ll want to show off your efforts! just a little olive oil brushed on top before baking can give your loaf that delicious golden hue.
Sprinkle some seeds on top too – it’s an easy way to make your bread look artisan and fancy.
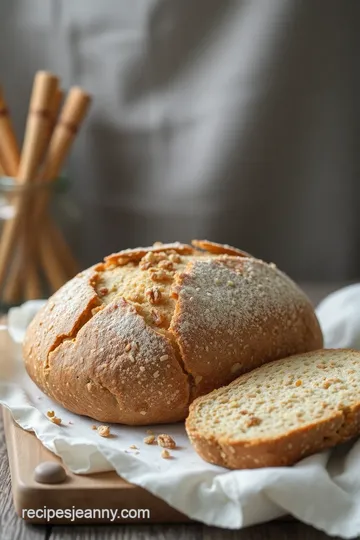
Perfect Presentation: Make Your Loaf Shine
So, when you pull that nutty loaf out of the oven, it’s all about the plating techniques . if you're making sandwiches, slicing it evenly will keep things neat.
For a rustic look, serve it straight from the loaf, letting your guests cut what they want.
Now, let’s talk garnishes . a sprinkle of sea salt or a drizzle of honey can elevate a slice straight out of the oven.
It’s super simple, but it adds that perfect finishing touch. and don’t forget about color combinations! you can’t go wrong with a little jam on the side or fresh fruits like berries for a quick breakfast.
Storage & Make-Ahead – Keep It Fresh!
After all that hard work, you'll want to know how to keep your homemade nut bread nice and fresh. store your loaf in a bread box wrapped in a kitchen towel for a few days.
For long-term storage, slice it and toss it in the freezer. a quick tip: just pop a slice in the toaster when you’re ready to eat.
It’ll taste like it’s fresh from the oven!
Reheating: if your bread starts to feel a bit stale, you can always pop it in the oven for just a couple of minutes.
That heat can bring back the crustiness that makes fresh bread so irresistible.
Creative Variations – Shake Things Up!
You can easily switch things up with this wholemeal bread recipe . feeling adventurous? try adding herbs like rosemary or spices like cinnamon for a twist.
Seasonal flavors like pumpkin spice in fall can make your loaf the star of the table.
Is gluten a no-go for you? you can use a gluten-free bread alternative , or sub a bit of both wholemeal flour and a gluten-free blend.
Just adjust the liquid a bit; quick baking hacks like that can save the day!
Complete Nutrition Guide – Holistic Health
You might be wondering about the nutrition that comes with this tasty treat. each slice packs a punch, offering protein, fiber, and those good fats from the nuts.
Wholemeal flour is a superstar in that it’s full of vitamins and minerals, making it among the healthiest bread options out there.
Score for wholesome breakfast recipes!
Aim for about 12 slices from your loaf. This not only makes for perfect portion guidance but also helps you enjoy this nutritional bread option without overindulging.
Expert FAQ Solutions – Clear the Confusion
Let’s clear up some common questions. a lot of bakers stress about proofing. just make sure your yeast is fresh, and you’ll be golden! if your dough isn't rising properly, check the warmth of your kitchen or give it more time.
Thought this was going to be a tough recipe? don’t sweat it! bread baking for beginners can be super straightforward.
Just follow each step, and you’ll find it’s not as intimidating as it seems.
Time to Get Baking!
So, you’re ready to take on this nutty wholemeal bread recipe. remember, practice makes perfect. don't get discouraged if your first loaf isn't perfect; each baking session is a step toward becoming a master at artisan bread baking .
Get those ingredients lined up, and dive in! you’re gonna love the smell wafting through your kitchen. this flavorful loaf not only nourishes your body but also warms your heart.
Happy baking, my friend!
Nutty Wholemeal Bread Recipe Card
⚖️ Ingredients:
- 2 ½ cups (315g) wholemeal flour
- 1 cup (125g) all-purpose flour
- 1 teaspoon (5g) salt
- 2 tablespoons (25g) sugar or honey
- 2 teaspoons (8g) instant yeast
- 1 cup (240ml) warm water (100°F to 110°F/38°C to 43°C)
- ¼ cup (60ml) olive oil or melted unsalted butter
- ½ cup (75g) mixed nuts (e.g., walnuts, almonds, hazelnuts) chopped
- ¼ cup (30g) sunflower seeds
- ¼ cup (30g) pumpkin seeds
🥄 Instructions:
- Step 1: In a large mixing bowl, combine the wholemeal flour, all-purpose flour, salt, sugar, and yeast.
- Step 2: Gradually add warm water and olive oil, mixing until a shaggy dough forms.
- Step 3: Turn the dough onto a floured surface and knead for about 10 minutes until smooth and elastic.
- Step 4: Incorporate the chopped nuts and seeds during the last few minutes of kneading.
- Step 5: Form the dough into a ball and place it in a greased bowl, covering it with a kitchen towel.
- Step 6: Let rise in a warm place until doubled in size, about 1 hour.
- Step 7: Punch down the risen dough and turn it onto a floured surface.
- Step 8: Shape it into a loaf and place it into the greased loaf pan.
- Step 9: Cover the loaf pan with a kitchen towel and let it rise until it doubles in size, approximately 30 minutes.
- Step 10: Preheat the oven to 375°F (190°C).
- Step 11: Bake for 35-45 minutes, or until the loaf is golden brown and sounds hollow when tapped.
- Step 12: Remove the loaf from the oven and let it cool in the pan for a few minutes, then transfer to a wire rack to cool completely before slicing.
Previous Recipe: How to Bake Marble Cake with Chocolate & Vanilla: A Delicious Family Treat!
Next Recipe: Ultimate Grilled Meatballs with Creamy Coconut Sauce: A Delicious Journey!