No-Bake Banana Toffee Icebox Cake
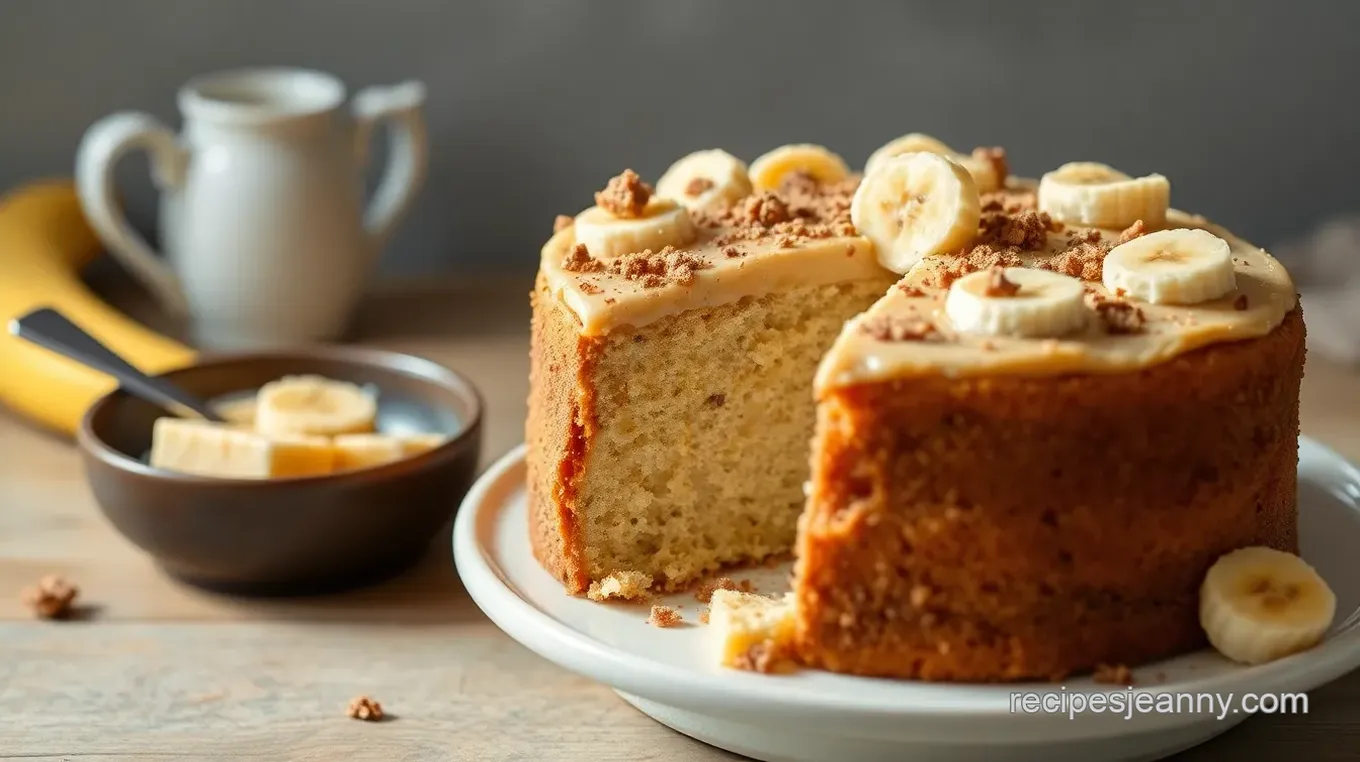
Craving something cool and indulgent? Try my No-Bake Banana Toffee Icebox Cake Recipe! It's layered with bananas, toffee, and graham crackers—pure bliss!

A Slice of Summer: No-Bake Banana Toffee Icebox Cake Recipe
Oh my gosh! have you ever had one of those days where the thought of turning on the oven just feels like a punishment? you know, those sweltering summer afternoons when all you want is something sweet, creamy, and oh-so-refreshing? that’s exactly how i stumbled across this no-bake banana toffee icebox cake recipe .
One day, after a long day of chasing my kids around the park, all i wanted was a dessert that demanded no baking and delivered tons of flavors.
And trust me, this beauty did not disappoint!
A Sweet Treat from the Past
This layered icebox cake has been making waves since the post-wwii era, when folks realized mixing heavy cream with graham crackers was a genius way to get dessert on the table without cranking up the heat.
Fast forward to now, and it’s still a crowd-pleaser! simplifying dessert prep for summer gatherings is always a win, especially if you’re like me and want your recipe to please everyone, from picky eaters to your grandma who insists everything was better "back in her day.
" plus, layer it with some ripe bananas and toffee? count me in!
Now, let's get into the nitty-gritty. if you’ve got 15 minutes to spare, a few pantry staples, and about 4 hours of chilling time , you're golden.
Seriously, this recipe is so easy that even my toddler can help out (and that’s saying something!). not to mention, the cost is totally reasonable.
Think of it as the perfect way to use those ripe bananas sitting on your counter that are just begging to be turned into something delicious.
Why This Cake is a Winner
So, what are the key benefits of this divine layered dessert? Well, let’s get into it!
-
Nutritional boost : we’ve got bananas in the mix, which means fiber and potassium. add that to the rich, creamy texture from whipped cream, and voila—you've got yourself a bit of balance in a dessert.
Yup, i said it— balance !
-
Cool factor : for summer gatherings, you can’t go wrong with this chilled cake. bring it out, slice it, and watch everyone’s eyes light up.
Seriously, it’s perfect for cookouts, birthday parties, or just because it’s tuesday.
-
Family-friendliness : this recipe is kid-approved, and your little ones will love getting their hands sticky while layering it up.
If you're looking for simple dessert recipes for kids, you've hit the jackpot with this one. plus, you can easily make it gluten-free or swap in dairy-free components!
-
A twist on tradition : ever tried a toffee icebox cake? it’s a unique combination that’ll surprise your taste buds while keeping things classic.
You know, like your favorite summer blockbuster but with a tasty twist.
All these points make this cake not just a dessert, but a fun activity to share with your family. Honestly, what's not to love?
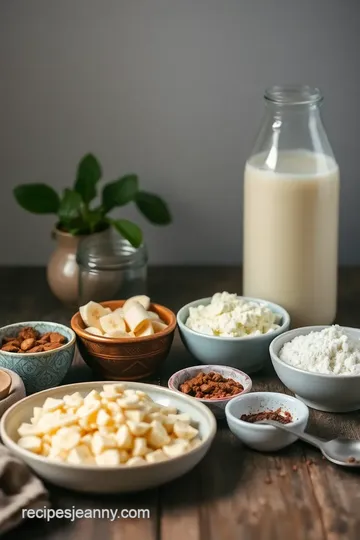
Alright, so let's dive into what you'll need for this delightful treat. Ready to gather your ingredients? Here’s what you’ll want to have on hand for the ultimate No-Bake Banana Toffee Icebox Cake !

Your Go-To Guide for Essential Ingredients
Hey there, fellow foodies! if you’re anything like me, you love whipping up delightful dishes that impress your family and friends but also keep it easy and fun.
I'm here to break down some essential ingredient knowledge that will up your cooking game. no more clueless grocery store trips! so, let’s dive in.
Premium Core Components
When it comes to cooking, quality matters . Let's get into some premium ingredients.
-
Measurements: you’ll need stuff like 1 ½ cups graham cracker crumbs (that’s 150g) for that no-bake banana toffee icebox cake.
Always handy to check out those metric measurements , especially if you’re baking like a pro!
-
Quality indicators: look for fresh, ripe bananas for your desserts. you know they're ripe when they're speckled with brown! and those toffee bits? they should be soft, not hard as rocks.
There’s nothing worse than biting into a dessert and getting a jaw workout!
-
Storage guidelines: keep your bananas on the counter until they reach peak ripeness; then toss them in the fridge to extend their life a little.
Did you know that heavy cream can last a week beyond the sell-by date if it’s unopened? just always give it a sniff first!
-
Freshness Tips: When you’re shopping, give your produce a squeeze. If it’s super soft or has dark spots, put it back. Trust me, you don’t want those sad fruits in your cake!
Signature Seasoning Blend
Now, let's sprinkle in some seasoning magic.
-
Essential Spice Combinations: For your layered icebox cakes, think about subtle flavors. A touch of cinnamon can do wonders with bananas. Feel adventurous? Toss in some nutmeg for a warm kick.
-
Herb Selections: You might not typically think herbs in a dessert, but fresh mint can add a refreshing note!
-
Flavor Enhancers: Vanilla extract is a must-have. Just a teaspoon can elevate your whipped cream desserts to another level.
-
Regional Variations: Depending on where you live, you might find fun twists to classic recipes. Ever tried a Southern-style banana dessert with pecans? YUM!
Smart Substitutions
Let’s be real; sometimes, you are out of ingredients. No stress!
-
Common Alternatives: Don’t have toffee bits ? Go for caramel sauce instead; it’s just as delicious!
-
Dietary Modifications: Got a gluten allergy? Use gluten-free graham crackers. It’s all about what works for you.
-
Emergency Replacements: Ran out of heavy cream? You can whip up coconut cream for a tropical twist!
-
Seasonal Options: If you find vibrant strawberries at the market, why not try them instead of bananas? It’s a fun variation!
Kitchen Equipment Essentials
Now, let's talk tools. You can’t bake without the right gear!
-
Must-Have Tools: You definitely need a good electric mixer for whipping cream. Trust me, no one wants to attempt that by hand!
-
Alternative Equipment Options: Don’t have a baking dish? No worries! A large plate can substitute if you layer it carefully.
-
Preparation Tips: Make sure everything is prepped before you start! It makes the whole process so much smoother.
-
Storage Solutions: Make your kitchen your best friend by keeping your ingredients organized. Label your boxes, and trust me, you’ll thank yourself later!
So there you have it! Armed with this essential ingredient guide, you're all set to make that fabulous No-Bake Banana Toffee Icebox Cake Recipe and wow your guests without breaking a sweat.
Next up, I’ll guide you step-by-step on how to whip this baby together. Trust me, they won't even believe you didn't bake a thing!
Mastering the Professional Cooking Method: From Prep to Perfection
Cooking is like an art form, isn’t it? but unlike michelangelo with his paints, we’ve got pots, pans, and a whole lot of ingredients! let me break down a professional cooking method, focusing on essential preparation steps, the nitty-gritty of the cooking process, expert techniques, and some solid success strategies.
Grab your apron, and let’s dive in!
Essential Preparation Steps
First off, mise en place —it’s not just french for “everything in its place”; it’s your secret weapon. before you even think about turning on your stove, make sure all ingredients are prepped.
Chop that onion, slice those veggies, and measure out your spices. this step will save you from running around like a headless chicken halfway through your cooking.
Next, think about time management . if you're whipping up something fancy, set a timer for various stages of your recipe.
Multi-tasking can be a recipe for disaster if you’re not careful! trust me, i’ve burned more than a few dinners because i didn’t keep an eye on the clock.
Keeping your kitchen organized is just as crucial. lay out all your tools and ingredients in a way that makes sense.
If you’ll need that whisk frequently, keep it handy, not buried under a mountain of pots. a tidy workspace is a happy workspace.
And let’s not forget about safety . Always handle knives with care and keep a fire extinguisher nearby just in case! Safety first, folks!
Step-by-Step Process
Alright, here’s where it gets real. Let’s break down your cooking into clear, numbered steps:
- Prep your ingredients as discussed earlier.
- Set your oven to 375° F ( 190° C) if baking is involved. If working with delicate ingredients, like egg whites, remember to keep that temperature under control!
- Cook for specified times —following the recipe's timing precision is critical. If it says 20 minutes , stick to it!
- Look for visual cues —browned edges, bubbling sauces, or the classic “toothpick test” for cake doneness. Take it from me; a well-timed poke can save you from a gooey mess!
Expert Techniques
Now, let me drop some professional methods on you. Ever heard of “searing”? This technique is crucial for meats; it enhances flavor and creates that delightful crust. Don’t skip it!
Pay attention to quality checkpoints —if a sauce isn’t coming together or the cake isn’t rising, adjust on the fly! troubleshooting is your best friend in the kitchen.
For instance, if a dish is too salty, a dash of sugar can balance it out.
Success Strategies
Let’s make sure you don’t trip on some common mistakes. overcooking is a big one; keep an eye on those delicate proteins! and if you find yourself with leftovers (yay!), know that many dishes get better the next day.
Think make-ahead options , like curries and casseroles.
And here’s a little nugget of wisdom: for a dish like my no-bake banana toffee icebox cake recipe , chilling it overnight enhances all those flavor layers.
Nothing beats waking up to a dessert that’s ready to shine at the potluck!
Chilling Out with Dessert
And if you’re looking for something cool, let’s talk about that no-bake banana toffee icebox cake ! it’s deceptively simple but a total crowd-pleaser.
You stack it with graham crackers, ripe bananas, and whipped cream—what’s not to love? plus, it’s a fantastic option for warm summer days.
You need just 15 minutes of active prep and 4 hours of chilling . trust me, your friends will think you’re some culinary genius!
Honestly, mastering the cooking method is all about practice; you’ll stumble a bit along the way, but that’s part of the process.
Get your family involved, and make it a fun experience. cooking isn’t just about feeding your belly; it’s about bringing people together.
And that’s the scoop on professional cooking methods! You’re ready to tackle your next dish with confidence. Stay tuned for some Additional Information on perfecting your culinary creations!

Additional Recipe Information for No-Bake Banana Toffee Icebox Cake
Oh my gosh, if you’re looking for a crowd-pleaser that’s super easy, the no-bake banana toffee icebox cake recipe is where it's at! i mean, who doesn’t love a good layered dessert? it's perfect for summer parties or just chilling on a hot day.
Let’s dive into some pro tips, presentation ideas, and everything else you need to make this cake shine!
Pro Tips & Secrets
First off, when you’re whipping that heavy cream, don’t over-whip it! you want those lovely, soft peaks without turning it into butter.
Trust me, i’ve gone too far before, and it’s not a fun mess to deal with! for time-saving techniques, here’s a golden nugget: make your graham cracker crust ahead of time and pop it in the fridge.
By the time you’re ready to layer on those creamy fillings, your base is nice and chilled.
For flavor enhancement, don’t hesitate to throw in a splash of lemon juice when layering your bananas. it brightens the flavor and keeps your bananas looking fresh! and presentation? honestly, a sprinkle of toffee bits on top makes this dessert pop! it’s like the cherry on top, except, well, way better.
Perfect Presentation
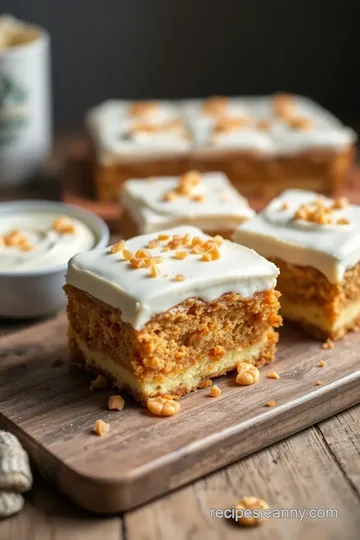
Now, let’s chat about that presentation. to really amp up the visual appeal of your layered icebox cake , use a square dish.
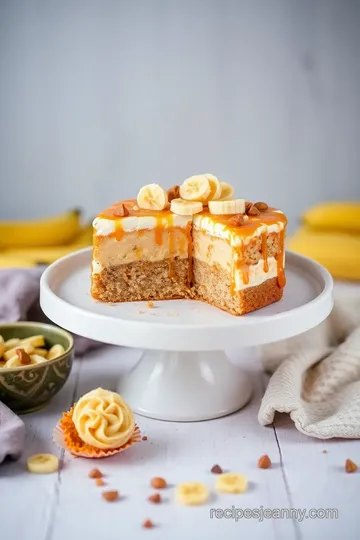
It makes slicing easier and gives you those perfect, tidy squares. when it comes to garnishing , a few banana slices on top or some fresh mint can elevate your dessert from “meh” to “wow!”
Color combinations matter too. stacks of golden bananas against the creamy white and then those crunchy bits of toffee? it’s eye-candy on a plate! and hey, if you have a fancy cake stand lying around, use that for an inviting presentation at your summer gatherings.
Storage & Make-Ahead
Okay, let’s talk about storage, because no one likes a soggy cake. to store leftovers (if there are any!), simply cover your cake with plastic wrap and keep it in the fridge.
It’s good for about 2-3 days, but i’d be surprised if it lasts that long once everyone gets a taste! for preservation, if you want to prep it ahead of time, you can make the layers a day in advance.
Just don’t add the whipped topping until you’re ready to serve.
Reheating isn’t necessary here—this is a cold dessert. Just slice, serve, and enjoy!
Creative Variations
One of the best parts of the no-bake banana toffee icebox cake recipe is just how adaptable it is. want a twist? instead of toffee bits, try using crushed oreos for that chocolate and banana dessert combo.
Yeah, it rocks! if you’re feeling adventurous, swap out the bananas for strawberries or peaches. they’re ripe and sweet in the summer, and you get a whole new flavor profile.
And hey, why not mix in some homemade toffee topping in between layers for an even richer taste? You’ll have your friends wondering if you went to culinary school.
Complete Nutrition Guide
You know, even though this dessert is indulgent, we can still talk about health. each serving of this beauty is about 320 calories .
Yes, it’s a treat, but you’re also getting a bit of potassium from those bananas! if you’re counting carbs, it may not be the best option, but hey, everything in moderation, right? for portion guidance, try to stick to about 1 square per serving.
It’s rich, which is what we love!
Expert FAQ Solutions
Let’s wrap this up with a few common questions. a lot of folks ask about substitutes for the graham cracker crust.
Feel free to play around with crushed nuts or gluten-free crackers if you need a gluten-free cake recipe.
Another great question i get is about whipping the cream. if you're feeling a lil’ lazy, can you use cool whip? sure! but honestly, nothing beats that homemade whipped cream flavor.
And for anyone worried about bananas browning—just give them a good squeeze of lemon juice to keep them fresh.
Encouraging Conclusion
So there you have it: a delightful breakdown of everything you need to know about making this scrumptious no-bake banana toffee icebox cake .
It’s not just a dessert; it’s an experience. grab your bananas and whip up this easy no-bake recipe that’s sure to impress family and friends.
Trust me, once you make it, you’ll be dreaming about this dish all summer long. go ahead, dive in! you won’t regret it.

No-Bake Banana Toffee Icebox Cake Card

⚖️ Ingredients:
- 1 ½ cups (150g) graham cracker crumbs
- ½ cup (115g) unsalted butter, melted
- 2 ripe bananas, sliced
- 1 cup (240ml) heavy cream
- ½ cup (60g) powdered sugar
- 1 teaspoon vanilla extract
- ½ cup (150g) toffee bits (plus extra for topping)
- 1 cup (240ml) heavy cream for topping
- 2 tablespoons (30g) sugar for topping
- ½ teaspoon vanilla extract for topping
🥄 Instructions:
- Step 1: Combine graham cracker crumbs and melted butter in a bowl. Mix until well combined. Press the mixture evenly into the bottom of the baking dish to form the crust.
- Step 2: In a mixing bowl, whip heavy cream until soft peaks form. Gradually add powdered sugar and vanilla extract. Continue whipping until medium peaks form. Gently fold in toffee bits.
- Step 3: Spread a layer of the cream mixture over the graham cracker crust. Arrange a layer of banana slices on top of the cream. Repeat the layering process (cream, bananas) until all ingredients are used, finishing with cream on top.
- Step 4: Cover the cake with plastic wrap and refrigerate for at least 4 hours or overnight to allow flavors to meld and the cake to set.
- Step 5: When ready to serve, whip heavy cream with sugar and vanilla until stiff peaks form. Spread the whipped cream over the top of the chilled cake and sprinkle with extra toffee bits.
- Step 6: Slice into squares and serve chilled for best flavor and texture.
Previous Recipe: Delicious & Easy Bake Puff Pastry Snickerdoodles in 30 min
Next Recipe: How to Make Decadent Baked Chocolate Cupcakes with Marshmallow Frosting
