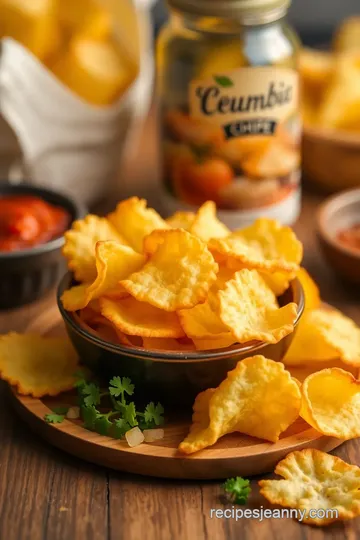
Homemade Fried Potato Chips: A Crunchy Delight!
Craving a tasty treat? Discover my grandmother’s fried potato chips crunch—crispy, customizable, and perfect for sharing or indulging solo. Let's dive in!

Oh my gosh, let me tell you about the first time i made fried potato chips crunchy & delicious snack .
I was just a kid, maybe eight or so, and my mom let me help out in the kitchen one saturday afternoon.
I thought i’d jazz up our movie night by making my own chips. it sounded super cool, and hey, how hard could it be? boy, was i in for a surprise! fast forward a few messy hours, and i had a pile of slightly burnt, oil-soaked potato slices.
But let me tell you, we couldn’t stop munching on those little failures! it was a solid introduction to diy snacks.
This story is a perfect segue into why homemade snacks are not just fun but also super rewarding!
Recipe Overview
Let's dive into this crispy love affair, shall we? the fried potato chips crunchy & delicious snack has its roots in classic american snacking history.
Did you know that potato chips were invented by a chef named george crum back in 1853? talk about a legend! these crunchy delights have evolved from simple salted bites to gourmet snacks with wild flavor profiles.
They're still a crowd favorite at parties, tailgates, and even quiet movie nights at home.
Now, about the nitty-gritty: making these chips isn’t rocket science! we’re talking easy here, my friends. you’ll need just about an hour from start to finish, including some soaking time for the potatoes.
As for costs? not much—just some potatoes, a bit of oil, and whatever seasonings you've got hanging around in your pantry.
This yields about four servings, making it a perfect appetizer or party snack idea!
Key Benefits
So, why should you roll up your sleeves and whip up some crispy snacks ? first off, let’s chat about health benefits.
When you make your own chips at home, you’re skipping all those weird additives you find in store-bought versions. plus, you get to control the salt and choose healthier cooking oils! want to make it even healthier? try some baked potato chips , which are a little less indulgent but so satisfying!
Let’s not forget how versatile these chips can be. they’re great as a standalone savory snack, but they also shine at gatherings.
Picture this: a bowl full of homemade party food next to a creamy ranch dip, and everyone is raving about your snack prowess.
Plus, these chips allow for plenty of fun customization with unique seasoning ideas or seasonal herbs to crank up the flavor.
And here’s the kicker—these chips can hold their own against any gourmet snack! the satisfaction of a crunchy bite, hot out of the fryer, just can’t be beat.
You have the power to create those perfect crunchy munchies that everyone loves.
So, whether you're prepping for a big game or just want to treat yourself, know that you have the ultimate diy potato chips recipe at hand.
They’re not just chips; they’re a crunchy love letter straight from your kitchen to your taste buds!
Now, let's keep this delicious train rolling and check out the ingredients you’ll need to start your crispy adventure…
Your Go-To Essential Ingredients Guide: Snack Like a Pro!
When you're diving into the world of homemade snacks, having the right ingredients is key. trust me, i’ve learned this the hard way! you don't want to find yourself halfway through a crispy snacks recipe only to realize you’re missing something crucial.
So let’s break it down!
Premium Core Components
Detailed Measurements
For those cooking at home, precision is your best buddy. Here’s a quick guide:
- 2 large Russet potatoes (around 500g)
- 4 cups of vegetable oil (that’s roughly 1 liter)
- 1 teaspoon kosher salt (5g), or adjust to your taste.
You can also scale it up or down; just keep the ratios in check!
Quality Indicators
Don’t settle for less when it comes to ingredients. Look for:
- Firm potatoes without blemishes for crispy homemade potato chips.
- Clear vegetable oil with no off smells.
Storage guidelines & shelf life
keep those potatoes in a cool, dark place like a pantry. they’ll stay fresh for about 1-2 weeks .
Your vegetable oil, however? it lasts for about 1 year if stored properly, preferably in a sealed container away from sunlight.
Freshness tips & selection criteria
always go for the best! check for skips and soft spots on the potatoes, and give them a good rinse to wash away dirt.
Fresh ingredients will give you that satisfying crunchy bite we’re all after!
Signature Seasoning Blend
Next, let’s chat flavor! You can keep things classic or get adventurous with essential spice combinations .
- Kosher salt: The king for those classic savory potato chips.
- Paprika: For a smoky kick.
- Garlic powder: Who doesn’t love a hint of that, right?
Herb selections
don’t forget about those seasonal herbs. fresh rosemary or thyme elevates your chips from good to gourmet snacks .
Just sprinkle them on right after frying for the best results!
Smart Substitutions
Sometimes life throws you a curveball. If you’re low on Russets, swap in Yukon Gold or red potatoes. They bring their own unique flavor!
For those watching carbs, consider baked potato chips as a healthier alternative. Baking at 400° F ( 200° C) until crispy keeps it light yet still satisfying.
Emergency Replacements
Out of vegetable oil? Give olive oil a try. It’s a bit different, sure, but it brings a nice flavor twist to your crispy snacks.
Kitchen Equipment Essentials
Before diving into my easy-to-follow chip recipe, let’s talk tools.
Must-have tools
invest in a sharp knife or a mandoline slicer—it’s a lifesaver for those thinly sliced potato chips .
You’ll also need a heavy-bottomed pot. it helps avoid unexpected oil splatters.
Alternative equipment options
no deep fryer? no problem! a heavy pot or even a skillet works just fine. just keep an eye on the oil temperature—around 350° f ( 175° c) is ideal for frying.
Preparation Tips
Make sure you have paper towels handy for draining the excess oil after frying. Nobody wants soggy chips!
Storage Solutions
Got a pile of chips left? Store them in an airtight container to keep those crunchy munchies fresh for a few days (if they last that long!).
Now that we’ve covered the essentials, you’re ready to dive into making those fried potato chips crunchy & delicious snack ! grab your ingredients, heat up that oil, and let’s bring those party snack ideas to life! just remember, cooking should be as fun as the snacks are to eat.
Happy frying!
Getting Started: The Professional Cooking Method
Cooking at a professional level isn’t just about fancy tools or expensive ingredients; it’s a mindset and a method. let's dive into some essential preparation steps to make your cooking experience smoother and more enjoyable—especially if you're tackling something like fried potato chips: crunchy & delicious snack .
Essential Preparation Steps
First thing's first: mise en place . this fancy french term simply means having everything in its place. picture this: you’re all set to make those thinly sliced potato chips , but you’ve got garlic powder buried under a mound of flour in the pantry.
A real pain, right? before you start, gather all your ingredients—cut potatoes, seasonings, oil—and have them ready. it'll save you time, and trust me, it’s a game-changer in terms of focusing on the cooking part.
Time management tips are also crucial. once the chips are soaking (you’ll do that later), use that waiting time to prepare your frying station.
Heat your vegetable oil to 350° f ( 175° c) and always have a timer. chips only need about 3- 5 minutes to turn that perfect golden brown.
This isn’t the moment to zone out and scroll through your phone.
Next up: organization strategies . keep your frying space tidy. get a bowl for chips, a plate for draining, and paper towels on hand.
It’s all about preventing chaos when you’re deep-frying those potato slices!
Don’t forget about safety considerations ! hot oil can be dangerous. always be mindful of splashes, and don't overcrowd your pot because that can lead to uneven frying.
Keep kids and pets away from the hot stove, okay?
Step-by-Step Process
Ready to fry? Here’s your step-by-step breakdown to perfectly crunchy chips:
-
Prepare your potatoes : Scrub them well and slice them into thin rounds, about 1/8 inch thick . You can use a knife or a mandoline for this.
-
Soak those bad boys : You’ll want to toss your slices in cold water for at least 30 minutes . This reduces excess starch and improves crispiness.
-
Heat the oil : Pour your 4 cups of vegetable oil into a heavy pot and heat it up over medium-high until it’s at 350° F ( 175° C) .
-
Dry the chips : After soaking, drain the slices and pat them dry with paper towels. This keeps your chips from getting soggy.
-
It’s frying time : Add your potato slices in batches to the hot oil. Each batch will need about 3- 5 minutes until they’re golden and crispy.
-
Drain them : Working quickly, scoop the chips out using a slotted spoon, letting them drain off any excess oil on a paper towel.
-
Season right away : While they’re still hot, sprinkle them with salt or your favorite seasoning.
-
Dig in : Enjoy these savory snacks right away or store them in an airtight container. Trust me, they won’t last long!
Expert Techniques
Let’s talk pro tips. to really excel with your potato frying techniques , remember to maintain a consistent oil temperature.
Too low, and your chips turn into soggy messes; too high and they might burn!
One of the most critical steps here is troubleshooting . if your chips come out unevenly cooked, check your slicing. those even thin potato slices are key! you’ll want them all about the same thickness for even cooking.
If you're looking to customize your potato chips , experiment with different seasoning after frying. spice it up with ranch powder or even some chili for a kick! it lets you add your own flavor profile, making them your own special chips.
Success Strategies
Now, let's chat success strategies. one of the most common mistakes i see? rushing the frying process. take your time, fry in small batches for perfectly crispy snacks .
Seriously, it pays off.
To assure the quality of those chips, make sure to check just a couple as a quality checkpoint . if they’re not meeting your crispy criteria, adjust your frying time or oil temperature.
If you want to prep ahead for gatherings, make-ahead options like storing unseasoned chips can be a lifesaver. fry them fresh right before the party, add seasonings, and serve.
Boom: you’re the snack hero!
And there you have it! a seamless approach to creating your own delicious fried snacks . those crispy diy potato chips aren’t just a snack; they’re the perfect appetizer and party snack ideas rolled into one.
In our next section, let’s explore some Additional Information on creating gourmet versions of your favorite homemade snacks!
The Inside Scoop on Making Fried Potato Chips: Crunchy & Delicious Snack
So, you’ve decided to whip up your very own fried potato chips ? awesome choice! this is not just any ordinary chip recipe; this is the king of homemade snacks .
I mean, who can resist a beautifully golden, crispy snack that’s perfect for any occasion? let’s dive into all the pro tips and secrets that’ll help you nail this crispy snacks recipe .
Pro Tips & Secrets
First things first, let’s talk chef’s insights . if there's one thing i learned, it’s that uniform slicing makes a world of difference.
Grab yourself a sharp knife or, if you're feeling a bit fancy, a mandoline slicer. you want those rounds to be around 1/8 inch thick.
Trust me, that’s the sweet spot for achieving that delightful crunch!
Do you want to save time? soak your potato slices in cold water for about 30 minutes . this may feel like a drag, but this simple step helps remove excess starch, leading to ultimate crispiness .
Don’t skip it!
Now, for flavor enhancement, sprinkle some paprika or garlic powder while they’re absorbing heat in the oil. adding them right after frying keeps those savory snacks packed with bold flavor.
Play with seasoning ideas to customize your chips: everything from ranch to chili powder works!
And don’t forget about presentation! Use pretty bowls or platters when serving. The visual appeal of your perfect appetizer makes it all the more compelling.
Perfect Presentation
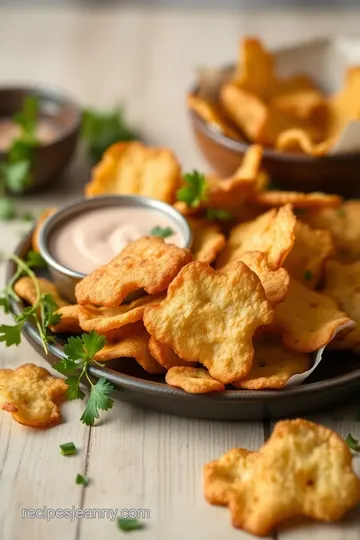
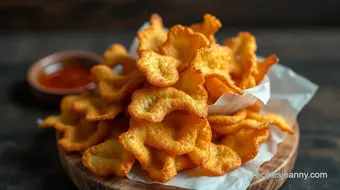
Okay, let’s get your chips looking as delicious as they taste. for the ultimate plating techniques , stack them in a cone made of parchment paper or serve in a deep dish with dipping sauces at the side.
Garnish ideas ? Think fresh herbs like rosemary or parsley for a pop of color and taste. Color combinations are crucial; pairing your golden chips with vibrant dips like guacamole or salsa is like a food match made in heaven!
Storage & Make-Ahead
Let’s face it, sometimes we make too many chips (no shame, they’re addictive!). to keep your crunchy potato chips crispy for days, store them in an airtight container .
They’ll stay fresh for about 3-4 days , but i doubt they’ll last that long!
If you want to prep a bit ahead, you can slice your potatoes the day before. Just keep them immersed in water in the fridge to prevent browning.
Creative Variations
Getting creative in the kitchen is where the real fun begins! ever thought about trying seasonal twists with your chips? you can add pumpkin spice during fall or sprinkle cinnamon sugar for a sweet treat.
Are you on a healthier kick? try making baked potato chips instead. just drizzle them with a bit of oil, season them, and toss them in the oven at 400° f until crispy.
You’ll enjoy a crunchy snack without the guilt!
Complete Nutrition Guide
Curious about what you’re munching on? a serving of these delicious fried snacks has about 250 calories . yes, they carry some fat thanks to the vegetable oil frying , but they’re more fulfilling than store-bought junk.
The best part? you control all the ingredients, so you avoid those mystery additives you might find on store shelves!
Expert FAQ Solutions
I get it, a million questions can pop up in your mind. Here’s a quick FAQ:
Why are my chips soggy? – Ah! Check the oil temperature. If it’s too low, that’s your villain right there. Aim for 350° F .
Can I reheat chips? – Sure! Just pop them in the oven at 300° F for about 10 minutes to bring back that crunch.
Remember, don’t sweat it. Cooking is all about having fun and experimenting!
Final Thoughts
So, there you have it! making fried potato chips: crunchy & delicious snack is not only a cinch but also super rewarding.
Look into into those flavors, get your hands messy, and remember that every batch is a new adventure in your kitchen.
Whether it’s party snack ideas , diy potato chips , or simply a way to enjoy a crispy treat while binge-watching your favorite series, these chips are the way to go.
Go forth and create — crisply fried potato perfection awaits. Cheers to your new favorite classic snack recipe !
Homemade Fried Potato Chips: A Crunchy Delight! Card
⚖️ Ingredients:
- 2 large Russet potatoes (about 500g), scrubbed and sliced thin (1/8 inch or 3 mm thick)
- 4 cups of vegetable oil (approximately 1 liter) for frying
- 1 teaspoon kosher salt (5g), or to taste
- 1 teaspoon paprika (2g) for a smoky flavor (optional)
- 1/2 teaspoon garlic powder (1g) (optional)
- 1/2 teaspoon onion powder (1g) (optional)
- Fresh herbs (like rosemary) for garnish (optional)
🥄 Instructions:
- Step 1: Scrub and rinse the potatoes. Slice the potatoes into thin, even rounds using a knife or mandoline.
- Step 2: Place the potato slices in a large bowl of cold water. Soak for at least 30 minutes to remove excess starch and improve crispiness.
- Step 3: In a heavy-bottomed pot, heat vegetable oil over medium-high heat until it reaches 350°F (175°C). Monitor regularly.
- Step 4: Drain soaked potato slices; pat them dry thoroughly with paper towels.
- Step 5: Fry the potato slices in batches, avoiding overcrowding the pot. Cook for 3-5 minutes or until golden brown, flipping as needed.
- Step 6: Remove chips with a slotted spoon, letting excess oil drip off. Transfer to a paper towel-lined plate to drain and cool.
- Step 7: While still warm, sprinkle with salt and optional seasonings of choice.
- Step 8: Enjoy immediately or store in an airtight container for later!
Previous Recipe: Ultimate Bake SunButter Raspberry Pie Delight: A Delicious Family Favorite
Next Recipe: Ultimate Bake Chocolate Chip Cookies with Salted Caramel: 5 Delicious Tips!