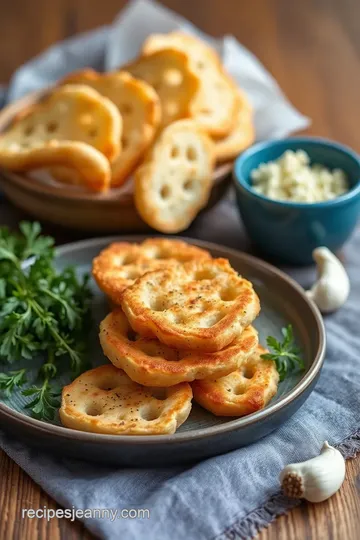
Crispy Garlic Bread Strips
Delight in my Bake Crispy Bread Strips with Garlic Flavor! These easy, crunchy garlic delights pair perfectly with soups or as appetizers. Discover the recipe!

- The Ultimate Crispy Garlic Bread Strips
- Essential Ingredients Guide: Your Secret to Flavorful Garlic Bread Strips
- Unleashing the Perfect Crispy Garlic Bread Strips
- Pro Tips & Secrets for Perfect Garlic Bread Strips
- Perfect Presentation
- Storage & Make-Ahead
- Creative Variations
- Complete Nutrition Guide
- Frequently Asked Questions
- Recipe Card
The Ultimate Crispy Garlic Bread Strips
Oh my gosh, let me tell you about the first time i whipped up crispy garlic bread strips ! picture this: it’s a rainy sunday afternoon, and the couch is calling my name.
I thought, “why not throw some easy snacks together?” so, i rummaged through my kitchen and found a stale baguette just chilling out.
That’s when it hit me—i could bake crispy bread strips with garlic flavor . talk about turning something ordinary into pure magic!
A Little History on this Delightful Snack
Now, these garlic bread sticks aren’t just a last-minute decision. they have their roots in the italian tradition of bruschetta , which usually showcases juicy tomatoes and basil.
Over time, folks have made their own variations, often using herb-infused bread like this one. nowadays, these crunchy snacks are a hit at dinner parties and family gatherings.
They're super easy to whip up, taking just around 30 minutes from prep to plate. honestly, anyone can do it, whether you’re a kitchen pro or just picking up a spatula for the first time!
An Overview of the Recipe
The cool part? this recipe is sooo budget-friendly! you’re looking at ingredients that won’t set you back much—about $5 for everything if you work it right.
Plus, from one baguette, you can yield a solid 4 servings . that’s a quick and satisfying snack for movie night or a casual dinner party without busting the bank.
Why You’ll Love Making This
Now, let's dive into why you should absolutely add these crispy delights to your dinner table. first off, can we talk about those health benefits ? these bread strips might sound indulgent, but you can control the butter content and pack in those flavorful baked snacks without overdoing it.
Plus, garlic itself is a fantastic flavor enhancer that might even boost your immune system. talk about a win-win!
These strips are perfect for just about any occasion. need a quick appetizer for dinner parties ? check! want something to dip into your creamy soup? double check! they pair just beautifully with a garlic butter dip or even a robust marinara sauce.
Honestly, who doesn’t love a crunchy bread side dish that’s versatile and delicious?
The Best Part? Total Simplicity
Cooking can sometimes feel daunting, especially with those complex chef recipes out there. but this? it’s all about simplicity. you can literally take about 15 minutes for prep and another 15 minutes to bake.
Bam! you’ve got yourself a gourmet snack that feels fancy but doesn’t require culinary school.
And if you’re looking for something a little different, feel free to switch it up. toss in some cheesy garlic bread strips by adding a sprinkle of cheese before baking or mix in some extra herbs for that gourmet touch.
So, who’s ready to learn how to make these crispy garlic bread strips? I promise you won’t regret it, especially when your kitchen starts filling up with that mouthwatering aroma of roasted garlic! Plus, all those little bits of Crispy bread delights will be gone before you know it!
Now let’s talk ingredients so you can start whipping these up and impress your friends and family!
Essential Ingredients Guide: Your Secret to Flavorful Garlic Bread Strips
When it comes to making Crispy Garlic Bread Strips , having the right ingredients is key. Let’s dive into what you need for this delightful treat, inspired by those crunchy Italian bruschetta snacks we all know and love!
Premium Core Components
First things first, you'll want to know the essentials. For our tasty bread strips, here’s what you should gather:
-
Bread: One large baguette (about 12 inches or 30 cm ). This gives that classic crunchy base.
-
Butter: You’ll need 1/2 cup (115 g) of unsalted butter . Melt it down for that rich flavor.
-
Garlic: Doesn’t get better than 4-6 cloves of fresh garlic, finely minced. The fresher, the better!
-
Herbs & Seasoning: Grab 1 teaspoon dried oregano , 1/2 teaspoon salt , and 1/4 teaspoon black pepper . These will pack a flavor punch!
-
Garnish (optional): A 1/4 cup (15 g) of chopped fresh parsley adds that touch of fresh color and herbaceous flavor at the end.
Signature Seasoning Blend
Creating the right flavor profile is crucial. Here’s how to elevate your garlic bread recipe :
-
Herb Selections: Along with oregano, feel free to add other herbs like thyme or rosemary for some extra flair.
-
Flavor Enhancers: A sprinkle of red pepper flakes can kick it up a notch if you like a little heat!
-
Regional Variations: While classic is fab, consider mixing it up with a little Parmesan on top for that Italian flair.
Smart Substitutions
Oh no, out of something? Don’t sweat it! Here are some quick substitutions to keep you going:
-
Bread Options: No baguette? No problem! Italian or French bread works just fine.
-
Butter: If you want a dairy-free version, swap out melted butter for olive oil . Just as delicious and still oh-so-crispy!
-
Emergency Replacements: If you're in the pinch for garlic, try a garlic powder sprinkle in the butter mix. I mean, it's not fresh, but it'll do.
Kitchen Equipment Essentials
You don’t need a fancy kitchen to whip these up! Here's what you absolutely need:
-
Baking Sheet: A good one will ensure those bread strips bake evenly.
-
Mixing Bowl: To combine your toppings. Trust me; you don’t want to skip this step.
-
Pastry Brush or Spoon: You’ll need this to generously coat your strips with garlic butter. Your friends will thank you!
Storage Guidelines and Freshness Tips
These crunchy bread snacks are best served warm, but if you have leftovers, store them properly:
-
Storage: Keep any extras in an airtight container. They’ll last for about 2-3 days . But let’s be real—you probably won’t have leftovers!
-
Freshness Tips: For that fresh-out-of-the-oven crunch, consider reheating them in the oven for a few minutes at 350° F ( 175° C) .
With these essential ingredients and tips, you’re all set to Bake Crispy Bread Strips with Garlic Flavor . The aroma of roasted garlic bread wafting through your house will have everyone wandering into the kitchen!
Ready to dive into the instructions? let’s get cooking! i'm so excited for you to try this recipe out and wow your friends with these easy garlic appetizers .
Trust me, they won’t be able to resist the crispy, buttery goodness!
Unleashing the Perfect Crispy Garlic Bread Strips
Oh my gosh, can we just take a moment to appreciate the joy of crispy garlic bread strips ? imagine this: you walk into your kitchen, and the air is filled with that mouthwatering smell of roasted garlic.
It’s like a hug for your nose! these strips are more than just a side; they’re a versatile little snack you can whip up for dinner parties, cozy family nights, or even just for you when you binge-watch your favorite show.
And honestly? you’ll impress everyone with just a bit of simple prep. let’s dive into the juicy details of making these delicious garlic strips!
Essential Preparation Steps
Before the fun begins, let’s chat about the nitty-gritty— mise en place . sounds fancy, right? but it just means having everything ready before you start cooking.
Chop up your garlic, measure out your butter, and slice your baguette into 1-inch strips . trust me, it saves time and keeps chaos at bay!
Now, while we’re at it, here are some quick time management tips : set a timer on your phone to remind you when to check those strips in the oven.
Nobody likes burnt bread. yikes!
Also, keep your workspace organized. put those butter and garlic mixtures near the bread, and tidy up as you go.
Safety first! remember, the oven will be cranked up to 400° f ( 200° c) . watch those fingers!
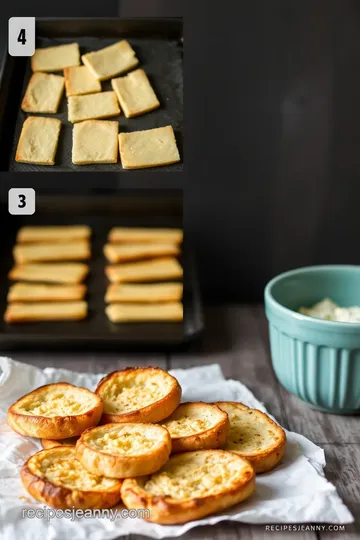
Step-by-Step Process
Let’s break it down, step by step:
-
Preheat your oven to 400° F ( 200° C) . This ensures your strips get that perfect golden crisp.
-
Prepare the bread : slice your baguette into those glorious 1-inch strips and lay them out on a baking sheet.
Leave a little space between each piece so they can crisp up beautifully.
-
Mix the topping : in a bowl, combine 1/2 cup melted unsalted butter , 4-6 cloves of minced garlic , 1 teaspoon dried oregano , 1/2 teaspoon salt , and 1/4 teaspoon black pepper .
You want to whisk this baby until it’s well mixed.
-
Coat the Bread : Brush that delicious garlic butter mixture generously over each bread strip. You can never have too much garlic flavor!
-
Bake : Pop those bad boys in the oven for 10- 15 minutes . Keep an eye on them—golden brown is the goal here. We want crunchy goodness, not charred disasters.
-
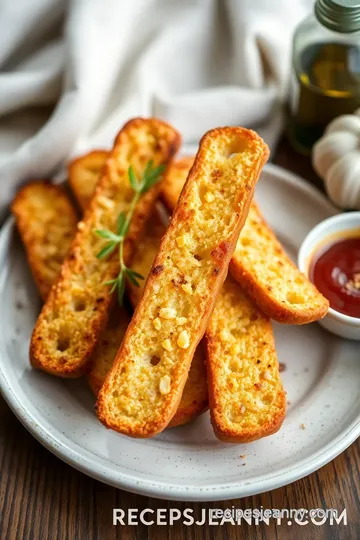
Garnish and Serve : Take them out, sprinkle some fresh parsley on top if you’re feeling gourmet, and serve them warm.
Expert Techniques
If you want to go next level, here are some fantastic expert techniques :
- Fresh garlic is your friend. It packs way more punch than that jarred stuff.
- Watch those edges! When they’re golden and crispy, you know you’ve nailed it. Avoid the soggy strip nightmare!
- If you want to go wild, toss in some red pepper flakes for a spicy kick!
Success Strategies
Almost any recipe has its oops moments, so here’s how to avoid them:
- One common mistake is overloading with garlic butter. You want to coat—not drown.
- Serve them fresh! Nothing beats that hot, crispy bread right from the oven.
- Make-ahead? Totally! Just prep your garlic butter and store it in the fridge. It’ll save you time later.
Wrapping it Up with Garlic Love
So there you have it! a foolproof way to bake crispy bread strips with garlic flavor . these strips aren’t just a side; they can elevate your pasta dinner, be the star of the game-night spread, or serve as that perfect little bite to enjoy with some garlic butter dip .
They’re versatile, delicious, and let’s be real, everyone loves a good oven-baked snack .
Next up, if you’re hungry for more cooking ideas, head on to additional information , where we dive deeper into various tips, tricks, and alternatives to keep your culinary journey exciting.
You’re going to love it!
Pro Tips & Secrets for Perfect Garlic Bread Strips
Alright, let’s dive into the secrets of this crispy garlic bread strips recipe that’ll leave your guests asking for more! when you bake crispy bread strips with garlic flavor , a few chef insights can make a huge difference.
Chef's personal insights ? fresh garlic truly is your best friend. the smell when it’s roasting? oh my gosh, it’s heavenly! ditch the jarred stuff; trust me, using fresh garlic elevates those crunchy bread snacks from "meh" to "wow.
" another tip is to avoid smothering each strip in butter. a light coating makes for that perfect crunch.
For time-saving techniques , while you’re waiting for the oven to preheat, get your bread sliced and the topping mixed. You’ll save time and get to that crispy goodness faster.
And don’t forget about flavor enhancement ! try adding some crushed red pepper flakes to the mix. it gives it a nice kick—perfect for those who like a bit of heat! another game-changer is incorporating some freshly chopped herbs.
It adds a pop of color and flavor too.
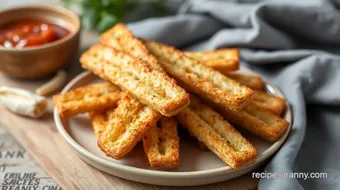
Presentation advice ? Make your bread look fancy by arranging it in a fun way on your serving plate. This isn’t just a side; it’s a dish !
Perfect Presentation
Presentation matters, folks—especially when you’re serving up easy garlic appetizers or impressing at a dinner party. Think of it as a little love letter to your guests.
You want to plate these perfectly! lay them out in a fanned arrangement, or bunch them up in a little basket.
Don’t forget to sprinkle a bit of fresh parsley garnish on top. the green really pops against that golden garlic goodness!
Garnish ideas like Parmesan shavings or even a drizzle of balsamic reduction can take your crusty bread strips from okay to gourmet.
And for color combinations? Aim for contrast! The golden brown from the oven-baked snacks plus bright greens from herbs? Pure magic!
Storage & Make-Ahead
Now let’s talk about storage guidelines because we all have those nights when we make way more than we can eat (oops).
These crispy delights can hang out in an airtight container for about 2-3 days at room temperature. i mean, they taste best fresh, but if there are leftovers, you can still enjoy them! for longer preservation, just freeze them.
Just make sure to wrap them tightly so they don’t end up with freezer burn.
Reheating instructions ? Pop them back in the oven at 350° F ( 175° C) for about 5- 10 minutes. They'll regain that crispy texture we all love!
Creative Variations
Feeling adventurous? The best part about these homemade garlic strips is their versatility.
For flavor adaptations , how about a bit of lemon zest added to the butter? It adds brightness. Craving a cheesy version? Add mozzarella right before baking—yes, please!
If you’re considering dietary modifications , you can swap out butter for olive oil for a delicious vegan twist .
And let’s chat about seasonal twists ; you could throw in some fresh herbs like basil in summer or rosemary in fall. It's like having a different dish every season!
Complete Nutrition Guide
Let’s break it down. each serving of these garlic bread strips gives you about 280 calories, 3g of protein, and 20g of fat.
Now, don’t let that scare you; these bread delights are perfect as a crispy bread side dish or to dip in something warm.
The health benefits ? well, garlic is known for its immune-boosting properties—so there’s that! and if you’re paying attention to diet, just keep in mind portion sizes.
One or two strips should do the trick alongside a lighter meal—a salad or soup.
So, are you ready to bake crispy bread strips with garlic flavor ? this recipe kicks the comfort food appetizers up a notch and is a hit for any gathering.
The process is simple, the ingredients are common, and the results are straight-up awesome. you’ll impress friends and family and maybe even turn them into garlic bread fans like you!
Just remember: have fun with it. cooking should be joyful, and this quick snack recipe is perfect for adding a tasty twist to any meal.
So let’s get baking—we’ve got crispy bread delights to make!
Frequently Asked Questions
How do I Bake Crispy Bread Strips with Garlic Flavor without burning them?
To prevent burning your bread strips, keep an eye on them while they bake. Bake at 400°F (200°C) for 10-15 minutes and check periodically, especially after the first 10 minutes. The edges should turn golden brown but not too dark; if you see this happening, remove them from the oven.
Can I make Bake Crispy Bread Strips with Garlic Flavor ahead of time?
While these bread strips are best served fresh for maximum crispiness, you can prepare the garlic butter mixture and slice the baguette in advance. Store the mixture in the fridge and the bread in an airtight container until you’re ready to bake.
What are some variations I can try for Bake Crispy Bread Strips with Garlic Flavor?
For variations, consider adding a pinch of red pepper flakes for a spicy kick or topping with grated Parmesan cheese before baking for a cheesy version. You can also explore different herbs like rosemary or thyme for added flavor nuances.
How should I store leftover Bake Crispy Bread Strips with Garlic Flavor?
To store leftovers, place the bread strips in an airtight container at room temperature for up to 2 days. To reheat, bake them for a few minutes at 350°F (175°C) to restore their crispiness rather than microwaving, which could make them soft.
Can I use other types of bread for this recipe?
Yes! While a baguette is recommended for its texture and crispiness, you can substitute with Italian or French bread. Just ensure the bread is sliced into similar thickness for even baking.
Is this recipe suitable for those with dietary restrictions?
This recipe can be easily adapted to meet dietary needs. For a dairy-free version, substitute butter with olive oil. Additionally, if you’re avoiding gluten, opt for gluten-free bread varieties.
Crispy Garlic Bread Strips Card
⚖️ Ingredients:
- 1 large baguette (about 12 inches or 30 cm), sliced into 1-inch strips
- 1/2 cup (115 g) unsalted butter, melted
- 4-6 cloves garlic, minced
- 1 teaspoon dried oregano
- 1/2 teaspoon salt
- 1/4 teaspoon black pepper
- 1/4 cup (15 g) fresh parsley, finely chopped (optional, for garnish)
🥄 Instructions:
- Step 1: Preheat your oven to 400°F (200°C).
- Step 2: Slice the baguette into 1-inch strips and arrange strips on a baking sheet, leaving space between each.
- Step 3: In a mixing bowl, combine melted butter, minced garlic, oregano, salt, and pepper. Whisk until well mixed.
- Step 4: Brush the garlic butter mixture generously over each bread strip.
- Step 5: Bake in the preheated oven for 10-15 minutes, or until golden brown and crispy. Check periodically to avoid burning.
- Step 6: Remove from the oven, sprinkle with fresh parsley if desired, and serve warm.
Previous Recipe: How to Make Yogurt at Home - Quick & Easy Dahi: A Kitchen-Tested Delight!
Next Recipe: Easy & Fluffy Pav Buns - Soft Indian Bread: My Family's Favorite Recipe