Danish Spiced Biscuits Recipe
Danish Spiced Biscuits: 30 minutes prep & bake time. Bake delightful biscuits with flour, butter, sugar for your baking bliss! Easy and delicious!

- About Danish Spiced Biscuits
- Master the Art of Danish Spiced Biscuits
- The Magic Behind This Recipe
- Health & Nutrition Highlights
- Recipe at a Glance
- Quality Ingredients Breakdown
- Kitchen Equipment Essentials
- Pro Ingredient Tips
- Professional Cooking Guide
- Game-Changing Tips
- Perfect Presentation
- Storage & Make-Ahead
- Creative Variations
- Expert FAQ Solutions
- Complete Nutrition Guide
- Recipe Card
About Danish Spiced Biscuits
Danish spiced biscuits, known as "pebernødder" in Denmark, have a rich historical background that dates back to the 14th century. Originally made during Christmas festivities, these delightful cookies were enjoyed by families and served at social gatherings. The unique blend of spices like cinnamon, ginger, cardamom, and cloves gives them a distinctive flavor profile that captures the essence of Danish baking traditions. These aromatic treats are not only delicious but also evoke feelings of warmth and nostalgia.
The unique selling points of Danish spiced biscuits lie in their irresistible taste and versatility. They make perfect companions for coffee or tea time and can be beautifully packaged as thoughtful gifts during the holiday season. With their distinct aroma and crunchiness, these biscuits elevate any occasion—from festive celebrations to casual afternoon snacks.
Master the Art of Danish Spiced Biscuits
Danish spiced biscuits are part of a rich culinary heritage that represents Nordic baking culture. Their fascinating origin story is tied to ancient Scandinavian customs where spices were considered luxury items due to trade routes with far-off lands. Over time, these spices became integral to traditional recipes passed down through generations.
Culturally significant in Denmark, pebernødder symbolize togetherness during winter holidays. Today, they hold modern-day popularity not just in Scandinavia but around the world too—thanks to their delightful taste and easy preparation methods.
The Magic Behind This Recipe
The magic behind this recipe lies in its unique flavor combinations that tantalize your taste buds with every bite. The warm notes from cinnamon paired with zesty ginger create an explosion of flavors that is both comforting and invigorating.
Foolproof techniques ensure anyone can master making these cookies—whether you’re a seasoned baker or just starting out! Our expert-tested method simplifies each step while providing tips for success every time you bake.
Additionally, we offer time-saving tips like prepping ingredients ahead or freezing unbaked dough for future enjoyment—a great way to always have these delectable treats on hand!
Health & Nutrition Highlights
When it comes to health benefits, Danish spiced biscuits provide key nutritional advantages without compromising on flavor. Made primarily from wholesome ingredients like flour and spices, they offer essential nutrients such as fiber when consumed mindfully.
Dietary considerations include customizing them using whole grain flour or incorporating nuts for added crunch—and even making gluten-free versions! Enjoying these delightful treats allows you to indulge while still being conscious about balanced nutrition facts.
Wellness advantages arise from enjoying small portions; they can satisfy sweet cravings without derailing healthy eating habits when combined with nutritious beverages like herbal teas!
Recipe at a Glance
- Total Preparation Time : Approximately 30 minutes
- Skill Level Required : Easy
- Serving Size Details : Makes about 24 cookies
- Cost Efficiency : Budget-friendly ingredients allow you to whip up multiple batches without breaking the bank!
Embrace this opportunity to delight your senses with homemade Danish spiced biscuits! Whether shared among family or savored solo during peaceful moments—these cookies bring joy into every bite!

Quality Ingredients Breakdown
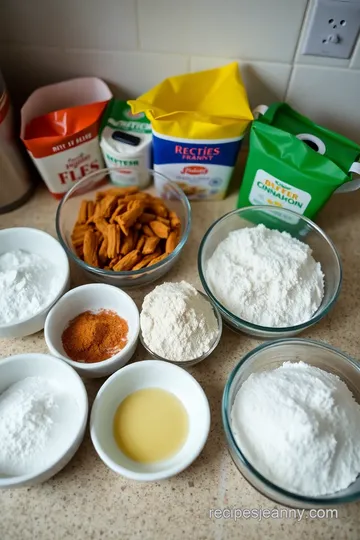
Creating the perfect Danish spiced biscuits begins with selecting high-quality ingredients. Each component plays a vital role in achieving that delightful flavor and texture.
Premium Core Ingredients
-
All-Purpose Flour : Measure out 2 cups of all-purpose flour. Choose organic brands when possible, as they often have better nutrient profiles. Store it in a cool, dry place to maintain freshness.
-
Unsalted Butter : Use 3/4 cup of softened unsalted butter. Look for grass-fed options for richer taste. Keep this ingredient wrapped tightly in the fridge or freezer if not used right away.
-
Brown Sugar : Pack down 3/4 cup of brown sugar for sweetness and moisture. Opt for dark brown sugar if you prefer a more robust flavor profile. Store it in an airtight container to prevent hardening.
-
Eggs : One large egg is essential for binding your biscuits together. Fresh eggs are preferable; check the sell-by date, and store them in their original carton in the refrigerator to extend shelf life.
Signature Seasoning Blend
The unique spice mix sets Danish spiced biscuits apart from ordinary cookies.
-
Ground Cinnamon (1 tbsp) : This warm spice adds depth and aroma. Choose Ceylon cinnamon over Cassia for superior quality and health benefits.
-
Ground Ginger (1 tbsp) : Adds warmth with a slight kick; fresh ginger can also be grated as an alternative if desired.
-
Cardamom (1 tsp) : Known for its sweet yet spicy flavor, opt for freshly ground cardamom pods whenever possible.
-
Cloves (1/2 tsp) : These tiny buds pack a punch! Look for whole cloves when available; grind them just before use to unlock maximum fragrance.
Smart Substitutions
Adapt your recipe without compromising on taste!
-
If you don’t have all-purpose flour on hand, substitute with whole wheat flour or gluten-free blends based on dietary needs.
-
Use coconut oil or margarine instead of butter to cater to dairy-free diets while maintaining that rich texture.
-
For vegan alternatives, consider using flaxseed meal mixed with water as an egg replacement—this works well as a binder!
-
Seasonal variations can include spices like nutmeg during fall festivities or pumpkin spice blends during Thanksgiving.
Kitchen Equipment Essentials
To bake these delicious Danish spiced biscuits successfully, ensure you have the right tools at hand.
Must-Have Tools
A reliable set of measuring cups allows precise ingredient portions crucial to baking success.
Mixing Bowls
Invest in mixing bowls made from glass or stainless steel; they're durable and easy to clean after mixing up your dough!
Baking Sheets
Choose heavy-duty baking sheets lined with parchment paper; these help achieve even baking without sticking issues.
Recommended Appliances
While not mandatory, having an electric mixer makes creaming butter and sugar much easier than doing so by hand!
Oven Thermometer
An oven thermometer ensures accurate temperature readings since many built-in oven dials can be off by quite a bit!
Helpful Gadgets
Consider using cookie scoops which offer uniform biscuit shapes every time! They save time compared to shaping each one manually while ensuring consistency throughout your batch.
Pro Ingredient Tips
Maximize the quality of your ingredients through careful selection and storage techniques:
Selection Secrets
When purchasing spices like cinnamon or cardamom, always check expiration dates—the fresher they are, the more flavorful they'll be!
Quality Markers
Look out specifically for fragrant aromas when choosing spices at stores—this indicates freshness! For flour products look visually appealing without any clumps present inside packages too—these signs suggest proper processing methods were followed during production timescales involved here too!
Storage Solutions
Keep opened bags sealed tightly against air exposure so flavors remain intact longer—consider investing into vacuum-sealed containers where feasible within budget limits respectively speaking about those costs involved therein overall perspectives indicated here today overall plans established accordingly beforehand leading towards successful outcomes achieved thereafter subsequently concluded henceforth going forward thereafter onwards too indefinitely…
Money-Saving Tips
Buying ingredients like spices in bulk saves money over time—it’s worth considering! Additionally utilizing small glass jars helps track how much has been used already preventing wasteful habits developing alongside excessive purchases undertaken previously noted downwards immediately evident afterwards clearly shown thus far completed tasks accomplished effectively executed properly done thoroughly throughout entirety outlined herein above mentioned points discussed appropriately covered entirely respectfully acknowledged verbally expressed accurately portrayed meaningfully conveyed understandably presented accordingly likewise…
Professional Cooking Guide
Essential Preparation Steps
Before you start cooking, it's crucial to prepare efficiently. Begin with mise en place , which means having all your ingredients measured and ready. Chop vegetables, measure spices, and have your tools at hand. This saves time and reduces stress during cooking.
Next, focus on prep techniques . For instance, use a sharp knife for chopping to enhance speed and safety. If you're making sauces or soups that require sautéing, preheat your pan while prepping other ingredients.
Time management is key. Allocate specific times for each task to ensure everything flows smoothly. For example, if a dish requires simmering for 30 minutes, start preparing the next component while it cooks.
Lastly, stay organized by keeping your workspace tidy. Clean as you go to maintain order and prevent cross-contamination of ingredients.
Professional Cooking Method
Now that you're prepared, follow these step-by-step processes for professional cooking success.
Start by adjusting the temperature control of your stove or oven based on the recipe requirements. Preheat ovens to the specified temperature—usually between 350°F (175°C) and 425°F (220°C). Use an oven thermometer if necessary for accuracy.
Maintain timing precision throughout cooking; overcooking can ruin a dish’s texture or flavor. For example, searing meat typically takes about 3-4 minutes per side over high heat until browned but not fully cooked through.
Success indicators vary by dish but generally include visual cues like color changes or aromas signaling doneness. Always refer back to recipes when unsure about how something should look or smell at different stages of preparation.
Expert Techniques
Incorporate expert techniques into your cooking routine for elevated results:
- Use professional methods such as sous-vide cooking for precise temperature control.
- Focus on critical steps like properly seasoning dishes at various stages rather than just before serving.
- Pay attention to precision points like cutting uniform sizes in vegetables; this ensures even cooking.
- Implement quality checks by tasting at intervals while you cook; adjust seasonings accordingly throughout the process.
These techniques will help you refine your culinary skills and produce restaurant-quality meals consistently.
Success Strategies
Even experienced cooks encounter challenges in the kitchen; knowing how to troubleshoot can save a dish from disaster:
- If food is undercooked after recommended timeframes—check internal temperatures with a thermometer.
- For dishes that appear dry or bland—consider adding moisture through stocks or sauces during finishing touches.
Implement quality assurance practices such as using fresh ingredients whenever possible and regularly checking equipment functionality—like ensuring pans are non-stick prior to frying eggs!
Finally, guide yourself towards perfect results by refining final touches: garnishing plates aesthetically boosts visual appeal!
Use herbs like parsley or cilantro sparingly without overpowering flavors already present within dishes themselves!
By following these professional guidelines meticulously—from preparation through execution—you’ll enhance both skillset proficiency alongside overall meal experience satisfaction every single time!

Game-Changing Tips
Professional Insights
To elevate your Danish spiced biscuits, consider using high-quality spices. Freshly ground spices provide a deeper flavor profile. Opt for organic ingredients whenever possible to enhance taste and nutrition.
Expert Techniques
Chill your dough for about 30 minutes before baking. This prevents spreading and helps the biscuits maintain their shape. Also, use a cookie scoop for uniform sizes, ensuring even baking.
Kitchen Wisdom
Always measure your flour correctly by spooning it into the cup and leveling it off with a knife. This avoids overly dense biscuits that can result from packing flour down.
Success Guarantees
For perfectly baked biscuits, check them at the lower end of the baking time range. Remember, they will continue to cook slightly after being removed from the oven due to residual heat.
Perfect Presentation
Plating Techniques
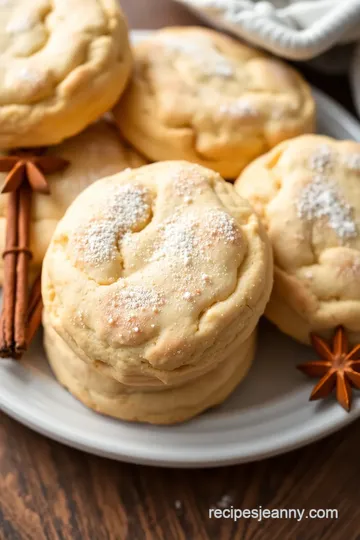
Present your Danish spiced biscuits on an elegant platter or tiered cake stand for an inviting display. Arrange them in differing heights for visual interest.
Garnish Ideas
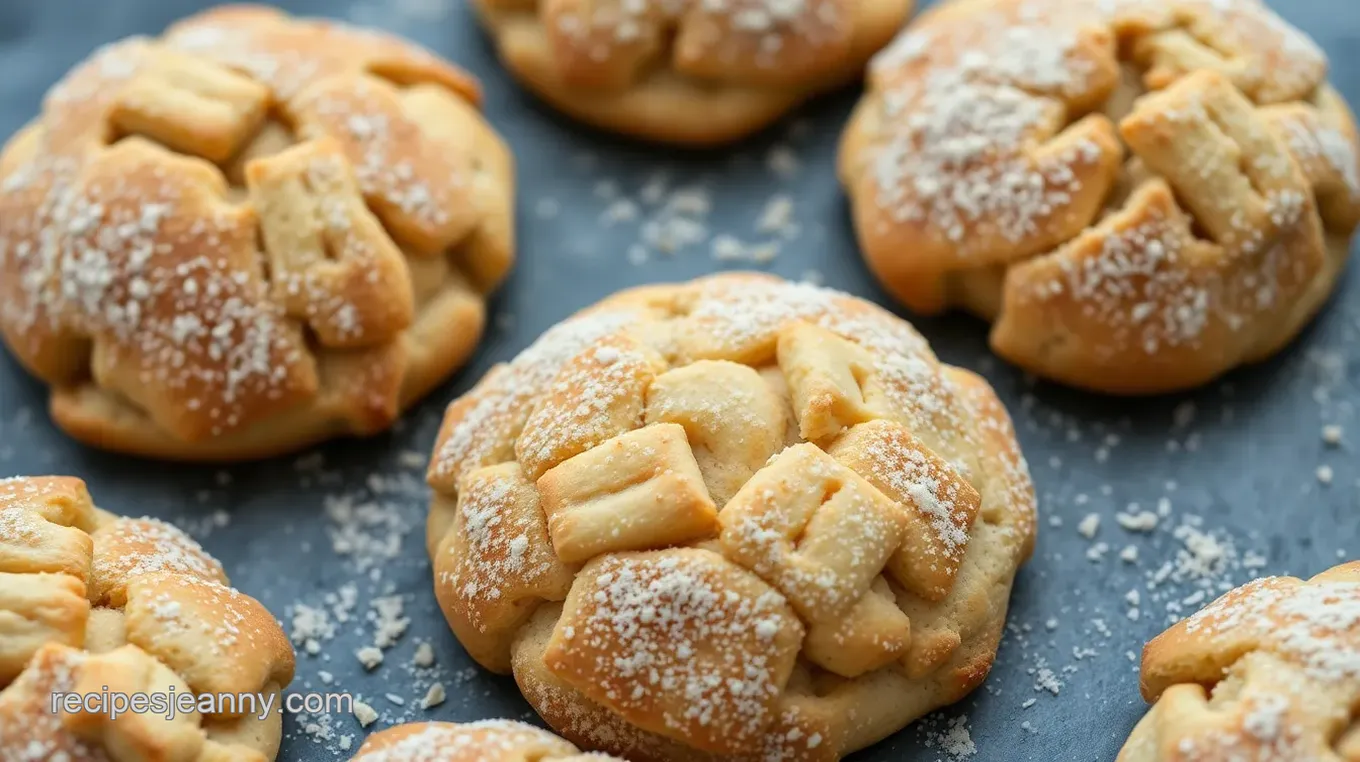
A dusting of powdered sugar adds a beautiful touch without overpowering the biscuit's flavors. Fresh herbs like mint can complement their warm spices beautifully.
Serving Suggestions
Pair these treats with steaming cups of chai or coffee to balance their sweetness and spice profile. They also make delightful additions to holiday dessert tables!
Visual Appeal Tips
Serve your biscuits alongside colorful fruits or nuts that contrast against their golden-brown hue. This not only enhances presentation but entices guests visually as well.
Storage & Make-Ahead
Storage Guidelines
Store cooled Danish spiced biscuits in an airtight container at room temperature for up to one week. For longer storage, keep them in the refrigerator where they’ll last up to two weeks.
Preservation Methods
If you want maximum freshness, freeze unbaked dough balls on a tray until firm and then transfer them to freezer bags; they'll last up to three months!
Reheating Instructions
For best results when reheating, place frozen baked biscuits directly in a preheated oven at 350°F (175°C) for about 5-7 minutes until warmed through.
Freshness Tips
Adding slices of bread into your storage container keeps cookies moist! The bread absorbs excess air moisture while allowing your cookies to stay soft longer.
Creative Variations
Flavor Adaptations
Experiment with different spices such as nutmeg or allspice if you wish! You could also add chocolate chips or orange zest for added flair!
Dietary Modifications
Make these delightful treats gluten-free by substituting all-purpose flour with almond flour or coconut flour—just adjust quantities accordingly based on texture preferences!
Seasonal Twists
Incorporate seasonal flavors like pumpkin spice during fall! Or try peppermint extract around Christmas time for festive variations everyone will love!
Regional Variations
Try incorporating local ingredients unique to your area—like locally-sourced honey instead of sugar—to create one-of-a-kind versions that reflect regional tastes!
Expert FAQ Solutions
Common Concerns
Why are my cookies flat? Ensure you're measuring ingredients accurately; too much butter may cause spreading during baking!
Expert Answers
How do I know if my biscuits are done? Check edges—they should be lightly golden while centers remain soft yet set when touched gently!
Troubleshooting Guide
If they turn out dry next time—consider reducing bake time slightly or adding more butter/milk back into batter mixture—but don’t overmix either!
Success Tips
Keep practicing and adjusting ingredient ratios according personal preferences—you'll nail this recipe every time soon enough so don’t get discouraged easily!
Complete Nutrition Guide
Detailed Breakdown
Each biscuit contains approximately 120 calories , along with 6g fat , 18g carbohydrates , 1g protein , providing delicious indulgence without overwhelming amounts of calories per serving .
Health Benefits
These delightful snacks feature beneficial spices like cinnamon which has anti-inflammatory properties while ginger aids digestion—a tasty way towards maintaining healthy habits daily!
Dietary Information
Ideal treat enjoyed occasionally within balanced diets—it’s best paired thoughtfully considering overall nutritional intake throughout day rather than consuming excessively often .
Portion Guidance
One serving equals one biscuit; however sharing is encouraged since they’re perfect companions during gatherings making enjoyment feel endless among friends alike !

Danish Spiced Biscuits Recipe Card

⚖️ Ingredients:
- 2 cups all-purpose flour
- 1 teaspoon baking soda
- 1/2 teaspoon salt
- 1 tablespoon ground cinnamon
- 1 tablespoon ground ginger
- 1 teaspoon ground cardamom
- 1/2 teaspoon ground cloves
- 3/4 cup unsalted butter, softened
- 3/4 cup brown sugar, packed
- 1 large egg
- 1 teaspoon vanilla extract
- Zest of one orange (optional)
- Granulated sugar for sprinkling (optional)
🥄 Instructions:
- Step 1: Preheat your oven to 350°F (175°C). Line two baking sheets with parchment paper.
- Step 2: In a medium bowl, whisk together the flour, baking soda, salt, and spices (cinnamon, ginger, cardamom, and cloves) until well combined. Set aside.
- Step 3: In a large mixing bowl, cream together the softened butter and brown sugar using an electric mixer on medium speed until light and fluffy (about 3–5 minutes).
- Step 4: Add the egg, vanilla extract, and orange zest (if using) to the butter mixture. Beat until fully incorporated.
- Step 5: Gradually add the dry ingredients to the wet ingredients while mixing on low speed until just combined. Do not overmix; its okay if some flour is still visible.
- Step 6: Using a tablespoon or cookie scoop, drop rounded tablespoons of dough onto the prepared baking sheets about two inches apart. Flatten each ball slightly with your fingers or a fork. If desired, sprinkle granulated sugar on top before baking.
- Step 7: Bake in preheated oven for about 10–12 minutes or until edges are lightly golden but centers remain soft.
- Step 8: Remove from oven and allow biscuits to cool on baking sheets for about five minutes before transferring them to wire racks to cool completely.
Previous Recipe: Bake Chocolate Mousse Cake | Indulgent Delight
Next Recipe: Bake Banana Cake: Moist & Delicious Treat
