Whipped to Perfection: Homemade Unsalted Butter
Craving the best Whip Cream Delicious Homemade Unsalted Butter? Discover my easy recipe that turns heavy cream into rich, flavorful butter perfect for any dish.

- Whipped to Perfection: Homemade Unsalted Butter
- Essential Ingredients Guide
- Whipped to Perfection: Homemade Unsalted Butter
- Pro Tips & Secrets for Whipped Butter Bliss
- Perfect Presentation: Butter That Looks as Good as It Tastes
- Storage & Make-Ahead: Keep Your Buttery Goodness Fresh
- Creative Variations: Spice Up Your Butter Game
- Complete Nutrition Guide: What’s In That Butter?
- Wrap-Up: Go Create Some Butter!
- Frequently Asked Questions
- Recipe Card
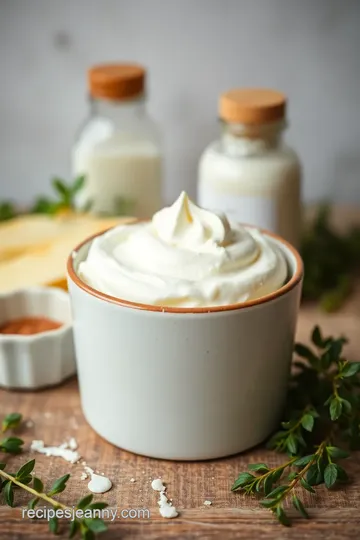
Whipped to Perfection: Homemade Unsalted Butter
Oh my gosh! have you ever spread a slab of fresh butter on warm, crusty bread and thought, this is what heaven tastes like ? well, let me tell ya, making your own whip cream delicious homemade unsalted butter is like opening a treasure chest full of flavor.
Honestly, it’s not as hard as you might think. if you’ve got a mixer (or a little bit of elbow grease), then you’re halfway there!
Making homemade butter is kind of a rite of passage in the kitchen. for centuries, folks have been turning out creamy, rich butter from fresh cow’s milk—and today, we’re just gonna do it from heavy cream! with this easy butter recipe , you’ll discover how to make butter from cream and give your fridge an upgrade.
Plus, you can impress your friends with your artisan butter at home skills! let’s dive in.
Recipe Overview
So, where did this buttery goodness come from? butter dates back to ancient times, and back then, it was often made by churning cream in bags while traveling.
Talk about a workout! today, it's way easier, thanks to modern tools. making your own fresh unsalted butter is super relevant now because everyone’s looking for homemade goodness in their meals.
Plus, with diy vibes high in the kitchen world, it’s become quite the trend.
In about 20- 25 minutes , you can whip up about a cup of this buttery goodness — that’s around 8 servings.
The best part? it’s easy ! just some heavy cream, that’s all you need. your wallet will be happy too; this one’s budget-friendly and guarantees you know exactly what’s going into your food.
Key Benefits
Now, let’s talk about why you should totally give this a shot. first off, this homemade butter recipe is way healthier than that store-bought stuff with who-knows-what in it.
Butter, in moderation, can be a part of a nutritious diet, bringing healthy fats to the table. plus, when you make it yourself, you get to control the flavor and add whatever herbs or spices tickle your fancy! it’s a flavor revolution, friends.
What’s more? this is perfect for special occasions! imagine serving it at a brunch spread or a holiday gathering, slathered on biscuits or fresh rolls; your guests will think you’re a gourmet chef.
And let’s not forget the unique selling points here. unlike those bland, mass-produced butters, your spreadable homemade butter can be customized with garlic, herbs, or even a bit of honey.
Plus, you get to experience the cream to butter process firsthand. it’s kinda cool!
So, it’s a win on multiple fronts: healthier, tastier, and a fun kitchen project. you’ll definitely skip the store on your next grocery run once you’ve tasted this homemade delight.
And don’t worry about the leftovers; let’s talk cold butter storage and keep that goodness fresh!
Transition to Ingredients
When you’re ready to get your butter party started, you’ll just need a few simple ingredients. grab your heavy whipping cream; it has to be the right kind, or you won’t have that perfect butter consistency.
Oh, and if you want a pinch of salt, that’s cool too, but it’s entirely optional! let’s get into the nitty-gritty of how to whip cream into a creamy, dreamy butter that will blow your mind and elevate all your meals.
Read on for the full ingredient list and the steps that will turn your kitchen into a butter-making factory!
Essential Ingredients Guide
If you're diving into the world of DIY butter-making, you’ll want to start with some Premium Core Components . We're talkin’ about the heart and soul of your flavor journey.
Premium Core Components
First off, let’s zero in on measurements . for a simple homemade butter recipe , you’ll need precisely 2 cups (480 ml) of heavy whipping cream .
And no, not that shelf-stable stuff. go for the good heavy cream ; it matters, trust me! when folks ask how to make butter from cream, i can’t stress enough: quality is key.
Now, how do you know you’ve got top-notch cream? it should be thick and rich, like that comforting feeling of being wrapped in a warm blanket.
If it holds onto the beaters and has no funky smell, you're golden!
Storage Guidelines
Once you whip that butter into existence, you'll want to keep it nice. storage tip alert : use an airtight container in the fridge.
Homemade butter can last up to two weeks easily, but don’t leave it hanging around too long. if you think you won’t use it all quickly, consider freezing some.
This way, you can enjoy your fresh unsalted butter even months later. just remember to label it!
Signature Seasoning Blend
But butter doesn’t have to be just plain ol' butter! That leads us to our Signature Seasoning Blend . Want to jazz it up? Here’s where you can get creative!
Essential spice combinations are lifesavers—garlic powder and dill anyone? or how about a sweet butter with honey that can top your pancakes to perfection? fan-freaking-tastic! you can even mix in fresh herbs for a flavorful twist.
Think chives or basil, whatever tickles your taste buds.
Smart Substitutions
And let’s talk about smart substitutions . you don’t always have to stick with the script. if you’re in a pinch and don’t have heavy cream, you can whip up some whipped butter from whipping cream , although the results may be a tad different.
And for those dairy-free folks out there, there’s the fantastic coconut cream option, though it’s a different vibe altogether!
Kitchen Equipment Essentials
Now, let’s get into the nitty-gritty of kitchen equipment essentials . no need for fancy gadgets—just a trusty stand mixer (or a jar if you’re feeling adventurous), a large mixing bowl, and a spatula.
Those kitchen tools? they make all the difference.
If you don’t have a stand mixer, don’t fret! I'm all about the DIY spirit; just grab a jar and shake away. It works!
Flavoring Homemade Butter
When it comes to flavoring homemade butter , you have options galore. want to keep it simple? add a pinch of salt to enhance that natural creaminess.
Going bold? try infusing your butter with spices or syrups! yes, maple syrup butter brings breakfast to a new level—who knew butter could wear so many hats?
And for the comfort of knowing what you’re eating, let’s chat about the nutritional benefits of butter . it’s actually a great source of vitamins a, d, e, and k.
Woo-hoo! you can feel good about spreading that creamy goodness.
Rinsing Butter Process
Oh, and during the rinsing butter process , i always give it a good rinse under cold water to wash away excess buttermilk.
This helps preserve that perfect butter consistency so it lasts longer. an extra tip? don’t underestimate the power of a good mix of flavors—garlic herb butter on bread is chef’s kiss !
Wrapping it Up
Now that we've walked through the essential ingredients and tools for making Whip Cream Delicious Homemade Unsalted Butter , you’re prepped and ready to get cooking!
Next up, I’ll share my step-by-step instructions to whip up this glorious butter and maybe a few surprises to make it uniquely yours. Grab your ingredients, and let’s get whisking!
Whipped to Perfection: Homemade Unsalted Butter
Oh my gosh, if you’ve never made homemade butter , you are seriously missing out! it’s a game-changer in the kitchen, and trust me, it’s way simpler than you think.
Plus, once you get a taste of your own fresh unsalted butter , slathered on warm bread, you’ll feel like a culinary wizard.
Let’s dive into the professional cooking methods that’ll make you a butter-making pro.
Essential Preparation Steps
First things first: let’s talk mise en place . that’s just fancy talk for having everything ready to go. you want to measure out 2 cups of heavy whipping cream and maybe a pinch of salt if you want that little extra oomph.
Having all your ingredients prepped makes everything smoother. don’t forget to chill your mixing bowl and beaters in the fridge for 10 minutes .
Seriously, a cold bowl helps the cream whip up faster!
Now, let’s touch on time management . this won’t take you forever, but you do want to keep an eye on the clock.
You’ll need about 10- 15 minutes of good whipping to turn that cream into butter. set a timer!
Then, there’s organization . i like to keep my counter clean while i work. easy to find things = less chance of chaos.
And safety? just be careful with the mixer when you’re whipping hard—it can be a bit splashy at first!
Step-by-Step Process
Alright, here’s the fun part. grab your chilled bowl and dump in the cream. start mixing on low speed. gradually crank it up to medium-high speed (that’s about 5-7 on most mixers).
Keep an eye on it— 3 to 5 minutes and you should see soft peaks form.
Now, here’s where the magic happens: keep whipping until you see stiff peaks, about another 3- 5 minutes .
Don’t walk away! you’ll start to see the butter separate from the buttermilk, and that’s your cue to pay close attention.
When it looks like butter (and it’s gorgeous!), pour it into a cheesecloth-lined bowl. let that buttermilk drain out. then, rinse the butter under cold water to help remove the remaining buttermilk.
This is called the rinsing butter process and it’s key for freshness!
Expert Techniques
Now, let’s up your butter game! use quality heavy cream—think best heavy cream for butter . over-whipping can happen, so when those golden butter solids are clumping up, stop! oh, and don’t skip rinsing; it’s super important for keeping your butter fresh.
After rinsing, if you want to get fancy, adding fresh herbs—hello, cooking with fresh herbs —or garlic can elevate your butter to a gourmet experience.
Think about what you like, and go for it!
Success Strategies
Let’s chat about common mistakes. The most common one? Not watching the cream closely. If you whip too long, you’ll have whipped cream instead of butter. Yikes!
To ensure quality, always taste it! And, if you want your butter extra spreadable, just soften it a little at room temperature before serving.
If you’d like to make butter ahead of time, go for it! store it in an airtight container. keep it in the fridge for the freshest results.
Cold butter storage is key here!
Final Thoughts
Making your own butter from cream is not just fun; it’s also rewarding. you get to control what goes into it and the flavors you love.
With whip cream delicious homemade unsalted butter , you’ve created a culinary delight right in your kitchen!
So whether you’re using that butter for baking, slathering on toast, or whipping it into something special, you’ll definitely feel like a pro.
But hey, this is just the beginning—stick around for more butter secrets and diy butter variations in the next section: additional information.
Remember, butter not only tastes good; it’s also a way to add a little love to your dishes! Happy cooking, friends!
Pro Tips & Secrets for Whipped Butter Bliss
Oh my gosh, if you’re diving into the world of whipped cream delicious homemade unsalted butter , there’s a few things i learned the hard way that will save you time and effort.
For starters, always go for heavy whipping cream that’s fresh—like, really fresh . you want the best heavies cream for butter to get that rich flavor.
Trust me, no one wants to bite into their homemade butter and taste something funky.
Now, let’s talk whipping techniques . chill your mixing bowl and beaters beforehand — it helps keep the cream at the right temperature and helps with the cream to butter process , saving you from over-whipping and a potentially sad kitchen disaster.
Honestly, i’ve done it a few times. it’s like watching a train wreck in slow motion.
And flavor enhancement? don’t be afraid to sprinkle in a pinch of sea salt after you whip the butter. this brings out all those creamy, buttery goodness vibes.
Or if you’re feeling adventurous, try adding some fresh herbs ! imagine rosemary or thyme butter on your warm, toasty bread.
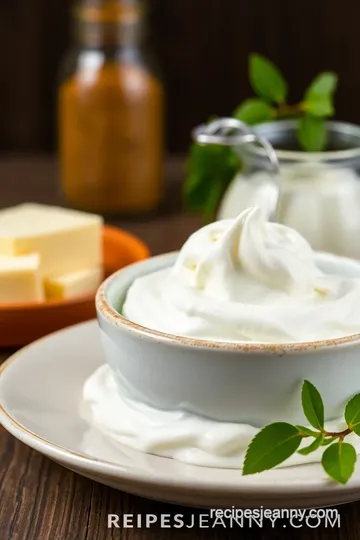
Perfect Presentation: Butter That Looks as Good as It Tastes
When it comes to plating your homemade creation , presentation matters! don’t just scoop your fresh unsalted butter into any old container.
Grab a cute jar or mold it into a log shape wrapped in parchment paper. a little sprinkle of chopped herbs can make it pop, visually speaking.
It’s all about those color combinations; a bright green hue against that soft yellow butter just makes your dish more inviting.
Consider adding a simple garnish on top, maybe some edible flowers or more herbs. I mean, who doesn’t love a pretty dish? It can totally elevate your gourmet butter recipes from “Meh” to “Wow!” Yeah, it’s all in the details—so don’t skip that part!
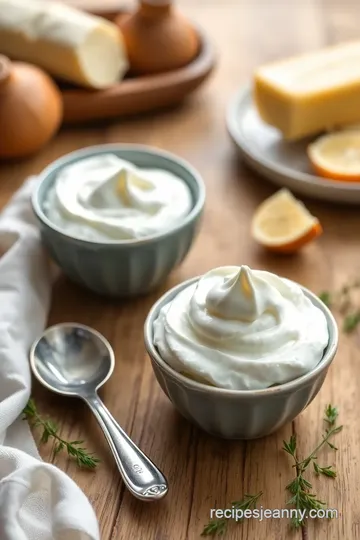
Storage & Make-Ahead: Keep Your Buttery Goodness Fresh
Let’s get down to the real stuff here: storage. your storage tips for homemade butter can make or break its freshness.
Ideally, you should keep it in an airtight container in the fridge, where it can stay fresh for up to two weeks .
I once let mine sit for too long and, well, let’s just say my butter was not in the mood for a return.
If you wanna get super organized, you can freeze it too! it will hold up for about six months. just be sure to wrap it well and label it—no one wants to discover mystery butter a few months down the line, right? when it’s time to use it, simply thaw it in the fridge and you’re good to go.
Creative Variations: Spice Up Your Butter Game
So, now that you’ve got your basic homemade butter recipe down, why not jazz it up? you can whip in various flavors to tickle your taste buds.
Want something sweet? try mixing in maple syrup for a beautiful sweet touch! or if savory is more your jam, blend in garlic and herbs for a fantastic roasted garlic butter.
Yum!
Seasonal twists can really shine as well. think about lavender butter for summer or a spiced cinnamon butter during the holidays.
Honestly, this is where you can get creative; there are no limits.
And hey, if you have any dietary modifications to consider, remember that the cream-based spreads you make can totally be adjusted to meet gluten-free or dairy-reduced diets.
Get your diy butter variations rolling!
Complete Nutrition Guide: What’s In That Butter?
Now, let’s chat about the nutritional benefits of butter —because i know you care about what you’re putting in your body.
When made right, homemade butter gives you control over what goes into it. you can enjoy it without unnecessary preservatives, and it’s loaded with healthy fats that provide energy and flavor in your meals.
Each serving (about two tablespoons) typically contains around 102 calories , packed with about 11 grams of fat . that’s some good stuff, folks! but, let’s keep portion sizes in mind; while butter is delicious, moderation is key.
Cooking with butter can elevate flavors, but we don’t need to drown our food in it.
Wrap-Up: Go Create Some Butter!
Alright, y’all, it’s time for the fun part—getting into the kitchen and making your own fresh unsalted butter ! with a handful of ingredients and some good tunes, you’ll whip up a batch in no time.
Keep these tips and tricks in mind and watch your butter-making skills take off! whether you're planning to spread it over warm bread or kicking up the flavor in sauces, i promise it’ll be a game changer.
So go ahead, make that whipped butter recipe , don’t stress, and most importantly, have fun! Happy whipping!
Frequently Asked Questions
What is the secret to making Whip Cream Delicious Homemade Unsalted Butter?
The key to making delicious homemade unsalted butter lies in using high-quality heavy whipping cream and monitoring the whipping process closely. Whip the cream until stiff peaks form and continue whipping until the butter separates from the buttermilk. This ensures a rich flavor and creamy texture.
How long does it take to make homemade unsalted butter?
Making Whip Cream Delicious Homemade Unsalted Butter typically takes about 20-25 minutes from start to finish. This includes around 10 minutes of active prep time and 10-15 minutes of whipping time. Patience is key as you watch the transformation from cream to butter!
Can I flavor my homemade butter, and if so, how?
Absolutely! You can customize your Whip Cream Delicious Homemade Unsalted Butter by adding ingredients like minced garlic, fresh herbs, honey, or spices during the mixing process. Experiment with different flavors to create unique spreads for bread or crackers.
What should I do with the leftover buttermilk after making the butter?
The buttermilk leftover from making homemade butter is perfect for baking! You can use it in pancakes, biscuits, or even salad dressings. It's a great way to incorporate flavor and moisture into your cooking.
How long can I store my homemade unsalted butter, and what's the best way to do it?
Your Whip Cream Delicious Homemade Unsalted Butter can be stored in the refrigerator for up to 1-2 weeks in an airtight container. For longer storage, consider freezing it for up to 3 months. Just make sure to wrap it tightly or use a freezer-safe container to maintain freshness.
Can I make homemade butter without a stand mixer?
Yes, if you don't have a stand mixer, you can still create homemade butter by using a hand mixer, or even a jar! If using a jar, simply shake vigorously until the cream thickens and separates. It may take more effort, but it’s a fun hands-on approach!
Whipped to Perfection: Homemade Unsalted Butter Card
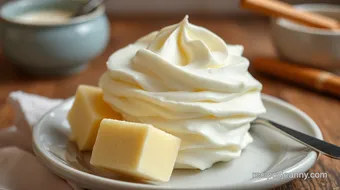
⚖️ Ingredients:
- 2 cups heavy whipping cream (not ultra-pasteurized)
- Optional: Pinch of salt to taste
🥄 Instructions:
- Step 1: Chill equipment: Place mixing bowl and beaters in the refrigerator for about 10 minutes to chill.
- Step 2: Add cream: Pour the heavy whipping cream into the chilled mixing bowl.
- Step 3: Whip the cream: Start at low speed, gradually increasing to medium-high speed. Whip until soft peaks form (about 3-5 minutes).
- Step 4: Continue whipping: Whip further until stiff peaks form (another 3-5 minutes). Watch closely as the cream turns into butter and separates from buttermilk.
- Step 5: Strain the buttermilk: Pour mixture into a cheesecloth-lined bowl, allowing the buttermilk to drain.
- Step 6: Rinse the butter: Rinse the butter under cold water to remove excess buttermilk, kneading gently with spatula.
- Step 7: Add salt (optional): Mix in a pinch of salt if desired for flavor.
- Step 8: Store: Transfer the butter to a jar or container, cover, and refrigerate.
Previous Recipe: Easy Bake Funfetti Cake - Perfectly Colorful Delight: A Family Favorite
Next Recipe: Make Nescafe Coffee: Quick & Easy Recipe for a Delicious Morning Brew