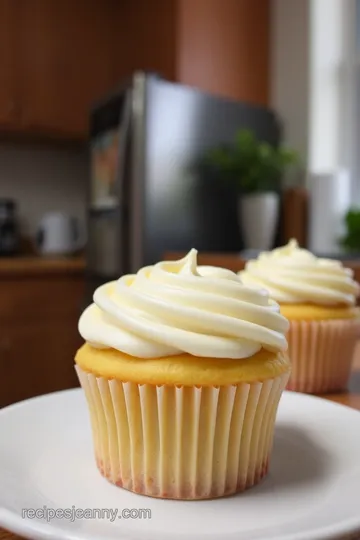
Vanilla Dream Cupcakes
Craving something sweet? These Vanilla Dream Cupcakes from my cupcake diaries are fluffy, buttery, and topped with dreamy vanilla frosting. Perfect for any occasion!

Cupcake Diaries: The Sweet Journey to Vanilla Dream Cupcakes
Opening Hook: A Vanilla Love Affair
Oh my gosh, i still remember the first time i bit into a fluffy, classic vanilla cupcake . it was at my best friend’s birthday party, the smell of baked goods wafting through the air, all warm and inviting.
I probably had my face covered in frosting before i even took my first proper bite. that sweet moment kicked off my cupcake diaries , a collection of memories tied to this magical little dessert.
Now, can you recall your own cupcake moments? yeah, i thought so! today, i’m gonna stroll down memory lane, sharing an oh-so-simple cupcake recipe that anyone can nail— vanilla dream cupcakes .
Recipe Overview: A Twist on Tradition
You know, cupcakes are like the tiny superheroes of the dessert world. they've been charming our taste buds since the early 19th century.
Back then, they were baked in small pots or cups—hence the name! fast forward to today, and these easy vanilla cupcakes are everywhere, taking the spotlight at parties, celebrations, and cozy family gatherings.
The beauty of this recipe? it’s as easy as pie, or should i say, easy as cupcakes! you’re looking at just about 1 hour of your time— 15 minutes of prep, 20 minutes to bake, and a little cooling time to make it all uniform and respectable.
Not to mention the cost—most of these ingredients are probably already chilling in your kitchen. this recipe yields 12 delightful cupcakes , perfect for sharing (or keeping all to yourself).
Key Benefits: More Than Just a Sweet Treat
First off, let’s talk health benefits . while we aren’t exactly calling these cupcakes health food, the homemade nature means you’re dodging all those mysterious preservatives found in store-bought options.
Plus—with ingredients like whole milk and real butter—you can feel pretty good about what you're indulging in.
These vanilla dream cupcakes are also the perfect party cupcake recipe. birthdays, holidays, or just adding some fun to a gloomy wednesday—they fit right in.
Unique selling point? everyone’s a fan of the beloved vanilla flavor, and these babies can easily be customized with flavor variations —hello, chocolate or strawberry options anyone?
Oh, and if you’re looking for some nifty cupcake decorating ideas , you can whip up a batch and let the kiddos get creative with sprinkles or all sorts of fun toppings.
Honestly, it’s super satisfying to watch them dive into the diy spirit.
Transition to Ingredients
So, are you itching to get started? you'll find that the cupcake ingredients list is straightforward. it’s all about grabbing a few essentials you probably have at home.
Whether you want to bake with the kids or just treat yourself after a long day, these vanilla dream cupcakes are waiting for you! let's dive into what you’ll need to make this dreamy delicacy.
Now that you have the scoop on this recipe, grab your baking tools because the next step is collecting those ingredients! you won't regret it when you're frosting up these beauties and savoring every bite.

Essential Ingredients Guide: Your Go-To for Sweet Success!
When it comes to baking, especially those delightful easy vanilla cupcakes , having the right ingredients is like having the secret handshake to a club.
Here’s your guide to premium core components that help unleash your inner baker. let's dive into the must-haves!
Premium Core Components
Detailed measurements
you know the drill: precision matters! for our vanilla dream cupcakes, you’ll need 1 ½ cups (190g) of all-purpose flour and 1 cup (200g) of sugar.
We’re not just eyeballing this—us bakers love our scales! if you’re in metric land, those measurements are your best pals.
Quality indicators for each ingredient
keep an eye out for fresh ingredients . your flour shouldn’t smell stale, and those eggs? they should be fresh.
A little tip: crack an egg in a bowl and take a whiff. if it smells funky, toss it! same deal with vanilla; get pure vanilla extract.
Your taste buds will thank you. trust me!
Storage guidelines and shelf life
store your flour in a cool, dry place. and sugar? in an airtight container! your butter can chill in the fridge until you're ready to create.
If you keep these guys happy, they’ll last longer, making sure you're equipped for those impromptu baking nights!
Freshness tips and selection criteria
buy eggs that are close to their use-by dates—seriously risky if you’re using old eggs.
For milk, go for the whole stuff for those fluffy cupcakes! check the packaging dates and avoid anything that looks slightly off.
Signature Seasoning Blend
Essential Spice Combinations
Now, when you think about flavor, vanilla is king. But let’s not forget that vanilla bean can kick things up a notch! It’s all about creating that homemade vanilla frosting that'll have everyone scraping their fingers on the bowl!
Herb Selections and Pairings
Okay, we aren’t making savory cupcakes, but herbs like basil can add an unexpected twist to your recipes—just sayin’ for some adventurous bakers out there!
Flavor enhancers and aromatics
a sprinkle of salt in your batter heightens flavor. seriously, your cupcakes will rise and shine! also, consider throwing in a twist of citrus peel for those sunny vanilla bean cupcakes .
Regional Variations and Alternatives
If you’re feeling creative, swap vanilla extract with almond or maple for a unique take! The world of cupcakes is wide, my friends.
Smart Substitutions
Common Alternatives
Run out of a key ingredient? Don’t panic! If you’re out of eggs, use ¼ cup of unsweetened applesauce. Works like a charm in those simple cupcake recipes .
Dietary Modifications
Gluten-free folks, no worries! Sub it out with gluten-free flour . It’s a game-changer, especially during those baking sessions with your kids.
Emergency Replacements
Stuck without baking powder? Just mix 1 tsp of baking soda with 1 tsp of vinegar . Voila! You got some emergency leavener—you're welcome!
Seasonal Options
Want to make those cupcakes a little more festive? Toss in some chopped pumpkin for a fall twist or crushed peppermint for holiday cheer!
Kitchen Equipment Essentials
Must-Have Tools
You’ll need a good mixing bowl, like a trusty sidekick. An electric mixer or a good old whisk works magic too! And don’t forget those cupcake liners types —they are your bestfriend!
Alternative Equipment Options
No cupcake tin? No problem! You can use a muffin tin; just check the baking time. Muffin vs. cupcake differences are subtle, but we’ll keep that a secret.
Preparation Tips
Chill your butter to get a creamy texture for that vanilla buttercream frosting recipe . It’s all about that creaming method baking , my friends!
Storage Solutions
Keep extras in an airtight container. Those cupcakes can last a couple of days if stored right, but trust me, they won't last that long with all that deliciousness around!
So now that we've rolled through the essentials, you’re all set for your Cupcake Diaries adventure. Get your apron out, preheat that oven, and let’s move on to the fun part—creating those mouthwatering Vanilla Dream Cupcakes! Your taste buds are in for a treat!
Mastering the Art of Cupcake Baking: The Vanilla Dream Cupcakes Adventure
Oh my gosh, my friends! let me tell you about my latest kitchen adventure: vanilla dream cupcakes . they’ve got that fluffy texture that melts in your mouth, topped off with the lightest, most heavenly vanilla buttercream frosting .
Seriously, if you’re looking for the best cupcake recipes ever, you’ve hit the jackpot. grab your mixing bowls, 'cause we're diving into the professional cooking method for these beauties!
Essential Preparation Steps: Get Your Game On!
Before we get into the cupcake magic, let’s chat about mise en place. this french term just means “everything in its place.
” have your ingredients ready to go: 1 ½ cups all-purpose flour, 1 cup granulated sugar, and more, right in front of you.
This little step keeps you from scrambling around when you could be having fun mixing and baking.
Now, let’s talk time management . set a timer for 20 minutes on your oven, because that’s how long these lovelies need to bake.
Don't forget to calculate some cooling time too. about 30 minutes should do the trick! trust me, your cupcakes will coop up nicely with those timing precision tips.
Keep it organized, too! i always find it helpful to use small bowls for each ingredient, especially when baking with kids.
Gives them a chance to help and learn a bit. also, keep a spray bottle with water handy in case of any spills—safety first, folks!
Step-by-Step Process: Let’s Get Baking!
Ready? Here’s how to create your dreamy cupcakes in clear steps:
- Preheat your oven to 350° F ( 175° C) .
- Prepare your cupcake tin with liners. Make it pretty!
- In a bowl, whisk together your dry ingredients: flour, baking powder, and salt .
- In a larger bowl, use an electric mixer to cream together the butter and sugar until fluffy (about 2- 3 minutes ).
- Add the eggs and vanilla extract to the mix, combining until smooth.
- Gradually mix in your flour mixture and whole milk , alternating until you see a nice, smooth batter.
- Fill those cupcake liners about 2/3 full .
- Bake in the oven for 18- 20 minutes , or until a toothpick comes out clean.
- Let ‘em cool for 5 minutes , then place them on a wire rack—this is where the magic happens!
When it comes to visual cues for doneness , keep an eye out for that golden-brown color.
Expert Techniques: Time to Level Up!
Okay, so here comes some pro advice. Use the creaming method baking technique —I swear by it! This technique really helps create those fluffy cupcake recipes we all adore.
Also, when frosting your cupcakes, use a piping bag if you want them to look like they came straight from a bakery.
A dollop of whipped cream on top is totally optional, but honestly? it's a sweet cupcake idea that can really jazz things up!
Success Strategies: Avoid the rookie mistakes!
Now, let’s address what can go wrong—and how to avoid those speedbumps, shall we?
One of the biggest missteps? overmixing. seriously, don’t do it. but if you somehow have a flat cupcake catastrophe, don’t sweat it.
You can always add a vanilla extract drizzle on top for some flair!
Double-check your ingredients list beforehand to ensure you aren't missing anything. and, ladies and gents, do your best not to skip on quality stuff.
Real vanilla extract will make all the difference, trust me!
Additional Information: The Cupcake Diaries Continues!
And there you have it—your guide to baking mouthwatering vanilla dream cupcakes straight from my cupcake diaries ! with all the tips and techniques, you’re ready to impress your family, host a party, or just treat yourself (no shame in that).
Remember, the key to creating these delightful treats lies in your heart, the fun you have while making them, and of course, a pinch of that classic homemade vanilla frosting magic.
So, lace up those aprons and get to baking! Can't wait to hear about your baking adventures. Happy cupcaking!
Additional Recipe Information for Your Vanilla Dream Cupcakes
Alright, cupcake lovers! Let’s dive into all the juicy details that'll make your Cupcake Diaries come to life. Whether you’re whipping these up for a birthday bash or a casual weekend treat, we've got some pro tips, presentation ideas, and storage tricks that'll have you baking like a pro in no time!
Pro Tips & Secrets
First off, baking tips for cupcakes are essential! My biggest secret? Always start with room temperature ingredients—those eggs and butter mix together so much easier and create a fluffier batter. Trust me!
Want to save time? try the creaming method baking method! it’s just a fancy way of saying beat your butter and sugar really well until it’s light and fluffy.
This step is crucial for light and airy cupcakes. and speaking of fluffy, don’t overmix your batter! just stir until it’s combined.
You'll thank me later!
For flavor enhancement, using real vanilla extract makes a world of difference. you can even sprinkle in some vanilla bean seeds if you're feeling fancy—just goes to show that vanilla bean cupcakes are officially snazzy! or throw in a pinch of salt to really bring out those sweet notes.
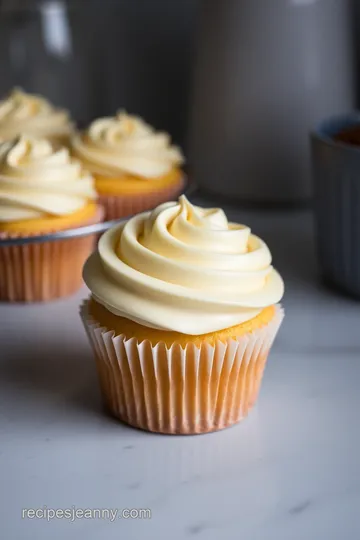
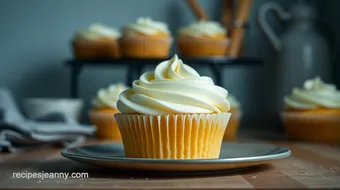
Perfect Presentation
Now, let’s chat about cupcake decorating ideas . after frosting, i love to sprinkle on some colorful sprinkles—it's like confetti for your taste buds! and don’t forget about plating.
Use fun, festive cupcake liners types that make each bite look as good as it tastes.
But if you really wanna wow your guests, think about color combinations. bright frosting with a contrasting liner? yes, please! lay those cupcakes on a tiered cake stand for an eye-catching centerpiece.
Your friends will think you’re a total baking rockstar, no kidding.
Storage & Make-Ahead
Let’s get real about storage. if you manage to have any leftovers (not likely, right?), keep your cupcakes in an airtight container at room temperature for about 2-3 days.
If you want to freeze them, wrap them tightly in plastic wrap—this will keep them fresh for up to a month.
So, if you want to wear your baking with kids hat, whip up a batch and freeze some for later!
When it’s time to reheat, just pop them in the microwave for about 10 seconds, and they're good as new.
And don’t forget, proper cupcake storage tips can make or break your sweet treats!
Creative Variations
Now let’s get creative! you can easily adapt this simple cupcake recipe to your mood. feeling chocolatey? swap in cocoa powder for a rich twist.
How about a tangy flavor? add lemon zest to the batter and use lemon extract in your homemade vanilla frosting .
The mind-blowing options are endless—it almost feels like a cupcake party in your kitchen!
For seasonal variations, throw in some pumpkin spice during the fall or peppermint extract around the holidays. Ways to have fun with cupcake flavors are practically limitless!
Complete Nutrition Guide
Let’s face it—cupcakes are a treat, and balance is key! these classic vanilla cupcakes pack a punch with roughly 310 calories each.
Perfect for celebrations, but keep in mind the sweet tooth’s toll. a little indulgence is lovely, but consider portions if you're sharing them with a group.
Expert FAQ Solutions
Got questions? you’re not alone! one common query is, “what if my cupcakes come out too dense?” that’s often from overmixing the batter, so remember: mix just until it’s combined! and if your frosting is a bit too runny, just add more powdered sugar until you reach that dreamy consistency.
Conclusion
So there you have it, folks! with these tips and tricks, you're all set to embark on your very own cupcake journey with our vanilla dream cupcakes .
Whether you're surprising the kiddos with easy vanilla cupcakes or mastering party cupcake recipes for that big bash, just have fun! at the end of the day, remember that baking is all about enjoying the process and sharing sweet moments with loved ones.
Happy baking!
Vanilla Dream Cupcakes Card
⚖️ Ingredients:
- 1 ½ cups (190g) all-purpose flour
- 1 cup (200g) granulated sugar
- ½ cup (115g) unsalted butter, softened
- 2 large eggs
- ½ cup (120ml) whole milk
- 2 teaspoons vanilla extract
- 1 ½ teaspoons baking powder
- ¼ teaspoon salt
- 1 cup (230g) unsalted butter, softened for frosting
- 4 cups (480g) powdered sugar
- 2 teaspoons vanilla extract for frosting
- 2 tablespoons (30ml) heavy cream or milk for frosting
🥄 Instructions:
- Step 1: Preheat the oven to 350°F (175°C).
- Step 2: Line the cupcake tin with cupcake liners.
- Step 3: In a medium bowl, whisk together flour, baking powder, and salt.
- Step 4: In a large bowl, using an electric mixer, beat the softened butter and granulated sugar until fluffy.
- Step 5: Add the eggs and vanilla extract, mixing until combined.
- Step 6: Gradually add the flour mixture and milk, alternating until the batter is smooth.
- Step 7: Spoon the batter into the prepared cupcake liners, filling them about 2/3 full.
- Step 8: Bake for 18-20 minutes, or until a toothpick inserted in the center comes out clean.
- Step 9: Let the cupcakes cool in the tin for 5 minutes, then transfer to a wire rack to cool completely.
- Step 10: While cooling, beat the softened butter for the frosting until creamy. Gradually add powdered sugar, followed by vanilla and cream, mixing until smooth.
- Step 11: Once cupcakes are completely cool, frost them using a piping bag or knife.
Previous Recipe: How to Make Creamy Yogurt Chips: Easy & Delicious Treats
Next Recipe: Ultimate Decadent Chocolate Chunk Cookies: 5 Tips to Indulge!