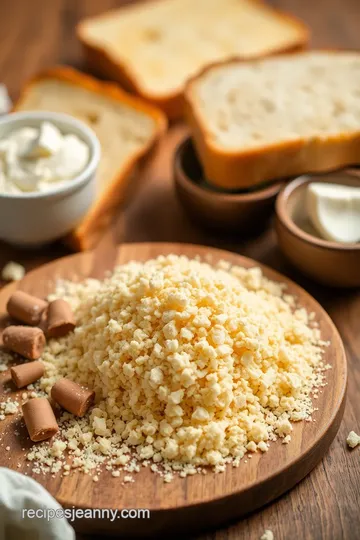
Quick and Crunchy: Homemade Toasted Bread Crumbs in Just 10 Minutes
Elevate your meals with my quick and easy Toast Homemade Bread Crumbs in 10 Minutes! Perfect for pasta, salads, and more. Discover the recipe now!

- A Crunchy Secret: Turning Stale Bread Into Toasted Perfection
- The Scoop on Toasted Bread Crumbs
- Why You Need These Crunchy Wonders
- From Stale to Sensational
- Essential Ingredients Guide: Get Cooking Like a Pro!
- Professional Cooking Method: Toast Homemade Bread Crumbs in 10 Minutes
- Pro Tips & Secrets
- Perfect Presentation
- Storage & Make-Ahead
- Creative Variations
- Complete Nutrition Guide
- Frequently Asked Questions
- Recipe Card
A Crunchy Secret: Turning Stale Bread Into Toasted Perfection
So, let me paint a picture for you. it’s a rainy sunday afternoon, and you have a loaf of stale bread sitting on the counter, looking as sad as that last piece of pizza at a party.
Honestly, i used to toss my stale bread in the trash without a second thought. but one day, i learned to toast homemade bread crumbs in 10 minutes , and oh my gosh, it changed everything! i discovered a way to bring that once-forgotten bread back to life, adding texture and flavor to my meals, all while saving money and reducing waste.
Imagine the satisfaction of saying, "hey, i made these crunchy bread crumbs myself!" that’s the emotional high you get from using what you already have to create something absolutely delicious.
And trust me, it’s super easy!
The Scoop on Toasted Bread Crumbs
Let’s dive into a bit of history. bread crumbs have been around since way before avocado toast became a thing.
They originated as one of those brilliant ideas to use up stale bread and avoid waste, and they’ve held on tight through the ages.
Nowadays, everyone is jumping on the breadcrumb train, thanks to that fabulous texture boost they bring to modern dishes.
Okay, here’s the kicker: making homemade toasted bread crumbs is totally doable in just 10 minutes . yep, you read that right! with about 5 minutes of prep time and another 5 minutes of cooking, you can whip up a cup of homemade breadcrumbs .
It’s an easy breadcrumb recipe that even novice cooks can nail. plus, it saves you from emptying your wallet on store-bought options.
Think of it as a quick dinner idea or a way to level up your leftovers!
Why You Need These Crunchy Wonders
Now, why should you care about these baking beauties? for one, they’re packed with health benefits—especially if you use whole-grain or gluten-free bread.
They’re low in fat, high in fiber, and can be infused with rich flavors like garlic or your favorite herbs.
Trust me, they’ll become your go-to for crispy bread topping on pasta or even for coating veggies for frying. talk about versatility, right?
These crunch-tastic crumbs are perfect for special occasions too. got a family gathering or a brunch with friends? toss a sprinkle of these garlic-flavored breadcrumbs on your dishes before serving.
It's not just food; it’s a conversation starter. “you made these? from what?” they might even ask if you have a culinary degree—just throw your hair back and say, “nah, just good at diy breadcrumbs at home!”
Key Benefits Recap:
- Health Boost: Rich in fiber and low in fat
- Versatile: Perfect for salads, crusts, or toppings
- Easy to Make: Seriously, 10 minutes!
- Eco-Friendly: Great for sustainable cooking
From Stale to Sensational
Ready to transform your stale bread into something incredible? let’s move on to the ingredients that will kick off this flavor journey.
Whether you want a simple, plain bread crumb topping or something a bit more adventurous with herb-infused flavors, you can customize this recipe to suit your taste buds.
The best part? you can feel good knowing you’re not only elevating your meals but also making the best out of what you’ve got in the kitchen.
Now, let's get to the ingredients you’ll need to turn that forgotten bread into crunchy bliss!
Essential Ingredients Guide: Get Cooking Like a Pro!
Alright, folks! let’s get down to the nitty-gritty of creating delicious meals straight from your kitchen. today, we’re diving into the essential ingredients guide to help you turbocharge your cooking game.
We’re talking about everything from premium core components to those sneaky smart substitutions that'll save your bacon when you’re in a pinch.
Premium Core Components
First up, let’s chat about those premium core components . These are the must-have ingredients that make your dishes sing. Here are some top picks:
-
Flour (all-purpose, flour) : you need about 2 cups (240 grams) for that fluffy baked goodness. look for a fine, soft texture - that’s a quality indicator you’re working with the good stuff.
Store it in a cool, dry place; it’ll last ages if you do!
-
Olive oil : for dressing, drizzling, or sautéing, aim for 1/2 cup (120 ml) of high-quality olive oil. a fruity aroma is the ticket to quality - trust me! keep it in a dark bottle for longer shelf life.
Signature Seasoning Blend
Let’s not forget about flavor. Okay, peeps, have you ever thought about that signature seasoning blend ? It’s like a chef’s secret weapon! You’ll want a solid combo of spices.
-
Essential Spice Combinations : Think Italian - oregano, basil, and thyme. If you’re feeling adventurous, Italian seasoning might be your go-to.
-
Herb Selections and Pairings : Fresh herbs? Yes, please! Pair parsley with garlic for a killer taste explosion , or use thyme for that earthy vibe.
-
Flavor Enhancers : Garlic powder is your best friend here; just a wee bit can turn a basic dish into a flavor bomb.
Smart Substitutions
Alright, let's talk about smart substitutions . You love a good recipe, but we all know sometimes ingredients just vanish—poof! Here are common alternative suggestions:
-
Common Alternatives : Out of garlic powder? Grab some onion powder instead. Super simple!
-
Dietary Modifications : Gluten-free pasta? No sweat! Simply swap in your fave gluten-free noodles for that same dish.
-
Seasonal Options : You can switch up fresh herbs when they're in season - your taste buds will thank you.
Kitchen Equipment Essentials
Now that we’ve stocked those cabinets, let’s move into kitchen equipment essentials . We’re not talking fancy gadgets here—just the basics that every kitchen should have.
-
Must-Have Tools : A solid chef’s knife, a cutting board, and a decent skillet. Seriously, these are non-negotiables.
-
Alternative Equipment Options : Don’t have a food processor? Use a good old-fashioned box grater for any shredding.
-
Preparation Tips : Always prep your ingredients before you start cooking. It makes everything easier and less chaotic!
-
Storage Solutions : Keep your spices in airtight containers away from heat for maximum freshness.
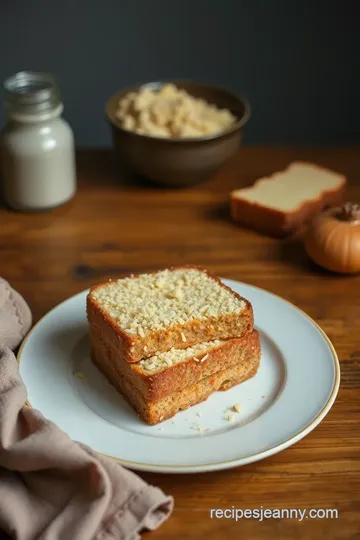
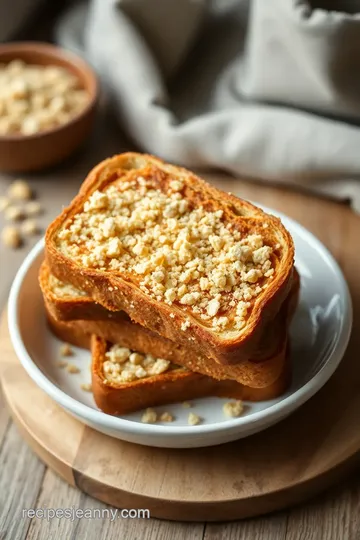
Toast Homemade Bread Crumbs in 10 Minutes
Now, i can’t finish this without giving a shoutout to how to toast homemade bread crumbs in just 10 minutes .
This little hack can level up any dish—think crunchy topping for pasta or breading for chicken! here’s what you’ll need:
-
3 cups of stale bread (roughly 6 ounces / 170 grams) : Don’t toss that stale bread! It’s perfect for this.
-
Flavor Options : Toss in some olive oil and garlic powder for extra flavor – trust me, it's a game-changer.
-
How to Toast : Heat a skillet over medium heat and stir those crumbs until golden brown. Seriously, keep an eye on it because they can burn quick!
So, there you have it! this essential ingredients guide should inspire you to get in that kitchen and create some magic.
For those brave souls ready to tackle a new recipe: grab your stale bread, and i promise you—making your own toasted bread crumbs is just the start of something delicious! let’s get cooking! 🍞
Professional Cooking Method: Toast Homemade Bread Crumbs in 10 Minutes
Oh my gosh! if you’ve got stale bread lying around, you’re in for a real treat. we're diving into the art of making homemade breadcrumbs —particularly, toasted bread crumbs that you can whip up in just 10 minutes ! seriously, this quick method is a game changer.
Whether you're aiming for a crunchy topping for your pasta or a crispy breading for chicken, this technique emphasizes the beauty of simplicity.
Essential Preparation Steps
Before we jump into the action, let’s cover some essential prep. first, you’ll want to get your mise en place together.
This fancy french term just means having everything ready to go. so, grab your stale bread—about 3 cups should do, and any variety will work, trust me.
Sourdough, whole wheat, pizza crust leftovers, you name it!
Next, time management is key. the whole shebang shouldn’t take longer than 10 minutes from start to finish. so, if you’re multitasking, keep an eye on your breadcrumbs while prepping other dishes.
Organization is also super important. make sure you have a baking sheet or skillet ready. if you plan on flavoring your crumbs, have olive oil, garlic powder, and your favorite herbs on hand.
Finally, don’t forget about safety considerations ! always watch your heat. those little crumbs can burn faster than you can blink—trust me, i’ve learned the hard way.
Step-by-Step Process
Time to get cooking! Here’s how to toast those crunchy nuggets:
-
Prepare the bread: cut or tear your stale bread into 1-inch pieces . if you want those garlic flavored bread crumbs , toss them in a mixing bowl with 2 tablespoons of olive oil and 1 teaspoon of garlic powder .
-
Process the bread: if you’re feeling fancy, pop those pieces into a food processor. pulse until they're a coarse crumb consistency.
No food processor? no stress! just use the bread pieces as they are.
-
Toast the Bread Crumbs: Preheat your skillet to medium heat or your oven to 350° F ( 175° C) . Spread those bread crumbs evenly on your skillet or baking sheet.
-
Stir and Monitor: Here’s where it gets serious! Stir frequently and toast for about 5 minutes . You want them to turn golden brown and crisp, but watch closely to avoid a burnt disaster!
-
Cool and store: once they're nice and toasted, remove them from the heat and let them cool on a plate.
If you’re not using them right away, store in an airtight container .
Expert Techniques
Here’s where we get to the good stuff—some expert techniques that'll take your breadcrumbs to the next level.
- Watch Your Heat: Bread crumbs can go from delightfully crispy to sadly burnt in an instant. Keep stirring, people!
- Quality Checkpoints: You’ll know they’re done when they look golden brown and have that crunchy sound when you lightly shake the skillet.
- Troubleshooting Tips: If your crumbs aren't browning evenly, shift them around with a spatula. Simple as that!
Success Strategies
Now, let's make sure you don't make the same mistakes I did when I first started cooking.
- Common Mistakes to Avoid: Using fresh bread can lead to soggy crumbs; that’s just the sad truth. Stick with stale bread recipes !
- Quality Assurance Tips: Always taste a few crumbs before adding them into your dish. Adjust flavors if necessary.
- Perfect Results Guide: Toasting those crumbs for exactly 5 minutes at the correct temperature will ensure crunchy perfection.
- Make-Ahead Options: Double or triple the batch and store! This way, you can whip up a delicious crunchy topping for salads or pasta anytime.
So there you have it! in just 10 minutes , you can transform stale bread into a versatile ingredient for all your cooking adventures.
Whether it's herb-infused breadcrumbs for a gourmet touch or a simple easy cooking hack for your weekly meals, it's all about making what you have work for you.
Stay tuned for additional information about storage tips and how to incorporate those fabulous crumbs into your meals!
Pro Tips & Secrets
Hey there, culinary adventurer! if you've ever wondered how to toast homemade bread crumbs in 10 minutes , i've got some juicy pro tips for you.
First off, don’t hesitate to go bold with your flavors. when making homemade breadcrumbs, a sprinkle of garlic powder or your favorite herb-infused breadcrumbs can be a game changer.
You’d be amazed at how much texture-boosting ingredients like a pinch of lemon zest can elevate those little crumbs to buttery bites of heaven.
Oh, and don't forget the time-saving techniques ! if you're in a rush, skip the food processor (though it's nice if you have one) and just tear your stale bread into chunks.
Then toast it until crispy. it’s really just about keeping an eye on it while stirring, so it doesn’t burn—it can go from golden to charred in the blink of an eye!
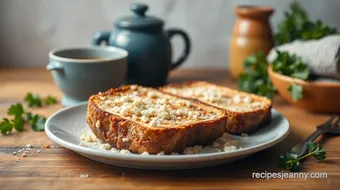
Perfect Presentation
Now, let’s talk about presentation . you know, the way you plate your food can make an ordinary meal look extraordinary.
Try piling those crunchy bread crumbs in a bowl for a rustic feel or sprinkle them artfully on top of a casserole.
It’s like giving your dish a snazzy little outfit!
For garnishes, consider shaking things up with fresh parsley or a twist of lemon. the color combinations really pop with the golden brown of your breadcrumbs against the vibrant greens or reds of veggies.
Honestly, a little careful thought goes a long way in making your dishes instagram-worthy.
Storage & Make-Ahead
You might be wondering about storage . if you find yourself with extra breadcrumbs (good for you!), they can hang out in an airtight container for about a week if you keep them in a cool, dry place.
If you want to keep them fresher longer, try popping them in the freezer. just make sure to portion them out first so you can grab what you need for all those quick dinner ideas.
You’ll thank yourself when you want to whip up some easy side dishes!
Reheating Instructions
When it comes time to reheat, you can toss them back into a skillet for a couple of minutes until they're warmed up and crunchy again.
But honestly, are they ever really going to last that long?
Creative Variations
Let’s spice things up with some creative variations ! the beauty of diy breadcrumbs at home is that you can adapt them however you’d like.
Want to go all out? try adding smoked paprika for a smoky kick or even a hint of parmesan for that extra elevated flavor.
If you’re trying to cater to anyone with dietary needs, just swap in gluten-free bread. No problem there. Plus, what about adding in some seasonal herbs during the summer? Cooking with stale bread doesn’t mean you have to skimp on taste or creativity!
Complete Nutrition Guide
So, what’s all this deliciousness packing in terms of nutrition ? let’s break it down. each cup of those flavorful breadcrumbs leads to around 150 calories , making them a guilt-free addition to any meal.
They’re also a good source of carbs which can give you that energy boost you need throughout your busy day!
For those watching their intake, portions are key! A sprinkle here, a dash there, and suddenly you’re turning plain dishes into flavor bombs without overdoing it.
So there you have it—your little roadmap to making homemade toasted bread crumbs that are bursting with flavor, quick to whip up, and can really turn your meals from drab to fab.
Whether you’re topping off your pasta or giving veggies a crunchy coating, these breadcrumbs can do it all!
Honestly, the next time you’re staring down a bag of stale bread, remember that instead of tossing it, you could be transforming it into something magical.
So go ahead, get creative, and enjoy the delightful crunch and flavor that comes from your own kitchen! you got this!
Frequently Asked Questions
What is the best type of bread to use when I want to Toast Homemade Bread Crumbs in 10 Minutes?
Any variety of stale bread works well, including white, whole wheat, or sourdough. The drier the bread, the better it will toast, so feel free to use any leftover or stale bread you have on hand!
Can I add flavors to my breadcrumbs when I Toast Homemade Bread Crumbs in 10 Minutes?
Absolutely! You can enhance the flavor of your bread crumbs by adding olive oil, garlic powder, or dried herbs before toasting. Feel free to experiment with different spices and seasonings to complement your dish!
How should I store the toasted bread crumbs?
After toasting, let the bread crumbs cool completely, then transfer them to an airtight container. They can be stored at room temperature for up to a week, or you can freeze them for longer shelf life—just make sure to label the container!
Can I make these Toasted Bread Crumbs ahead of time for later use?
Yes, making a larger batch ahead of time is a great idea! You can toast the bread crumbs and store them in an airtight container. This way, you can have them on hand for quick meals and snacks.
What dishes can I use my toasted bread crumbs on?
Toasted bread crumbs are incredibly versatile and can be used as toppings for pasta, casseroles, or salads. They're also perfect for breading meats and vegetables before baking or frying to add a delicious crunch!
Are these toasted breadcrumbs healthy?
While toasted bread crumbs do provide some calories, they can be part of a balanced diet if used in moderation. Using whole grain or gluten-free bread can enhance their nutritional profile, and you can minimize added fats by toasting them without oil if you prefer a lower-calorie option.
Quick and Crunchy: Homemade Toasted Bread Crumbs in Just 10 Minutes Card
⚖️ Ingredients:
- 3 cups of stale bread (roughly 6 ounces / 170 grams)
- 2 tablespoons of olive oil (30 ml)
- 1 teaspoon of garlic powder (5 g)
- 1 teaspoon of dried herbs (thyme, oregano, or parsley)
🥄 Instructions:
- Step 1: Cut or tear stale bread into 1-inch pieces. (Optional) If flavoring, place the bread in a mixing bowl and drizzle with olive oil and sprinkle with garlic powder and dried herbs.
- Step 2: Place bread pieces in a food processor and pulse until they reach a coarse crumb consistency. (If not using a food processor, skip this step and use the bread pieces as large crumbs.)
- Step 3: Preheat a skillet over medium heat or place a baking sheet in the oven at 350°F (175°C). Add bread crumbs to the skillet or spread them evenly on the baking sheet.
- Step 4: Stir the bread crumbs frequently, toasting for about 5 minutes until they are golden brown and crisp. Keep a close eye to prevent burning.
- Step 5: Remove from heat and let the crumbs cool on a plate. Store in an airtight container if not using immediately.
Previous Recipe: Easy & Refreshing Blend Watermelon Lemonade Drink for Hot Summer Days
Next Recipe: Quick Popcorn with Flavorful Seasonings: A Fun Twist on Movie Night Munchies