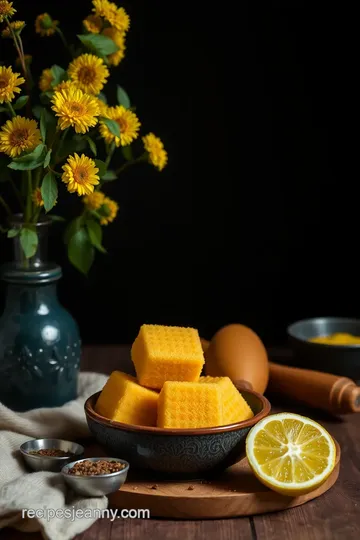
Stovetop Khoya Pedas: Decadent Sweet Treats in 40 Minutes
Craving delectable Stovetop Khoya Pedas Sweet Treats in 40 Mins? Discover this easy Indian sweet recipe that's perfect for festivals and special occasions!

- A Sweet Journey to Stovetop Khoya Pedas
- Essential Ingredients Guide for Delicious Indian Sweets
- Mastering the Art of Stovetop Sweets: Essential Cooking Methods
- Pro Tips & Secrets
- Perfect Presentation
- Storage & Make-Ahead
- Creative Variations
- Complete Nutrition Guide
- Frequently Asked Questions
- Recipe Card
A Sweet Journey to Stovetop Khoya Pedas
You ever find yourself on a lazy sunday, and all you can think about is treating yourself to something sweet? i mean, who doesn’t love a little dessert magic in their kitchen? well, let me tell you about a delightful recipe that’s about to become your new best friend— stovetop khoya pedas: sweet treats in 40 minutes .
Picture this: creamy, fudge-like bites bursting with cardamom flavor and just a hint of nuttiness. trust me, once you dive into this easy khoya dessert , you'll be hooked!
The Story Behind Khoya Pedas
Let’s take a quick trip down memory lane. khoya pedas come from north india, where they celebrate life with rich, sweet treats.
Traditionally, they are made from milk that’s been simmered down to create khoya , a wonderfully creamy base. this recipe is like a shortcut on your typical bollywood musical journey—quick, simple, and oh-so-satisfying!
Now that we've got a bit of history under our belts, here’s the deal: making these fudge-like indian sweets is not just a family affair during festivals.
Today, people whip them up for casual gatherings, last-minute dinner parties, or even just because they need a sugar fix! in only 40 minutes , you’ll go from kitchen novice to dessert champ, all without breaking a sweat.
And let's be real, what's better than a last-minute dessert that looks like you put all the effort into it?
Recipe Time and Cost
Alright, let’s break it down. you’ll be in and out of the kitchen in no time. prep time is about 10 minutes, and the cooking will take roughly 30 minutes.
That’s a total of just 40 minutes for a decadent treat! and you’ll yield about 10 to 12 pieces—perfect for sharing (or not, no judgment here!).
Now, talking numbers, the ingredients won’t bust your wallet either. a few cups of milk, some sugar, a little ghee, and a sprinkle of pistachios for good measure can be easily found in your pantry or local grocery store.
Think of this as an investment in happiness!
Sweet Perks of Khoya Pedas
Let’s discuss the benefits, shall we? first off, these little beauties are packed with some serious health benefits . if made right, you're looking at a gluten-free indian sweet that’s bursting with calcium thanks to the milk.
And we all need a bit of that, am i right?
Unique selling points? you can make them vegan by just swapping out a few ingredients—hello, almond milk! plus, they shine as festive indian treats that are sure to impress any guest.
Whether it's diwali or a tuesday night, stovetop khoya pedas fit right in.
Oh, and did i mention how unbelievably delicious it is to pair these with a warm cup of chai? the cardamom flavor mingles perfectly, like two old friends catching up over a cozy cup of tea.
Also, if you’re on the hunt for quick sweet treats , look no further. this recipe is peppered with foolproof steps, so you can whip it up even during a hectic evening.
Easy to serve and delightful to share, these homemade khoya pedas are a must-have for any occasion!
Ready to Make Some Magic?
So, are you ready to dive into some creamy goodness? Stay tuned for the ingredient list, and let’s get cooking! Trust me, this is going to be the sweetest part of your day!
Without any more delay, let’s gather our ingredients and make some magic happen in the kitchen!

Essential Ingredients Guide for Delicious Indian Sweets
When whipping up something as delicious as stovetop khoya pedas: sweet treats in 40 minutes , you wanna make sure you have the right ingredients on hand.
Let's dive into the essentials to make your indian sweets recipe a success!
Premium Core Components
First things first, let’s chat about the premium core components —the backbone of your culinary creation. Here’s a little cheat sheet for you:
- Milk: Aim for 4 cups (960 ml) of whole milk. Quality? Look for that creamy top signifying freshness!
- Sugar: Grab yourself 1 cup (120 g) . This is your sweet magic ticket.
- Cardamom Powder: Just 1/4 teaspoon is enough to infuse that rich, aromatic flavor.
- Ghee: You’ll need 2 tablespoons . Trust me, it adds a richness that’s like a hug in your mouth!
Storage tips: Store any leftover ghee in a cool, dark place. Milk? Use it within a week for the best taste!
Signature Seasoning Blend
Now, let’s sprinkle in some flavor. Although this treat has its signature spice combo, consider these signature seasoning blends :
- Cardamom: A must-have! Not only does it enhance your fudge-like Indian sweets, but it also gives them that classic flavor.
- Pistachios: Use them for garnishing! They add a lovely crunch and look oh-so-pretty on your pedas.
Each region across India offers its own twist on flavors—like saffron in the West or coconut in South Indian sweets. Feel free to explore variations with what's available!
Smart Substitutions
You will love how adaptable these recipes can be! Here are some smart substitutions for those of you who might run out of a key ingredient:
- Milk Alternatives: Busy schedule? Swap whole milk with almond milk or coconut milk for a vegan khoya pedas version.
- Sweetener Swap: Got some jaggery lying around? Go ahead! It’ll give a delightful depth to your easy khoya dessert.
- Nut Substitutes: If pistachios aren’t your jam, toss in some chopped walnuts or almonds. Totally your call!
Kitchen Equipment Essentials
Before we get cooking, let’s get you geared up with some kitchen equipment essentials :
- Heavy-bottomed Pot: A must-have for that slow and steady milk reduction. It’ll prevent burning, which we’re not fans of.
- Wooden Spoon or Spatula: You’ll be doing a lot of stirring, so make it comfy!
- Greased Tray: Once the pedas are ready, you’ll need a spot to cool and set them. Grease that bad boy!
Pro tip: Don’t pack your pedas too tight when shaping; give them some room for that nice, creamy texture.
Wrapping Up
Now that you’ve got the lowdown on essential ingredients and handy tips, you're almost ready to embark on your stovetop sweet recipes adventure.
Remember, the secret to those rich, creamy desserts lies not just in the ingredients but in the joy you mix into them!
Picture yourself in a kitchen filled with the warm scent of cardamom, as you whip up these traditional indian desserts .
And the best part? they’ll be done in just 40 minutes —perfect for a sweet fix or to impress your friends at a gathering.
Ready to dive into the recipe for Stovetop Khoya Pedas ? Trust me; it’s going to become one of your go-to quick Indian sweets for any occasion—whether it’s a cozy night at home or a festive celebration! Let's get cooking!

Mastering the Art of Stovetop Sweets: Essential Cooking Methods
When it comes to whipping up sweet treats in the kitchen, there's something special about the professional cooking method. whether you're tackling the beloved stovetop khoya pedas sweet treats in 40 mins or just aiming for that ideal pot of fudge-like indian sweets, a bit of prep can go a long way.
Let's break down how to nail it, step by step!
Essential Preparation Steps
Okay, first things first: mise en place . this fancy french term just means getting everything ready before you start cooking.
Gather all your ingredients—trust me, nothing's worse than discovering you're out of sugar after the milk's boiling away.
Now, time management is key! i’ve been there, burning my ghee because i got distracted watching tiktok. so, stick to a game plan.
Start your prep with the milk and then the rest.
And don’t forget organization. keep your workstation tidy. use bowls for dry ingredients and separate ones for wet ones. a clean space means less stress.
Plus, safety is a must! when the milk’s simmering, keep an eye on it; we don’t want any spills or burns.
Step-by-Step Process
Alright, let’s dive into making those Homemade Khoya Pedas ! Here’s your clear, numbered guide:
-
Prepare the Milk : Pour 4 cups of whole milk into a heavy-bottomed pot.
- Bring it to a boil over medium heat , stirring continuously. This prevents sticking and burning.
-
Reduce the Milk : Lower the heat and let the milk simmer .
- You want it to go down to about 1 cup . This might take about 25- 30 minutes .
-
Add Sugar and Ghee : Stir in 1 cup of sugar and 2 tablespoons of ghee .
- You’ll know you’re on the right track when the sugar dissolves fully!
-
Flavoring : Add in 1/4 teaspoon of cardamom powder and keep cooking.
- Let it simmer for another 5 minutes until the mixture starts pulling away from the pan.
-
Shape the Pedas : Pour the mixture onto a greased plate and let it cool just enough to handle.
- Shape it into small, round pedas.
-
Garnish : Roll 'em in 1/4 cup of chopped pistachios .
- Finish with a dusting of cardamom powder for that perfect touch!
Expert Techniques
When making these delightful Indian sweets , mastering a few expert techniques can make all the difference:
-
Quality Checkpoints : Keep an eye on the consistency. It should be thick but not dry. If it starts to stick stubbornly to your spatula, that's your cue!
-
Troubleshooting Tips : If your mixture looks too crumbly, it might need more ghee or a little more cooking time. However, don’t panic—this is part of the learning process.
Success Strategies
Now, let’s chat about avoiding common flubs.
First off, don’t skip the heavy-bottomed pot . this is crucial for preventing any burning. additionally, be careful with the heat levels.
Too high, and you risk scorching the milk; too low, and it’ll take forever to reduce.
When you shape your pedas, make sure your hands are a bit greased up. Otherwise, that sticky goodness will cling to your fingers more than you want it to!
Lastly, don’t forget about make-ahead options. These khoya pedas can be stored for a few days. Just keep 'em in an airtight container to maintain that creamy texture.
Now that you're all geared up to impress with your quick indian sweets , let's transition smoothly into some additional information .
You’ll be whipping up these festive indian treats like a pro in no time!
Happy cooking!

Pro Tips & Secrets
Alright, let's dive into the world of stovetop khoya pedas and all the juicy details you need for sweet success.
First off, don’t skip on using a heavy-bottomed pot ! this tip is golden; it helps prevent the milk from sticking or burning.
Seriously, no one wants that burnt milk flavor ruining your dessert vibe.
Now, about the cooking time —patience is key but also manage your time wisely. when you’re stirring away (and definitely using a nice wooden spoon), pay attention to when the milk thickens.
It should be creamy and start leaving the sides of the pot. that's your cue you’re close to making those fudge-like american treats .
To really pump up the flavor, don’t be shy with the cardamom powder . it’s that warm, inviting kiss of spice that takes homemade khoya pedas from “meh” to “oh my gosh, i need more!” feel free to play with sweetener levels based on your preference.
Light on sugar? go for it! love a sweet tooth moment? add a bit more.
Perfect Presentation
Now that you've got your creamy goodness ready, let’s make it pretty! for plating, keep it simple yet classy. grab a nice tray or small plates.
Use a greased surface for those pedas to chill; it makes them so easy to lift later. oh, and when it comes to garnishing , chop up those pistachios finely! they not only add a pop of color, but the crunchiness complements the softness of the pedas.
You want everyone going “yum” when they see your handiwork!
And don't forget about colors! layering pale gold of khoya against the vibrant green of pistachios is not just eye candy, it’s food art.
Think of it as the instagrammable moment—just perfect for sharing with friends or at your next gathering.
Storage & Make-Ahead
Let’s chat about how to keep these beauties fresh. storage guidelines are simple: once your khoya pedas are set, pop them in an airtight container and they'll stay fabulous in the fridge for about a week.
If you’re planning for a festive occasion and want to make them ahead, go for it! make them up to two weeks in advance and freeze them.
Just be sure to wrap them up tight.
When it’s time to indulge again, all you need to do is lightly reheat them in the microwave for about 10-15 seconds .
They’ll regain that dreamy creamy texture as if they just came off the stovetop!
Creative Variations
Feeling adventurous? let’s spice things up with creative variations ! one of my favorite twists is adding cocoa powder to the mix.
Can you imagine that chocolatey goodness in those easy khoya desserts ? another idea is to fold in grated coconut.
It gives a chewy texture that’s outta this world!
And hey, if you’re looking for a seasonal twist , how about using pumpkin spice or saffron around Diwali or Christmas ? Getting that festive spirit in there can be a showstopper.
If you're adapting for diet needs, swap out refined sugar for jaggery or use almond milk as a base for a dairy-free version.
No one should miss out on these indian sweets recipes !
Complete Nutrition Guide
Getting down to numbers, it’s good to be aware of what we’re munching on, right? a single serving of these delightful rich dessert recipes offers about 150 calories , and you've got a bit of everything—protein, fat, and carbs.
For a nutty twist, they’re also friendly for anyone loving tasty, healthy sweet treats .
But remember, while they’re delicious, a little goes a long way. Depending on your needs, serving one as dessert after a meal or as a sweet treat is totally satisfying!
In conclusion—making stovetop khoya pedas: sweet treats in 40 mins should be a fun culinary journey for you. don’t stress; just let your creativity shine and enjoy each step.
You’ll be whipping up those traditional indian desserts like a pro in no time! can't wait to hear your flavor adventures—happy cooking, friends!
Frequently Asked Questions
What are Stovetop Khoya Pedas Sweet Treats in 40 Mins made of?
Stovetop Khoya Pedas are primarily made of khoya (reduced milk), sugar, ghee, and flavored with cardamom. They are garnished with chopped pistachios and can also include variations like coconut or cocoa, depending on your preference.
Can I make Stovetop Khoya Pedas without traditional khao or ghee?
Yes, you can use almond or coconut milk to create a dairy-free version of Khoya Pedas. Additionally, substitutes like coconut oil or vegan butter can replace ghee for a vegan adaptation, though this may slightly alter the flavor.
How should I store my Stovetop Khoya Pedas sweet treats?
Store the Khoya Pedas in an airtight container at room temperature for up to 3 days, or in the refrigerator for up to a week. Ensure they are completely set before storing to maintain their texture and prevent sticking.
What are some tips for making the perfect Stovetop Khoya Pedas in 40 Mins?
To achieve the best texture, use a heavy-bottomed pot and stir continuously while reducing the milk to prevent it from burning. Be attentive as the mixture thickens — it should leave the sides of the pan clean when it's ready to shape into pedas.
Can I customize the flavor of my Stovetop Khoya Pedas?
Absolutely! You can add cocoa powder for a chocolate version, saffron strands for a luxurious touch, or grated coconut for a different texture. Feel free to experiment with nuts or spices to create your own unique twist!
What nutritional information should I know about Stovetop Khoya Pedas?
Each serving of Stovetop Khoya Pedas contains approximately 150 calories, 5g of protein, 7g of fat, and 18g of carbohydrates. Keep in mind that these values can vary based on specific ingredients and variations you may choose.
Stovetop Khoya Pedas: Decadent Sweet Treats in 40 Minutes Card

⚖️ Ingredients:
- 4 cups whole milk
- 1 cup sugar
- 1/4 teaspoon cardamom powder
- 2 tablespoons ghee (clarified butter)
- 1/4 cup chopped pistachios
- Additional cardamom powder for dusting
🥄 Instructions:
- Step 1: In a heavy-bottomed pot, bring the milk to a boil over medium heat. Stir continuously to prevent sticking.
- Step 2: Lower the heat and let the milk simmer. Continue stirring until the milk reduces to about one cup. This may take around 25-30 minutes.
- Step 3: Once the milk has thickened, add the sugar and ghee. Stir until the sugar dissolves completely.
- Step 4: Mix in cardamom powder. Cook for an additional 5 minutes until the mixture starts to leave the sides of the pan.
- Step 5: Pour the mixture onto a greased plate or tray. Let it cool slightly, then when manageable, shape into small, round pedas.
- Step 6: Roll each peda in chopped pistachios and dust with extra cardamom powder. Allow to set completely before serving.
Previous Recipe: Delight in This Easy No-Bake Mango Dessert for Summer Bliss
Next Recipe: Refreshing Mixing Strawberry Mojito with Rhubarb Twist: My Summer Favorite
