Fluffy Pav Buns: Soft Indian Bread for Every Meal
Craving the best Bake Soft Pav Buns - Fluffy Indian Bread? Enjoy these easy-to-make buns with curries or as a snack. Perfect for any meal!

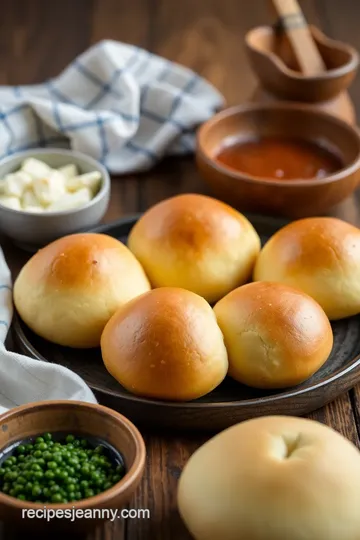
Bake Soft Pav Buns - Fluffy Indian Bread
Oh my gosh, can i just tell you how these soft pav buns changed my perception of homemade bread? there i was, a totally average cook, trying to whip up something impressive for a family dinner.
The aroma of fluffy bread filling the kitchen was like magic. it was a total game-changer, you know? pav buns are incredibly versatile.
I’ve used them for everything from breakfast sandwiches to being a sidekick for spicy curries. when you master the art of how to make pav, you unlock a whole new world of deliciousness!
A Little History, A Lot of Flavor
So, let's dive into what makes these buns so special. pav , which means "bread" in portuguese, has traveled a long way and become a cornerstone in indian street food culture.
They’ve been around for ages, originally introduced by portuguese settlers and adapted by indian cooks over the years. fast forward to today, and you can hardly walk through an indian city without stumbling over a stall selling pav bhaji or vada pav .
These buns are made from a yeast dough that puffs up to create that enviably soft texture. it's all about that perfect balance of ingredients and a little patience while the dough rises.
I mean, if you can handle a little waiting, making homemade pav is totally worth it! the prep time is low, clocking in at about 15 minutes, with an hour of sitting while it does its thing.
And then the bake time? just a quick 15- 20 minutes, and boom—you’ve got yourself a dozen fluffy buns!
The Benefits of Fluffy Pav Buns
Now, you might be wondering, “why bother making these buns?” well, let’s talk about the benefits. first off, they’re a fantastic source of carbs to fuel your day.
Pair them with your favorite curry side dishes, and you’re in business. they are vegetarian-friendly and can even be made eggless if that suits your vibe.
The nutritional value of pav is surprisingly decent considering how good they taste. they bring warmth and comfort, perfect for any occasion, especially family gatherings or casual brunches.
And, let me tell you, these buns have a unique quality— buttered pav fresh out of the oven is a revelation! they pair wonderfully not just with curries, but also as a sandwich base or with some jam for a sweet twist.
Honestly, these fluffy wonders can elevate your meal game from "meh" to "whoa, what just happened here?"
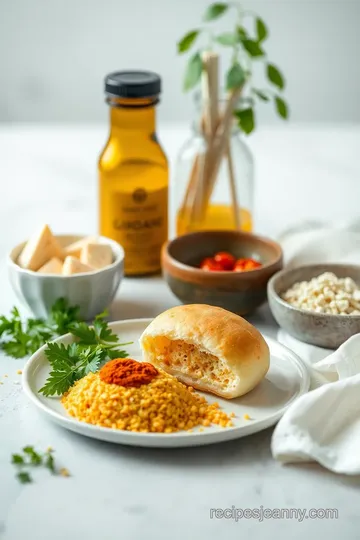
Time to Gather the Essentials
Alright, let’s transition to what you actually need to get this party started. you’ll want to gather some all-purpose flour, instant yeast, and a few other basics like sugar and salt.
Oh, and don’t forget the warm milk to keep the fluffy dough nice and cozy! it’s a simple list, making this an easy baker recipe for those just starting out or anyone looking to impress without breaking a sweat.
If you’re a bit unsure about baking with yeast, fret not! i’ve got some killer baking tips that'll make the process smoother than your favorite butter on hot pav.
For sure, you can manage this, and your friends and family will thank you for it!
So, are you ready to jump in? Let’s dive into the ingredients and start making those amazing spiced buns that’ll have everyone begging for seconds!
Essential Ingredients Guide
Alright, folks! let’s dive into the essential ingredients guide that’ll set you up for success in the kitchen, especially if you're looking to bake soft pav buns - fluffy indian bread .
These buns are not just an indian staple; they’re incredibly versatile and can elevate a meal in so many ways.
Premium Core Components
When it comes to your ingredients, quality matters. You want to ensure you’re getting the most out of your baking, especially with that yeast dough. Here’s what you need to know:
-
Detailed measurements: for those of us in the u.s., remember that 4 cups of all-purpose flour is about 500 grams .
Precision can be your best friend in baking, so when in doubt, weigh it out!
-
Quality Indicators: Look for fresh ingredients. Your flour should smell neutral, and yeast should be alive (fizzy when activated). No one wants dead yeast on their quest for fluffy buns!
-
Storage guidelines: store your flour in a cool, dry place. unopened yeast can sit on the shelf for a while but once opened, put it in the fridge to extend its lifespan.
A good rule of thumb? use it within 6 months .
-
Freshness Tips: Check expiry dates and give your flour a little sniff test. If it smells off, toss it!
Signature Seasoning Blend
Now let’s jazz it up with some seasoning. Trust me, this can elevate your soft bun recipe from basic to bakery-style:
-
Essential Spice Combinations: A pinch of cardamom or clove can take your dough from simple to something unique.
-
Herb Selections: Think about integrating herbs like cilantro or garlic into your dough for a savory touch that pairs brilliantly with curry side dishes.
-
Flavor Enhancers: A dash of sugar helps balance the savory and adds a little sweetness, perfect for that traditional Indian recipes vibe.
-
Regional Variations: Depending on your mood, you can switch things up! Try adding spices that are typical in regional dishes. Anyone up for trying saffron for an elevated flavor?
Smart Substitutions
Let’s talk about substitutions, because life happens, right? Sometimes you just can’t find that specific ingredient:
-
Common Alternatives: If you’re out of all-purpose flour, bread flour works wonders, especially for those spongy pavs.
-
Dietary Modifications: For an eggless pav, replace the egg with flaxseed meal mixed with water—trust me, it works!
-
Emergency Replacements: No butter? No problem! Swap it for coconut oil or any vegetable oil you have lying around.
-
Seasonal Options: Seasonal ingredients can help shake things up. Blueberries or cranberries can turn your dough into delightful sweet buns.
Kitchen Equipment Essentials
Having the right tools can make or break your baking game:
-
Must-Have Tools: You really need a good mixing bowl, whisk, wooden spoon, and a reliable baking sheet. It’s all about using the right equipment to make that fluffy dough.
-
Alternative Equipment: No mixer? Just use your hands! It’s the best way to connect with your food anyway.
-
Preparation Tips: The best part? Tackle the mess beforehand! Clearing your space will allow you to focus solely on easy baker recipes without distractions.
-
Storage Solutions: Keep your baking essentials organized. Clear containers with labels can help you find what you need quickly.
There you have it! an essential guide that will make your journey in baking those soft pav buns a whole lot easier.
Choosing the right ingredients, knowing how to substitute, and using the right tools can lead you to bakery-style pav in your own kitchen.
Now, let's get ready to dive into those step-by-step instructions that’ll guide you through how to make pav like a pro!
Mastering the Art of Baking Fluffy Pav Buns: An Essential Guide
Oh my gosh, have you ever had fluffy pav buns ? if you haven’t, you are seriously missing out! these little rounds of joy are like clouds in the bread world.
Perfectly soft and oh-so-absorbent for all kinds of indian curries, they’re truly game-changers when it comes to comfort food. seriously, they make everything better—especially when part of a scrumptious meal like pav bhaji or enjoyed as a buttery vada pav ! let’s dive into how you can bake soft pav buns - fluffy indian bread like a pro, shall we?
Essential Preparation Steps
Okay, first thing’s first: mise en place . this fancy french term just means getting all your stuff together. measure out your flour, sugar, and warm milk before you start.
This will save you from the ‘where did i put that?!’ panic—trust me, i’ve been there.
Time management is key. set your timer for the first rise at an hour and get ready to multitask. maybe clean up a bit or plan your toppings while the dough is rising.
This way, you’ll stay organized and won’t feel like you’re on a cooking show competition!
Safety is paramount too. make sure your kitchen work area is clean. wash your hands before you start, especially when working with yeast dough .
We want soft buns, not a bun with extra crunch from germs, right?
Step-by-Step Process
Let’s break it down into simple steps:
-
In a large bowl, combine 1 cup (240ml) of warm milk ( 110° f/ 43° c) , 2 tablespoons of sugar , and 2 teaspoons of instant yeast .
Wait about 5- 10 minutes until it’s all frothy.
-
Add in 1/4 cup (60ml) of melted butter and 1 large egg . then, mix in 4 cups (500g) of all-purpose flour and 1 teaspoon of salt till it’s all combined.
It should look shaggy—nothing fancy here!
-
Now, knead that dough for about 8- 10 minutes on a floured surface until it's smooth and elastic. This is where the magic happens, folks!
-
Let it rise in a greased bowl covered with a towel for about 1 hour , and watch it puff up. It’s like watching a Marvel movie—good things take time!
-
Once it’s doubled, punch it down (take out your frustrations if you need to!), and divide it into 12 pieces.
Shape each into a ball and place them on a baking sheet lined with parchment.
-
Let them rise again for about 30- 45 minutes until they’re puffy. Meanwhile, preheat your oven to 375° F ( 190° C) .
-
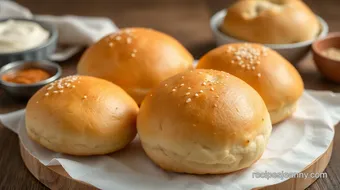
Pop those buns in the oven for 15- 20 minutes or until they look golden brown. here’s a pro tip: tap on the bottom and listen for a hollow sound.
If you hear it, they’re good to go!
-
Brush them with a little melted butter if you’re feeling extra fancy!
Expert Techniques
Now, if you want to step it up a notch, here are some pro tips for baking:
-
Make sure your yeast is fresh. Old yeast is like waiting for a bus that will never arrive—super disappointing!
-
When kneading, use the windowpane test : stretch a small piece of dough. If it stretches without tearing, it’s ready!
-
If your dough isn’t rising, it could be the temperature. make sure your spot is warm and cozy. try turning your oven on for a minute, then off—set your bowl inside to rise.
Success Strategies
Okay, common mistakes to avoid ? Don’t rush. This isn’t a race; it’s about the fluffy dough . If you over-knead, it might get tough—no one wants a workout when they’re trying to enjoy soft buns!
For quality assurance , always check your dough before the second rise. Does it feel soft and puffy? Great! If not, give it more time.
And if you’re short on time, guess what? you can always make-ahead dough and keep it in the fridge overnight.
Just remember to let it come to room temperature before you bake—patience is key!
So there you have it, folks! enjoy the process of making soft bun recipes and dive right into the delicious world of indian bread recipes .
Up next, we’ll touch on some additional information about creative ways to serve these buns that’ll have your friends and family coming back for seconds!
Additional Recipe Information for Baking Soft Pav Buns - Fluffy Indian Bread
Pro Tips & Secrets
Oh my gosh, when it comes to baking soft pav buns , there are a few tricks that can make your journey so much smoother.
First, yeast is your bestie here. make sure it's fresh! if you’re not sure, just mix it with warm milk and sugar to see if it bubbles up.
That tells you it’s alive and kicking!
Next up, kneading. you wanna knead that dough like it owes you money! seriously, 8- 10 minutes is key to getting that fluffy texture you’re dreaming of.
If you have a stand mixer, use it. just don’t forget to scrape the sides!
And here’s a time-saving tip : make the dough the night before and let it rise in the fridge. it’s a game-changer, giving your buns even more flavor.
Plus, you wake up, and bam—fresh homemade pav without the hassle!
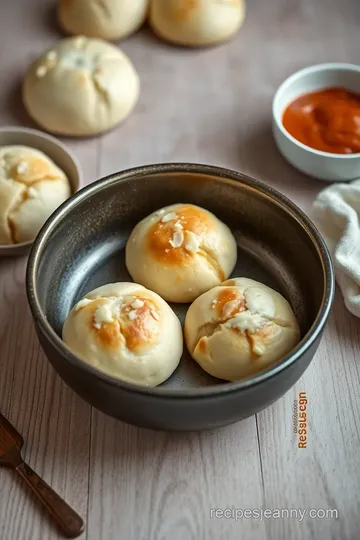
Perfect Presentation
Now, let’s talk about making those buns look as good as they taste. plating soft pav buns is all about the love you put in! stack them in a basket lined with a cute cloth, maybe even sprinkle some herbs on top for a splash of color.
Here’s a fun garnish idea: toasted sesame seeds or even finely chopped cilantro! it pops so beautifully against that soft, buttery surface.
Oh and remember, color combinations matter. serve your fluffy buns with vibrant curries—think deep oranges and greens. it’s like food art on a plate!
Storage & Make-Ahead
If you find yourself with extras (which we seriously doubt, but just in case), here’s how to store your soft buns.
Let them cool completely, then pop them into an airtight container. they’ll stay good in the fridge for about a week.
Want to go longer? freeze those goodies! wrap each bun in plastic wrap and store in a freezer bag—easy peasy! when you’re ready to enjoy, just pop them in a preheated oven at 350° f for about 10— 15 minutes.
They’ll come out warm, fluffy, and tasting freshly baked.
Creative Variations
Feeling adventurous? let’s mix it up! these buns are so versatile . try adding spiced buns by mixing in a teaspoon of cumin or dried coriander.
Want some sweetness? toss in some raisins or chopped nuts. how about a twist for every season? pumpkin puree in fall or zesty orange zest in spring can keep things fresh.
Dietary modifications ? No problem! You can easily make these eggless pav buns by swapping out the egg with a flaxseed mix or some yogurt. Just remember, experimentation is key.
Complete Nutrition Guide
Alright, let’s get down to the numbers. each soft pav bun clocks in around 150 calories . not too shabby, right? with some protein, carbs, and a hint of fat, they’re perfectly balanced to complement your curries.
These buns also provide energy, making them ideal for a busy day. but here’s the kicker: they are super customizable when it comes to nutrition.
Want more fiber? add some whole wheat flour into the mix. need to be gluten-free? try almond or coconut flour.
Just be sure to adjust the liquid accordingly.
Wrapping Up
Baking soft pav buns - fluffy indian bread is a delightful experience! not only are you creating something tasty and comforting, but you’re also bringing a piece of indian culture into your kitchen.
Remember, whether you’re serving these beauties with some spicy pav bhaji or gobbling them up with butter and jam, the joy they bring is unbeatable.
So, go on, embrace the flour, embrace the yeast, and let loose! baking is about experimenting and making delicious memories.
Whether you're prepping for a family dinner or just craving something tasty, these buns should definitely be your go-to. happy baking, my friend!
Frequently Asked Questions
What is the secret to Bake Soft Pav Buns - Fluffy Indian Bread?
The secret lies in the yeast and the kneading process. Make sure to use fresh yeast and allow the dough to rise in a warm environment. Kneading it well develops gluten, which is essential for that soft, fluffy texture.
Can I make Bake Soft Pav Buns - Fluffy Indian Bread ahead of time?
Yes, you can prepare the dough and then refrigerate it overnight after the first rise. This slow fermentation enhances the flavor. Just allow it to come to room temperature before shaping and baking.
How should I store leftover pav buns?
Store leftover pav buns in an airtight container at room temperature for up to 2 days. For longer storage, wrap them tightly in plastic wrap and freeze for up to a month; simply thaw and warm them up when ready to eat.
Can I modify the recipe to make it gluten-free?
Yes, you can use a gluten-free flour blend designed for baking instead of all-purpose flour. However, you may need to adjust the liquid content slightly, as gluten-free flours can absorb more moisture. It's also a good idea to add a binding agent like xanthan gum.
What are some great serving suggestions for pav buns?
Pav buns pair beautifully with various dishes like Vada Pav, Pav Bhaji, or spicy curries. You can also serve them with a simple salad or dips like chutney to enhance your meal.
Are there any nutritional considerations for Bake Soft Pav Buns - Fluffy Indian Bread?
Each bun contains roughly 150 calories, with moderate amounts of carbs and protein. To make them healthier, consider using whole wheat flour or reducing the sugar amount. This will add fiber and nutrients, perfect for balanced meals.
Fluffy Pav Buns: Soft Indian Bread for Every Meal Card
⚖️ Ingredients:
- 4 cups (500g) all-purpose flour
- 2 teaspoons (7g) instant yeast
- 2 tablespoons (25g) sugar
- 1 teaspoon salt
- 1 cup (240ml) warm milk (110°F/43°C)
- 1/4 cup (60ml) unsalted butter, melted
- 1 large egg
- 1 tablespoon (15ml) melted butter (for brushing after baking)
🥄 Instructions:
- Step 1: In a large mixing bowl, combine warm milk, sugar, and yeast; let sit until frothy (about 5-10 minutes).
- Step 2: Add melted butter, egg, salt, and half of the flour; mix until combined.
- Step 3: Gradually add the remaining flour until a shaggy dough forms.
- Step 4: Transfer dough to a floured surface; knead for about 8-10 minutes until smooth and elastic.
- Step 5: Form into a ball and place in a greased bowl; cover with a towel.
- Step 6: Let the dough rise in a warm place until doubled (about 1 hour).
- Step 7: Punch down the dough; divide into 12 equal pieces and shape each into a round ball.
- Step 8: Place them close together on a baking sheet lined with parchment paper.
- Step 9: Cover the shaped buns with a towel and let rise for another 30-45 minutes until puffy.
- Step 10: Preheat oven to 375°F (190°C) during the last 15 minutes of the second rise.
- Step 11: Bake for 15-20 minutes or until golden brown. Check doneness with a hollow sound when tapped on the bottom.
- Step 12: Brush with melted butter if desired; let cool on a wire rack.
Previous Recipe: Easy & Crispy Garlic Bread Strips: A Flavorful Garlic Delight
Next Recipe: Quick & Easy Grilled Chicken Shawarma Wraps: My Ultimate Family Favorite