Gluten-Free Schär Pancakes

- Are You Missing Out on the Perfect Pancake Experience?
- The Wholesome Journey of Pancakes
- The Complete Guide to Gluten-Free Schär Pancakes
- Your New Favorite Gluten-Free Pancakes
- Health and Nutrition Highlights
- Recipe at a Glance
- Premium Ingredients Guide
- Kitchen Equipment Essentials
- Foolproof Cooking Steps for Gluten-Free Schär Pancakes
- Success Guaranteed Tips
- Perfect Presentation
- Storage and Make-Ahead
- Creative Variations
- Complete Nutrition Guide
- Expert FAQ Solutions
- Recipe Card
Are You Missing Out on the Perfect Pancake Experience?
Have you ever tried biting into a pancake that promised fluffiness but ended up being a sad, flat disk of disappointment? how can something so simple be such a heartbreaker? well, let’s change that narrative, shall we? today, i’m thrilled to share my gluten-free schär pancakes , a game-changer for anyone who's ever struggled with gluten intolerance—or for those just looking for a delicious breakfast option that happens to be gluten-free.
These pancakes take about 25 minutes from start to finish, and trust me, they're super easy to whip up! perfect even for the kiddos to join in.
Seriously, if i can make these while half-awake on a sunday morning, you can too!
The Wholesome Journey of Pancakes
Pancakes have been around for centuries, and they hold a special place in so many cultural hearths—from fluffy american stacks drizzled in syrup to the thin, crepe-like varieties enjoyed in much of europe.
The idea of flipping a round piece of joy, whether soaked in delicious toppings or folded around sweet fruit, is a universal delight.
But for those of us navigating gluten-free eating, the search for the perfect pancake can feel daunting—like trying to find a needle in a haystack.
Schär, a well-recognized brand in gluten-free baking, has made it easier by offering fabulous, high-quality all-purpose flour. and what this means for us pancake lovers is that we don't have to sacrifice our love for breakfast treats.
So, think beyond just fluffy pancakes; you’re enjoying something rooted in history, adapted to bring joy even to those with dietary restrictions.
The Complete Guide to Gluten-Free Schär Pancakes
Delving into the rich culinary heritage of pancakes reveals all sorts of fascinating stories and variations. riding on that heritage, these schär pancakes are not just a meal; they’re a little slice of culture, bridging gaps between dietary needs and deliciousness.
They’re rising to modern-day popularity, especially in households that focus on healthy breakfasts without sacrificing flavor.
So, what’s special about these pancakes? well, they boast unique flavor combinations thanks to the gluten-free flour, and they’re ridiculously easy to prepare with foolproof techniques that anyone can master.
I've had my fair share of pancake flops, but these turn out marvelous every time—with just a bit of patience.
Your New Favorite Gluten-Free Pancakes
Now let’s talk about flavors! with hints of vanilla and a sprinkle of sugar, these pancakes are perfect on their own or topped with whatever you fancy.
Fresh fruit? chocolate chips? a dusting of powdered sugar? yes, please! what’s more, when using schär gluten-free flour , you’re not just whipping up pancakes; you’re enhancing dietary inclusivity while satisfying your taste buds.
From my experience, one of the biggest triumphs of this recipe has been the fact that everyone—kids, adults, and gluten-eaters alike—cannot get enough.
I once made these for a brunch gathering, thinking i’d have leftovers. spoiler: i didn’t. it’s hard to resist that golden brown goodness!
Health and Nutrition Highlights
In terms of nutrition, these pancakes pack quite a punch. with a solid mix of protein, carbohydrates, and healthy fats, you’re getting a well-balanced meal that will keep you going through the morning.
They’re suitable for various dietary considerations, so whether you’re avoiding gluten or just looking for a healthy breakfast option, you’re set.
You can easily make modifications to make them even healthier. opt for non-dairy milk alternatives if you're watching dairy intake, or consider sugar alternatives for a more natural sweetness.
Not to mention, the healthcare benefits of gluten-free options can be a win-win for those with gluten intolerance.
Recipe at a Glance
- Total preparation time: 10 minutes
- Cooking time: 15 minutes
- Skill level required: Easy (perfect for all kitchen warriors)
- Serving size: 4 servings (about 4 pancakes each)
- Cost efficiency: Budget-friendly, especially when you factor in how much joy these bring to breakfast!
So, are you feeling as excited as i am? let’s gear up for the fun part next—gathering all the ingredients we need.
I promise you’ll find everything you need right in your pantry! getting ahead of my excitement, i’ll walk you through the perfect ingredients list next.
It's time to bring these fluffy beauties to life!
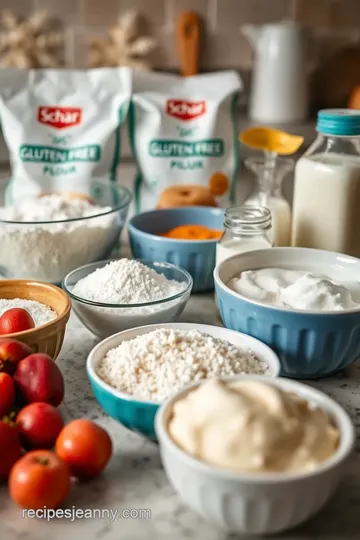
Premium Ingredients Guide
Creating the perfect batch of Gluten-Free Schär Pancakes starts with the right ingredients. Let me share a peek into my pantry and some tips I've learned along the way.
Premium Core Ingredients
-
Dry Ingredients:
- 1 cup Schär Gluten-Free All-Purpose Flour - This is the star of the show. I always check if it's fresh and feels light – no lumps or clumps for me, thank you. If it looks dusty or dull, it’s time for a new bag.
- 2 tablespoons sugar - I prefer regular granulated sugar, but if you want a deep, rich flavor, go for brown sugar. It brings that lovely caramel note that’s fantastic in pancakes.
- 1 teaspoon baking powder & 1/2 teaspoon baking soda - Seriously, these little guys are your best friends! Fresh baking powder can make a world of difference. If you’re unsure, just toss a bit in warm water; if it bubbles like a soda, you’re good to go.
- 1/4 teaspoon salt - Table salt is what I typically use, but a sprinkle of sea salt elevates the flavor beautifully.
-
Wet Ingredients:
- 1 cup milk (or non-dairy alternative like almond or oat milk) - Depending on the mood, I switch between oat milk for that creamy texture or almond for something lighter. Just make sure whatever you choose has no added sugars.
- 2 large eggs - Room temperature is key. I’ve learned this from experience. Cold eggs mess with my batter consistency.
- 2 tablespoons vegetable oil (or melted coconut oil) - Oil helps create a tender pancake. Coconut oil gives it such a scrumptious twist, and, oh boy, the smell!
- 1 teaspoon vanilla extract - A splash of pure extract makes everything a bit more lovely. Honestly, you can never have too much vanilla.
-
For Cooking:
- A bit of cooking spray or butter for greasing. I love the unmistakable crispiness that butter brings, but it tends to brown faster, so keep your eyes peeled to avoid a smoky kitchen disaster.
Signature Seasoning Blend
While pancakes are pretty great as they are, a little bit of extra flavor can turn them into something special.
- Spice Combinations: A hint of cinnamon or nutmeg can take your pancakes to a cozy, comfort-food level. Try only half a teaspoon of cinnamon for a warm touch but don't overdo it!
- Herb Selections: Not typical for sweet dishes, but I like to sneak in a pinch of fresh rosemary or thyme in savory variations. Mind-blowing, trust me!
- Flavor Enhancers: A splash of almond extract or even orange zest can really jazz things up!
- Aromatic Additions: Freshly grated nutmeg if you're feeling fancy – but I'll stick to the pre-ground stuff most of the time.
Smart Substitutions
Life happens, and sometimes we need to improvise! Here’s what I’ve picked up along the way.
- Alternative Options: Don’t have Schär flour? You can try other gluten-free blends, just look for similar ingredients.
- Dietary Swaps: For a dairy-free version, nut milks work wonders, but be cautious with flavor profiles—some can be popular at parties while others not so much.
- Emergency Replacements: Out of eggs? Ground flaxseed mixed with water can work, just remember the pancakes might be a bit denser.
- Seasonal Variations: If summer hits and fresh berries are on sale, mash some into your batter for your fruit fix in every bite.
Kitchen Equipment Essentials
To whip up these glorious pancakes, having the right tools is a game changer.
- Must-have Tools: A large mixing bowl and a whisk (or electric mixer if that’s your jam) are absolute musts.
- Recommended Appliances: A non-stick skillet or griddle is magic when it comes to cooking pancakes evenly.
- Helpful Gadgets: I swear by my pancake dispenser to keep the sizes even. No more batter splatters!
- Home Alternatives: If you lack a rolling pin, boom! A wine bottle works like a charm in a pinch when flattening dough, just don’t ask for my advice on pairing wine with pancakes, ha!
Pro Ingredient Tips
- Selection Secrets: Stick to brands that you know and trust. It sounds simple, but it’s true.
- Quality Markers: Freshness is key with flour. If it smells stale, it probably is.
- Storage Solutions: Keep your ingredients sealed tight and in cool, dark places. A pantry is a classical move; don’t leave them on the counter!
- Money-saving Tips: Look for stores that offer bulk products. You can save a little while stocking up.
So, now that we've gathered our ingredients and tools, let's dive into the fun part: cooking! you won’t want to miss how to whip up those fluffy pancakes that everyone will love.
🍽️
Foolproof Cooking Steps for Gluten-Free Schär Pancakes
If you’re in the mood for breakfast but need to keep it gluten-free, you’ve landed in the right spot! these gluten-free schär pancakes are not just easy to whip up, but they also deliver that fluffy satisfaction we all crave in the morning.
Grab your apron; let’s dive into the delightful world of pancake-making!
Essential Preparation Steps
Before we even think about firing up the skillet, let’s chat about mise en place . that fancy term just means getting all your ingredients ready.
Gather your schär gluten-free flour , sugar, baking powder, baking soda, salt, and your wet ingredients: milk (use your favorite non-dairy milk if that’s your jam), eggs, oil, and vanilla.
It’s way less stressful when you have everything at hand!
Now, let’s talk prep techniques. first, i like to whisk all the dry ingredients together in a large mixing bowl.
This way, i can be sure the baking powders and salt are evenly distributed. nobody wants a pocket of salt in a pancake, am i right? next, mix the wet ingredients in another bowl until you have a beautiful, unified concoction.
For time management, everything should come together in about 10 minutes of prep and 15 minutes of cooking. don’t stress about being perfect—this is supposed to be fun! keep things organized: use labels or little bowls for your ingredients if they help.
Keeping your kitchen tidy makes everything go smoother.
Professional Cooking Method
Let’s get to the exciting part! start by heating your non-stick skillet or griddle over medium heat. here's a hint: if you flick a little water onto the skillet and it dances, you’re ready to go.
Lightly grease it with cooking spray or butter, and we’re in business!
Now, mix your dry and wet ingredients. pour the wet ingredients into the dry bowl, and gently stir until you have just combined everything.
Don't go overboard; a few lumps are perfectly fine. let the batter sit for about 5 minutes—they get all cozy this way, making sure fluffy pancakes.
Grab about 1/4 cup of batter for each pancake. cook ‘em for 2-3 minutes until bubbles pop and the edges look solid.
Then, flip! another 2-3 minutes until they’re a lovely golden brown, and voilà! your kitchen should smell like breakfast heaven.
Expert Techniques
Here’s where i add some expert techniques gleaned from my cooking adventures. first, make sure your wet ingredients are room temperature.
This tiny detail can make a world of difference in mixing. and really, don’t skip that resting time—it’s essential when you’re working with gluten-free flour to ensure you get that fluffiness.
Now, i once made pancakes with a super thick batter thinking it would lead to heartiness. nope! they turned out dense and sad.
So remember, keep it a little loose, and you’ll be golden.
When checking for doneness, look for golden edges and bubbles forming. if they’re getting too brown before they set, lower the heat a notch.
Success indicators, folks—they’re the little things that tell you all is well in pancake land!
Success Strategies
Sometimes things don't go as planned, and that's ok! if your batter is too thick, add a splash of milk; too thin? just mix in a bit more schär gluten-free flour .
Also, always taste-test your pancakes to ensure they’re just right. if one tastes a bit off, tweak the spices or add more vanilla.
For quality assurance, keep an eye on the cooking times. you want each pancake to come out consistent. and if you need to, keep cooked pancakes warm in an oven set to low—this way, they all get served at the same time without going cold.
And just like that, you’ve got gluten-free pancakes that are sure to be a hit at breakfast! Don’t forget to play around with toppings—maple syrup, fresh berries, or a sprinkle of chocolate chips can take you to pancake heaven!
In the next section, we’ll explore some additional information that will help you make these pancakes your own, plus ways to jazz them up further for a breakfast spread that’ll make everyone at the table cheer!
Success Guaranteed Tips
When it comes to cooking, especially gluten-free baking, a bit of insider knowledge can make all the difference. from my own, sometimes hilarious, experiences, i’ve picked up a few professional insights.
First off, don't rush the mixing. i’ve experienced pancake batter that went from “heavenly fluff” to “dense disc” just by overmixing.
Just give it a gentle stir until the ingredients are barely combined.
Expert techniques are golden. for instance, if you're using schär gluten-free flour, be sure to follow the resting time i mentioned.
Letting that batter sit helps the flour absorb the liquids and achieve that light texture we all crave in pancakes.
Trust me, i once skipped this step in a mix and ended up with a breakfast akin to shoe soles.
.. not a good morning!
And let’s talk kitchen wisdom. use room temperature ingredients for the wet mix—it makes everything blend better! i learned this when i decided to be lazy one frosty morning and used cold milk.
The pancakes turned out cold in the center, while the edges were crispy. ugh, just ugh!
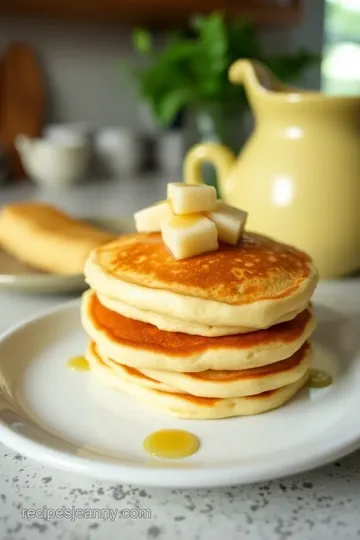
Perfect Presentation
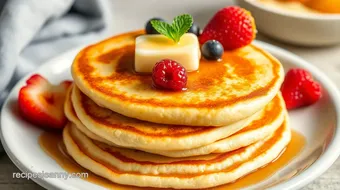
So you’ve made these magnificent gluten-free pancakes, but how do you serve them in style? plating techniques can turn a basic breakfast into something spectacular! always make it fun: stack those pancakes high, slightly staggered for a bit of height.
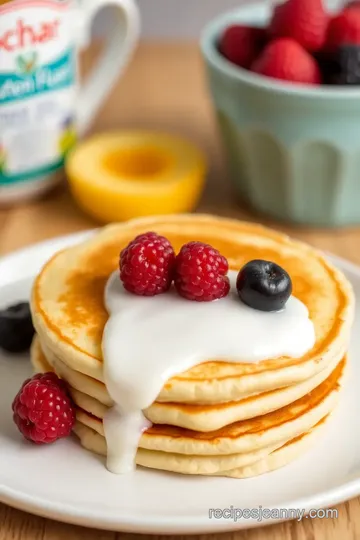
When it comes to garnishes, don’t just sprinkle powdered sugar! fresh berries on top give you that wow factor, plus vibrant color that shouts, “i’m fancy!” you can also drizzle real maple syrup or an alternative like agave for a sleek look.
And for serving suggestions, think about pairings! a side of greek yogurt dolloped on the plate adds a creamy contrast.
Remember, we eat with our eyes first. visual appeal tips? use a bright plate and contrast colors. you want your meal to be as appetizing as possible!
Storage and Make-Ahead
Alright, pumpkin, let’s talk storage. these pancakes can actually be stored in the fridge for up to three days, although they are best fresh.
Wrap them in foil or use an airtight container. if you want to make your life easier, prep the batter a day ahead and store it in the fridge; just be sure to stir briefly before cooking.
Preservation methods can also include freezing pancakes. i can’t tell you how many times i’ve saved my weekend by pulling out a few from the freezer! lay them flat in a single layer on a baking sheet, freeze them, then stack them in a container.
Just pop them in the toaster or microwave to reheat.
As for freshness tips, if you’ve got leftover batter, it’s best used within 24 hours. make sure to give it a gentle stir too, as it may thicken up a bit.
Trust me; no one wants pancake gum.
Creative Variations
Now let’s dive into creative variations! gluten-free pancakes are like a blank canvas. i often adapt the flavors based on what’s in season or what’s left in the kitchen.
Come summer, i toss in some fresh blueberries—oh my, it’s like a burst of sunshine with every bite!
Dietary modifications are also a breeze. want it vegan? use a flax egg instead of regular eggs and a non-dairy milk, like almond or oat.
That’s how my vegan friends enjoy brunch with zero fuss.
Thinking of regional variations? how about throwing in a little cinnamon and nutmeg for a cozy autumn vibe? or go wild with pumpkin puree if you’re feeling festive! each addition gives your pancakes a unique twist, keeping breakfast exciting.
Complete Nutrition Guide
Now, let’s break down what you’re actually getting with these pancakes. each serving packs around 220 calories, which is not too shabby for a breakfast treat! the reality is, these pancakes have a solid mix of carbohydrates and are good for fuel, especially if you start your day with a bit of activity.
Health benefits? well, using gluten-free flour like schär opens you up to enjoying breakfast without the gluten hassle. they’re super friendly even for folks with dietary restrictions.
Portion guidance can be tricky; based on what i’ve experienced, four pancakes per serving is a good measure. don’t feel guilty if you polish off five!
Expert FAQ Solutions
You may have some common concerns (trust me, i’ve been there too). is my batter too thick? i’ve beaten mine too hard before, and it turned out like paste! just add a touch more milk until it’s the consistency you want.
If your pancakes are burning instead of browning, try reducing the heat. sometimes, i get impatient and crank it up, but you end up with charred outsides and raw cuffs, not a win! and if you ever find yourself wondering if you can skip the resting time, take my advice: don’t.
You’d hate yourself later on, trust me.
Whipping up gluten-free schär pancakes doesn’t just give you a delicious meal; it's a journey filled with successes, mistakes, and creativity.
Whether you’re entertaining guests or simply indulging in a cozy breakfast at home, these pancakes can shine through! just remember the tips and tricks, and you’ll create a dish that’s not only tasty but also brings everyone together around the table.
Enjoy!
Gluten-Free Schär Pancakes Card
⚖️ Ingredients:
- 1 cup Schär Gluten-Free All-Purpose Flour
- 2 tablespoons sugar
- 1 teaspoon baking powder
- 1/2 teaspoon baking soda
- 1/4 teaspoon salt
- 1 cup milk (or non-dairy alternative like almond or oat milk)
- 2 large eggs
- 2 tablespoons vegetable oil (or melted coconut oil)
- 1 teaspoon vanilla extract
- Cooking spray or butter for greasing the pan
🥄 Instructions:
- Step 1: Prepare your workspace: Gather all your ingredients and have a large mixing bowl and a whisk or electric mixer ready. Heat a non-stick skillet or griddle over medium heat. Lightly grease it with cooking spray or butter.
- Step 2: Mix dry ingredients: In the large mixing bowl, combine the Schär gluten-free flour, sugar, baking powder, baking soda, and salt. Whisk together until well mixed.
- Step 3: Mix wet ingredients: In a separate medium bowl, whisk together the milk, eggs, vegetable oil, and vanilla extract until fully combined.
- Step 4: Combine mixtures: Pour the wet ingredients into the bowl with the dry ingredients. Stir gently until just combined. Let the batter sit for about 5 minutes.
- Step 5: Cook pancakes: Once the skillet is heated, pour about 1/4 cup of batter onto the skillet for each pancake. Cook for 2-3 minutes until bubbles form, then flip and cook for another 2-3 minutes.
- Step 6: Serve: Remove pancakes from the skillet and serve immediately with toppings like maple syrup or fresh berries.
Previous Recipe: Fluffy Soufflé Pancakes - Light and Comforting
Next Recipe: Namaste Gluten Free Flour Recipes: 7 Fluffy Pancake Variations