Gluten-Free Namaste Pancakes
Explore delightful Namaste gluten free flour recipes with these 7 fluffy pancake variations that are quick, easy, and perfect for any breakfast occasion! Discover now!

- Are You Ready to Flip Your Breakfast Game?
- A Delicious Journey Through Pancake History
- The Ultimate Guide to Mastering Gluten-Free Namaste Pancakes
- What Makes This Recipe Special
- Health and Nutrition Highlights
- Recipe at a Glance
- Ready to Cook?
- Perfect Ingredients Selection
- Kitchen Equipment Essentials
- Expert Cooking Method for Gluten-Free Namaste Pancakes
- Success Guaranteed Tips
- Perfect Presentation
- Storage and Make-Ahead
- Creative Variations
- Complete Nutrition Guide
- Expert FAQ Solutions
- Recipe Card
Are You Ready to Flip Your Breakfast Game?
Have you ever found yourself stuck in a breakfast rut, munching on toast or a cereal bar when all you really want is something warm and comforting to kick off your day? well, listen up! today, i’m sharing a recipe that’s not only delicious but also caters to that gluten-free craving : gluten-free namaste pancakes.
These fluffy beauties can transform your mornings from ordinary to extraordinary in no time.
What makes this recipe special? let me tell you! it takes just about 25 minutes from start to finish, and it’s super easy—perfect for those busy weekday mornings or a leisurely weekend brunch.
You’ll impress your family or guests with these light, fluffy delights, and you won't need any gourmet cooking skills to pull them off.
Trust me, i’ve had my share of pancake disasters, but this recipe is foolproof!
A Delicious Journey Through Pancake History
Pancakes have a rich history that dates all the way back to ancient civilizations. the ancient greeks and romans cooked up flat cakes on hot stones, and even in medieval england, pancakes were a staple.
Fast forward to today, and we’re mixing up delightful variations, particularly for those of us requiring gluten-free options—thank goodness for namaste gluten-free flour recipes ! these recipes allow us to enjoy this classic dish without sacrificing taste or texture, making it a go-to for gluten-free breakfast ideas.
What sets these pancakes apart is the unique blend of flavors and textures that you can achieve using namaste foods recipes .
They not only cater to those avoiding gluten but also taste just as good (if not better!) than traditional pancakes.
The Ultimate Guide to Mastering Gluten-Free Namaste Pancakes
Let’s dive into what makes these pancakes so beloved! they hold a fantastic place in modern brunch culture, serving both comfort and nostalgia.
There’s something about biting into a warm pancake that takes you back to childhood, right? plus, they’re super versatile; you can stack them high and top them with your favorite toppings or get creative with mix-ins.
Here’s the kicker: not only are these pancakes absolutely delicious, but they’re also packed with nutritional benefits. using gluten-free flour doesn’t mean we have to skimp on nutrients; no way! we can whip up pancakes that are wholesome and satisfying, keeping us fueled for whatever the day has in store.
What Makes This Recipe Special
So, what’s the secret sauce behind these pancakes? unique flavor combinations play a huge part—think vanilla extract mixed with sweet buttermilk, all wrapped up in a light pancake.
The techniques are simple, which is exactly why they’re so appealing! i mean, who doesn't love a straightforward recipe? when i first tried making pancakes, i remember how i messed up with the mixing, but this method pretty much guarantees success.
I'll also share some time-saving tips that come from my own trial and error in the kitchen. if you let the batter rest, it allows the flour to soak up that buttermilk, giving you a fluffy texture that i didn’t achieve the first time around.
Mistakes are just lessons in disguise, right?
Health and Nutrition Highlights
Now, let’s chat about what’s truly great about these pancakes from a health perspective. each pancake packs around 150 calories, which isn’t bad for a delightful breakfast treat.
They offer a good balance of carbohydrates and protein, making them a solid option to kickstart your day.
Even if you’re following a gluten-free diet, you can still enjoy these pancakes without compromising on nutrition! you can easily substitute buttermilk for almond milk for an even lighter treat or whip in some mashed bananas for added sweetness.
Plus, they’re free from many allergens, which is a bonus if you’re serving guests with dietary restrictions.
Recipe at a Glance
Let me break this down for you:
- Total preparation time: 10 minutes
- Cooking time: 15 minutes
- Total time: 25 minutes
- Serving size: About 4 pancakes
- Difficulty level: Easy peasy!
And here’s the best part: the ingredient list is simple, and you likely already have most of it at home!
Ready to Cook?
Excited about trying your hand at this recipe? up next, trust me, you’ll want to check out the ingredients section—those fluffy pancakes await you! whether you’re gearing up for a sunday family brunch or just want to treat yourself on a snowy morning, these gluten-free namaste pancakes will quickly become a staple in your breakfast routine.
Let’s dig into that ingredient list so you can get cooking!
Perfect Ingredients Selection
When it comes to whipping up a delightful plate of gluten-free namaste pancakes , getting your ingredients right is crucial.
The good news is that you don’t need to stress; i'll walk you through all the nitty-gritty details. let’s get into it!
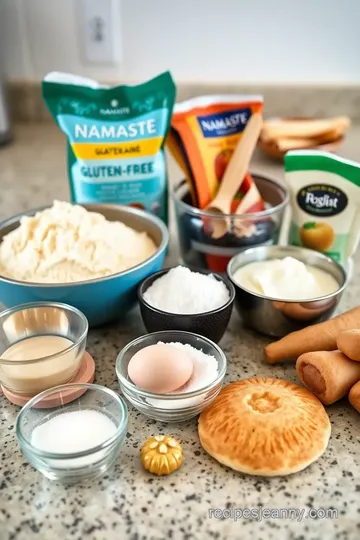
Premium Core Ingredients
- 1 cup Namaste Gluten-Free Flour Blend : This flour blend is where your pancake magic starts. It’s made with a mix of high-quality ingredients like brown rice flour and tapioca flour, making sure those pancakes turn out fluffy and light . Look for boxes that have a “gluten-free” label on them for quality assurance; it really does make a difference.
- 1 tablespoon granulated sugar : You can adjust this – I usually like mine just a tiny bit sweet. If you’re going for healthy pancake recipes, consider using honey or maple syrup instead.
- 1 teaspoon baking powder and 1/2 teaspoon baking soda : These are your secret weapons for those light and airy pancakes. Make sure your baking powder isn’t outdated; a quick wipe of the rim will keep it nice and fresh.
- 1/4 teaspoon salt : It might seem small, but this is a flavor enhancer; don’t skip it!
- 1 cup buttermilk or a non-dairy alternative: Buttermilk adds richness. If you’re dairy-free, almond milk with a splash of vinegar can do the trick! Just let it sit for about 5 minutes and voila – homemade buttermilk!
- 1 large egg : It brings everything together. Substituting it can be tricky unless you’re well-versed in vegan baking. Flaxseed meal works – just mix 1 tablespoon of flaxseed with 2.5 tablespoons of water and let it sit until thickened!
- 2 tablespoons melted butter or coconut oil : Both add a lovely flavor, but you can easily swap them out. Remember, melted butter means better pancakes!
- 1 teaspoon vanilla extract : Trust me, this little dash makes a huge difference. It’s like the cherry on top of your pancake sundae.
- Cooking oil or non-stick spray : For pan prep; even though we love cast iron or non-stick pans, better safe than sorry!
Signature Seasoning Blend
This is where you can personalize your pancakes. how about adding some spices? a pinch of cinnamon and nutmeg can really elevate things, giving you that cozy feel reminiscent of grandmother’s kitchen.
Add some chopped nuts or chocolate chips for a crunch or sweetness - just mix them in right before cooking.
Smart Substitutions
Sometimes, life gets in the way, and you just don’t have all the ingredients. if you’re missing gluten-free flour substitutes , try almond flour or blended oat flour.
If you’re out of buttermilk? use regular milk with a squeeze of lemon! don’t let pantry shortages stop you; think creatively.
And hey, if you’re stuck with a very ripe banana, that could work too – just mash it and mix it into the batter for natural sweetness!
Kitchen Equipment Essentials
Now, let’s get into the tools you’ll need because what’s cooking without the right gear? You don’t need to break the bank here—just some everyday essentials.
- Non-stick skillet or griddle : This is where the magic happens. Non-stick pans ensure your pancakes slide out easily without getting stuck or falling apart.
- Mixing bowls : I recommend a large one for wet ingredients and a medium for the dry stuff. No need for a huge production here!
- Whisk : A simple tool, but a game-changer when it comes to incorporating air into your pancake batter.
- Measuring cups and spoons : Precision is key! If you’ve ever tried eyeballing measurements and ended up with a pancake disaster, you know what I mean!
Pro Ingredient Tips
- Quality markers : When shopping for your Namaste gluten-free flour, look out for packaging with a gluten-free certification. This gives you peace of mind.
- Storage solutions : Store flour in an airtight container in a cool, dry place. I’ve encountered flour that turned slightly musty because I didn’t store it correctly—learn from my mistakes!
- Money-saving tips : Purchasing in bulk can save you a pretty penny, especially for staples like flour or sugar.
Alright, now that we’ve got the ingredients all lined up like a choir, it’s time to get cooking! next up, i’ll guide you through the step-by-step cooking instructions to bring these fluffy gluten-free pancakes to life.
You're gonna love how easy and satisfying it is to whip them up!
Expert Cooking Method for Gluten-Free Namaste Pancakes
Essential Preparation Steps
Before we dive into the cooking, let’s talk about mise en place. it’s one of those fancy french terms that basically means “everything in its place.
” so, gather your ingredients: namaste gluten-free flour blend, sugar, baking powder, baking soda, salt, buttermilk, egg, butter or coconut oil, and vanilla.
Trust me, having everything ready makes the whole process smoother—and less messy!
Moving on to prep techniques, whisk your dry ingredients together in a medium bowl first. this little step is key because it prevents clumps of baking powder messing with your fluffiness.
Speaking of fluffiness, ensure that your wet ingredients—a combination of buttermilk, egg, melted butter (or coconut oil), and vanilla—are well incorporated in another bowl.
Oh, and don’t forget the timing management. total prep time is about 10 minutes; that's not too shabby for pancakes, right?
When it comes to organization tips, i like to set my non-stick skillet on the stove and get it heating up while i mix the batter.
It keeps everything moving along nicely, and there’s nothing worse than a cold griddle when you're in pancake mode!
Professional Cooking Method
Let’s get down to business with the step-by-step process. first, pour your wet ingredients into the bowl of dry ones and gently fold them together.
The key here is to mix just until combined—over-mixing can lead to dense pancakes, and nobody wants that!
Now, onto temperature control. heat your skillet on medium; too hot and you risk burning those lovely pancakes, too low and they might not cook through.
You want a nice, golden brown finish, so aim for a surface that allows bubbles to form—this usually takes about 2-3 minutes.
As for timing precision, when those bubbles appear, flip the pancake! cook for another 2 minutes or so, and voila! success indicators include a light golden color and a springy texture when gently pressed.
If they look more like charcoal, um, well… let’s not dwell on that, shall we?
Expert Techniques
Now, let’s talk about some professional methods. for the fluffiest outcome, i learned the hard way that letting your batter rest for about 5 minutes before cooking can make a world of difference.
It gives the gluten-free flour time to absorb liquid, resulting in a lighter pancake.
When it comes to critical steps, remember to adjust the thickness of your batter if needed. a splash more buttermilk if it’s too thick or a pinch of flour if it’s too thin can save your breakfast from becoming a disaster.
Never underestimate the power of quality checks: a taste test never hurt anyone! if it doesn’t taste right, it won’t feel right either.
Success Strategies
Having pancakes that are both delicious and visually appealing is the goal! here’s where some troubleshooting tips come in handy.
If your pancakes spread too thin, they might lack that cozy, fluffy vibe. consider using a thicker batter next time.
For quality assurance, keep an eye out for any lumps after mixing your ingredients. lumps are occasionally okay, sure, but massive hard lumps? not so much! trust your instincts; if it looks odd, it probably isn’t going to cook right.
As for your guide to perfect results, always serve these pancakes warm. if you’re making a batch, keep the first pancakes in a low oven (around 200°f) while you cook the rest.
Trust me on this; they will thank you!
So there you have it! in about 25 minutes, you’ll have these gluten-free beauties that not only taste hearty but also feel like a big warm hug.
Next up, let’s dive into some suggested variations or toppings to spice things up!
Success Guaranteed Tips
When i first dove into making gluten-free namaste pancakes , i had my fair share of kitchen calamities. but trust me, with a bit of wisdom, anyone can ace this recipe.
First off, professional insights suggest using a well-blended flour mix. namaste gluten free flour itself was a game-changer for me.
Those impulse buys at the health food store? sometimes they’re worth it. this blend really pulls everything together.
Now, let’s talk about expert techniques . for the fluffiest pancakes, let the batter rest for a minute or two after mixing it.
It’s a simple trick, but it changes the game. even if it feels like watching paint dry, you’ll be glad you did when you bite into a light and fluffy pancake.
A sprinkle of kitchen wisdom : always measure your flour correctly. too much flour makes for dense pancakes. i learned this the hard way, ending up with pancakes that could double as hockey pucks.
I mean, unless you’re planning a winter sport in your kitchen, you want them light!
Lastly, the key to success guarantees : patience. If your first pancake doesn’t turn out picture-perfect, don’t sweat it! You’re still getting deliciousness on your plate.
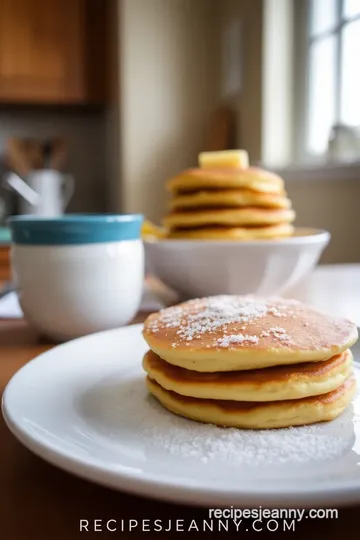
Perfect Presentation
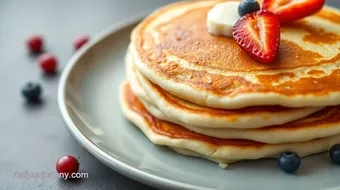
Let’s face it; we eat with our eyes first. plating techniques can elevate your simple pancakes to instagram-worthy dishes. use a large white plate to really show off those fluffy beauties; it creates a beautiful contrast.
As for garnish ideas , fresh strawberries or blueberries can add a splash of color. i once topped mine with a sprig of mint—conversation starter for sure! and don’t forget those serving suggestions —a drizzle of maple syrup, a dollop of yogurt, or a sprinkle of chopped nuts can take it over the edge.
To up the visual appeal , stack the pancakes neatly. a three-pancake stack often looks the best. you can even dust some powdered sugar on top for that rustic charm, which always thrills my kids.
Trust me, it’ll bring smiles to the breakfast table.
Storage and Make-Ahead
Sometimes, life gets busy, and you might want to prep your pancakes in advance. for storage guidelines , if you have leftovers (which is rare but can happen), just refrigerate them in an airtight container for up to 3 days.
Now, for those interested in preservation methods , you can also freeze your pancakes. i often stack them with parchment paper between layers and store them in freezer bags.
Take them out on busy mornings—just pop them in the toaster!
For reheating instructions , a toaster oven does wonders. it keeps the pancakes crispy, unlike the microwave, which makes them a bit soggy.
However, if that’s your only option, just use a low power setting.
To keep your pancakes fresh, freshness tips like rewarming with a quick blitz on the skillet for a couple of minutes can do the trick.
Creative Variations
Getting bored with the same old pancakes? not on my watch! there are endless flavor adaptations you can experiment with.
Sometimes i toss in chocolate chips, and other times, i sprinkle cinnamon for a cozy feel.
If you need dietary modifications , it’s super easy! just swap out the buttermilk for almond or coconut milk to make things dairy-free.
And here’s a pro tip: a bit of vinegar in your non-dairy milk can simulate buttermilk in a pinch!
For those wanting some seasonal twists , think pumpkin spice in the fall or lemon zest in the spring. oh, and for something more adventurous, regional variations like adding cornmeal can give your pancake that southern flair.
Complete Nutrition Guide
Feeling guilty about that stack of pancakes? don’t! here’s a detailed breakdown to reassure you. each pancake has about 150 calories, 4 grams of protein, and 2 grams of dietary fiber.
Those numbers may vary a bit depending on your specific ingredients, but it makes for a healthy breakfast choice.
The health benefits of going gluten-free are numerous, especially for those with intolerances. Using dietary information like how each pancake’s sugar content can help you tweak recipes for your lifestyle is essential.
Don't worry too much about portion guidance. Start with one or two, and if you’re still hungry, go for another pancake or maybe some fresh fruit on the side.
Expert FAQ Solutions
Now, onto some common concerns when making these pancakes. a lot of people ask if the batter can be stored.
Sure, but it’s best when used fresh! each batch is really part of the experience.
From my own kitchen trials, here’s an expert answer : if your pancake batter seems too thick, it’s probably due to over-measuring your flour.
Add a splash more buttermilk to loosen it up!
When it comes to cooking, i’ve had my share of pancakes that weren’t cooked evenly. the troubleshooting guide here is to keep an eye on your heat.
Too high a flame leads to burnt outsides and gooey insides.
For those looking for success tips , don’t rush. Give them time to puff up before flipping. The perfect pancake takes patience!
In conclusion, making these gluten-free namaste pancakes can be so much more than just whipping some ingredients together. it’s about exploration, creativity, and sometimes even learning from your mistakes.
Hopefully, with this guide—covering everything from success tips to creative twists—you’ll feel inspired to lift that whisk and explore your way to pancake perfection! enjoy every bite!

Gluten-Free Namaste Pancakes Card
⚖️ Ingredients:
- 1 cup Namaste Gluten-Free Flour Blend
- 1 tablespoon granulated sugar
- 1 teaspoon baking powder
- 1/2 teaspoon baking soda
- 1/4 teaspoon salt
- 1 cup buttermilk or a non-dairy alternative
- 1 large egg
- 2 tablespoons melted butter or coconut oil
- 1 teaspoon vanilla extract
- Cooking oil or non-stick spray for the pan
🥄 Instructions:
- Step 1: In a medium bowl, combine the Namaste Gluten-Free Flour Blend, sugar, baking powder, baking soda, and salt. Whisk these dry ingredients together until well combined.
- Step 2: In a separate bowl, whisk together the buttermilk, egg, melted butter (or coconut oil), and vanilla extract until smooth.
- Step 3: Pour the wet mixture into the bowl with the dry ingredients. Gently mix until just combined. Be careful not to over-mix; a few lumps are perfectly fine.
- Step 4: Heat a non-stick skillet or griddle over medium heat. If needed, lightly grease with cooking oil or non-stick spray.
- Step 5: Pour about 1/4 cup of batter onto the skillet for each pancake. Cook until bubbles form on the surface and the edges look set, about 2-3 minutes. Flip and cook for an additional 2 minutes until golden brown.
- Step 6: Transfer pancakes to a plate and keep them warm in a low oven if necessary while you cook the remaining batter. Serve with your choice of toppings.
Previous Recipe: Schar Gluten Free Flour: 7 Fluffy Pancake Recipes Delight
Next Recipe: Bakery Rack: 7 Hacks for Perfect Cinnamon Roll Delight