Homemade Gluten-Free Sour Cream
Wondering if sour cream is gluten free? Let me share my easy homemade sour cream recipe that's creamy, tangy, and perfect for tacos or dips. Try it out!

- Is Sour Cream Gluten Free? Let’s look into In!
- What’s the Lowdown on Homemade Sour Cream?
- Why You’ll Want to Make Your Own
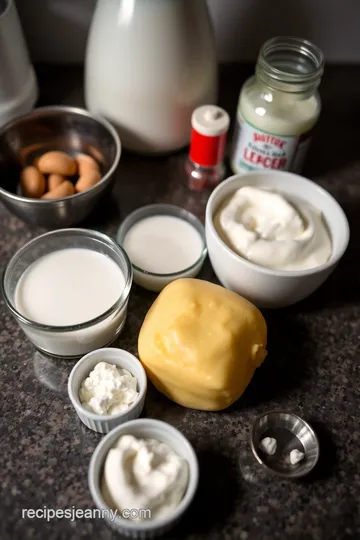
- Your Ultimate Guide to Essential Ingredients
- Mastering the Art of Gluten-Free Homemade Sour Cream
- Pro Tips & Secrets
- Perfect Presentation
- Storage & Make-Ahead
- Creative Variations
- Complete Nutrition Guide
- Expert FAQ Solutions
- Wrap-Up
- Recipe Card
Is Sour Cream Gluten Free? Let’s look into In!
Alright, picture this: a chilly fall evening, the smell of chili bubbling on the stove, and there in the fridge, waiting to be topped off—my homemade gluten-free sour cream .
Seriously, just thinking about it gives me the warm fuzzies! now, let's chat about that question you've probably been wondering, “ is sour cream gluten free? ” spoiler alert: yes, my friends, it is! but there's more to it!
Now, if you’re like me and have that tangy sour cream sitting in your fridge, you know how versatile it is.
From serving as a topping for your nachos to mixing in the most divine dips, homemade sour cream is a staple in my kitchen.
I remember the first time i tried to make it – it was a bit of a leap of faith, but trust me, if i can do it, you can too!
What’s the Lowdown on Homemade Sour Cream?
Sour cream has been around forever. seriously, its history dates back to ancient cultures where people would ferment cream to create that delightful tang! it’s fascinating how this rich, creamy condiment made its way into modern kitchens and has become a must-have for everything from tacos to creamy sauces.
Now let’s get real—making this deliciously creamy dip or sauce is as easy as pie. yeah, i said pie! you can whip it up with just a few ingredients (and no fancy kitchen gadgets necessary), and it’s perfect for those busy weeknights or casual get-togethers.
Prepping it takes just 10 minutes , but don’t forget about that 24-hour fermentation time. good things come to those who wait, right?
And here’s the best part: not only is it inexpensive to make, but one batch yields about 1 cup of this creamy goodness. So, what’s stopping you?
Why You’ll Want to Make Your Own
Let’s talk benefits. first off, this homemade sour cream is gluten-free , making it a great option for anyone watching their gluten intake! plus, you know exactly what’s in it—no weird additives or mystery ingredients.
Just fresh cream , lemon juice , and a splash of yogurt to get the fermenting fun going.
And let’s not forget those health perks! if you’ve been searching for a healthy sour cream alternative , you’re looking at it.
You get all the sour cream nutritional benefits without the fillers that come with store-bought versions. plus, sour cream can be a trim-your-waistline friendly option when you need a lil' creaminess without the guilt.
Perfect for birthday parties, holiday gatherings, or just a casual weeknight meal with friends, homemade sour cream fits the bill for almost any occasion.
Whether it’s a creamy salad dressing or a dip for those fresh veggies, not to mention the fantastic topping for potato skins or alongside your favorite tacos—they pair perfectly!
And hey, if you want to get fancy, ditch the plain and mix in some herbs or spices; a spicy sour cream variation could add a delightful kick to your next taco night!
So, are we ready to dive into this easy sour cream recipe? you’ll want to gather your ingredients and get mixing, because once you try it, you might never go back to the store-bought stuff.
Oh, and don’t forget, you can make dairy-free sour cream too! Just swap out the heavy cream for coconut cream, and you’re all set for a deliciously creamy, vegan-friendly alternative.
Time to roll up those sleeves and get to it! Let’s check out what you need to whip up this dreamy homemade sour cream.
Your Ultimate Guide to Essential Ingredients
Whether you're whipping up a creamy dip or a wholesome sour cream sauce , having a grasp on your ingredients is key.
This guide highlights the must-have elements for creating culinary magic in your kitchen. let’s dive in!
Premium Core Components
First things first! Let’s tackle those premium core components .
-
Measurements: when it comes to cooking, accuracy counts. for this, you’ll want to know your measurements— 1 cup or 240 ml of heavy cream will work wonders for your easy sour cream recipe .
Keep a measuring cup handy!
-
Quality indicators: fresh ingredients make all the difference! look for heavy cream that’s rich and free from additives. check the expiration date and flip it if it’s almost due.
Your sour cream for baking will thank you later!
-
Storage Guidelines: Keep your ingredients stored properly. Heavy cream? It needs to chill in the fridge. And remember: sour cream usually lasts about 2 weeks when stored correctly.
-
Freshness Tips: Always do a quick sniff test. If cream smells off, it’s not worth the risk— waste not, want not.
Signature Seasoning Blend
Now let’s spice it up! This is where you can shine with a signature seasoning blend .
-
Essential Spice Combinations: Think garlic powder and onion powder for a classic blend! If you’re into Latin flavors, paprika gives that perfect twist.
-
Herb Selections: Fresh herbs like dill or chives pair fantastically with sour cream. They’ll help create a creamy salad dressing that’s bright and zesty.
-
Flavor Enhancers: Don’t forget about lemon juice—talk about tangy flavor profile! It’s fantastic in your homemade sour cream .
-
Regional Variations: Ever tried using chipotle for a southwestern flavor? Yum! Or how about a touch of curry powder for a unique twist? The sky’s the limit!
Smart Substitutions
Life happens, and sometimes you just need to improvise with smart substitutions .
-
Common Alternatives: No sour cream on hand? Plain yogurt makes an excellent substitute. It’s tangy, creamy, and packs a nutritional punch—check out those plain yogurt benefits !
-
Dietary Modifications: For a dairy-free sour cream, use coconut cream ! Mix it with a bit of lemon juice and you’ve got a smooth alternative.
-
Emergency Replacements: Out of heavy cream? You can blend milk with butter to achieve a similar richness for those sauces or dips.
-
Seasonal Options: As summer rolls around, consider fresh herbs from your garden to jazz up your recipes. They’ll elevate anything you’re making!
Kitchen Equipment Essentials
Now, let’s talk about the must-have kitchen tools .
-
Must-Have Tools: A good mixing bowl, a whisk, and a clean glass jar are your best friends. Trust me! These basic items will help you create culinary wonders.
-
Alternative Equipment: No whisk? Use a fork! Honestly, it might take a bit longer, but it gets the job done.
-
Preparation Tips: Before you start mixing, make sure everything is neat. A tidy workspace leads to smoother culinary adventures.
-
Storage Solutions: Use airtight jars or containers for your homemade sour cream or any other creations. Trust me, it helps keep things fresh longer!
So now that you know what to have on hand, how about we jump into the fun stuff? making your own gluten-free sour cream at home is a breeze! if you’ve ever wondered, “ is sour cream gluten free ?” the answer is yes! just follow along with this easy recipe.
You’ll soon whip up some tangy, creamy goodness that’s perfect for topping baked potatoes, mixing into sauces, or even crafting delicious dips.
Let’s get cooking!
Mastering the Art of Gluten-Free Homemade Sour Cream
Who doesn’t love a dollop of tangy sour cream on their baked potatoes or tacos? honestly, it’s like a cool hug for your taste buds! plus, it’s versatile – i mean, you can whip it into creamy dips or use it in baking.
Today, i’m going to guide you through an easy sour cream recipe that’s both gluten-free and packed with flavor.
Essential Preparation Steps
Before we jump into making this deliciousness, let’s tackle some essential prep steps. you know what they say: mise en place is everything! that’s just french for “everything in its place.
” believe me, it makes cooking way easier when you have everything ready to roll before you start.
Time management is key, too. set aside about 10 minutes for active prep. once that’s done, just let the sour cream sit for about 24 hours to ferment.
Yes, i know, waiting is a bummer, but that’s what gives it that perfect tang.
Stay organized! grab all your equipment—like a clean glass jar, a mixing bowl, and measuring cups—so you aren’t scrambling around mid-recipe.
Oh, and food safety for fermenting is super important. make sure everything’s clean to avoid any unwanted surprises.
Step-by-Step Process
Alright, let's dive into the nitty-gritty. Here’s how to whip up your own gluten-free sour cream :
-
Combine Ingredients : In a mixing bowl, whisk together 1 cup heavy cream , 1 tablespoon lemon juice , and 1 tablespoon plain yogurt . Make sure it's mixed well!
-
Transfer to Jar : Pour that creamy goodness into your clean glass jar. Make sure it’s loosely covered; you want some airflow for fermentation!
-
Let it Ferment : Leave that jar at room temperature (around 70° F or 21° C ) for 24 hours . You’ll notice the magic happen as it thickens.
-
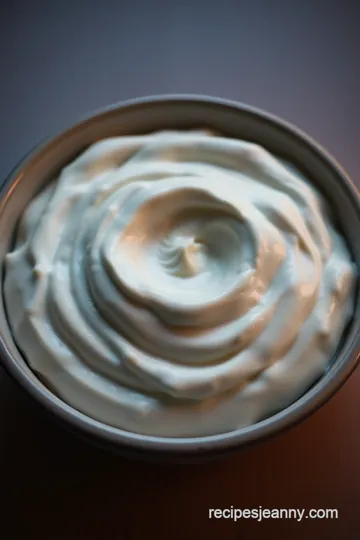
Check for Doneness : After a day, if it’s thick and tangy, boom! You’re done. If not, let it sit for a few more hours.
-
Refrigerate : Lastly, stir it well, cover it tightly, and pop it in the fridge for up to two weeks.
Expert Techniques
Now, let’s talk pro tips to get this right. Here’s what you need to know about quality checkpoints :
-
Fresh Ingredients : Always start with the freshest cream and yogurt. It makes a world of difference, trust me.
-
Temperature Control : That room temperature is crucial for the fermentation process. Too cold? No bueno. Too hot? You’re in trouble.
-
Timing Precision : Stick to that 24 hours . It might be tempting to sneak a taste, but resist!
-
Visual Cues for Doneness : When it’s thick and has a slightly tangy smell, you know you're in the zone!
Success Strategies
Okay, we all make mistakes. Here are common ones to steer clear of:
-
Skipping the Cleanliness : Using unclean equipment can ruin your sour cream. Yikes!
-
Using Old Ingredients : Check those expiration dates. Old cream or yogurt is a recipe for disaster.
-
Not tasting : feel free to adjust the flavor by adding a bit more lemon juice or even switching up the yogurt for a different tang.
Explore the culinary uses of sour cream !
And guess what? This is a make-ahead option ! You can whip it up a day in advance and have it waiting for your next taco night.
A Delicious Closer
So there you have it! you’ve just made homemade gluten-free sour cream that’s creamy and full of flavor. it’s perfect for your baking or as a topping for just about anything.
Seriously, this stuff is magic! and if anyone asks, “ is sour cream gluten free? ” you can confidently tell them, “you bet!”
Stay tuned for the last part of this journey—additional information on sour cream variations, fun flavor enhancements, and more ways to enjoy this tangy delight.
You’re going to love using this in all your creamy dips and sauces! trust me, once you go homemade, you'll never want store-bought again.
Pro Tips & Secrets
Alright, folks! let’s dive into some pro tips and secrets for making your homemade gluten-free sour cream stand out. i’ve been in the kitchen enough to know that little tweaks can make a big difference .
First off, fresh ingredients are key . you want that heavy cream to be as fresh as possible. personally, i've messed up a recipe because i thought expired cream was “good enough.
” trust me, it’s not! when you're mixing together that heavy cream, lemon juice, and yogurt, whisk them like you mean it.
Get in there! it makes the fermentation process better and gives you a creamier texture .
Speaking of fermentation, temperature matters! aim for around 70° f (or 21° c) which means no direct sunlight, my friends.
This way, your sour cream can develop that perfect tanginess we all know and love. if your kitchen is cold, think about putting your jar near the oven or on a warm windowsill.
And hey, don’t forget to taste test. you might want a bit more lemon to amp up that tangy flavor profile !
Perfect Presentation
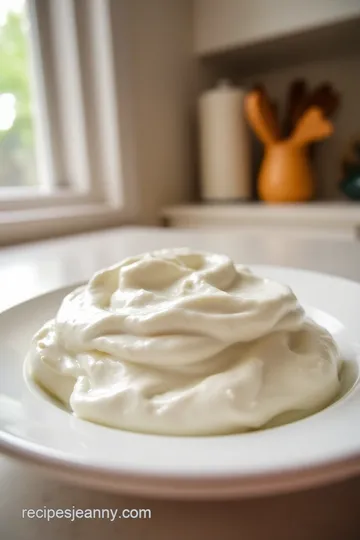
Now let’s talk presentation . i mean, who doesn’t want to dig into something that looks as good as it tastes? for the ultimate plating techniques , use a nice shallow bowl.
Then, give your sour cream a generous dollop right in the center.
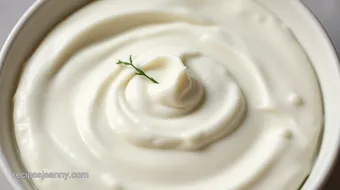
For garnish, how about some fresh herbs? a sprinkle of chives or parsley adds a pop of color and freshness.
You can also add a bit of paprika for a beautiful contrast. if you’re serving it as a dip, why not use colorful veggies or crispy tortilla chips around the edge for that visual appeal ? nothing says “look at me” like a colorful spread.
Storage & Make-Ahead
Now, let’s chat about storage because nobody wants sour cream on their counter turning into weird science experiments! your homemade sour cream can last up to two weeks in the fridge – don’t wait that long, though; you’ll want to use that creamy goodness asap.
Just keep it in a tightly sealed container. if you’ve got leftovers, and let’s be real here, who doesn’t? you can even use it in scrambles, tacos, or as a base for dressing.
If you plan on making this a day in advance for a party, it’s perfect! Just make sure to give it a good stir before serving. Freshness is everything, right?
Creative Variations
For those who like shaking things up, there are plenty of creative variations you can try! want a lil’ kick? mix in some chipotle powder for a spicy sour cream.
Or how about an herbed version? add dill or cilantro for a fresh twist that’s tasty on tacos.
Don’t forget dietary modifications if you're targeting specific diets. A vegan version can be made using coconut cream and dairy-free yogurt. It’s an easy sour cream recipe everyone can enjoy.
And seasonal twists? In the summer, muddle in fresh berries for fruit dips or a dessert sauce. You’ll be amazed at how versatile sour cream can be!
Complete Nutrition Guide
Now onto the complete nutrition guide . homemade gluten-free sour cream is not just delicious; it carries some solid nutritional benefits.
With roughly 100 calories per serving , it has healthy fats from the cream which are great for your body.
Plus, the plain yogurt adds some protein and gut-friendly probiotics.
When crafting a meal around your sour cream, think about balance. pair it with fresh veggies or proteins for a well-rounded dish.
Remember, the beauty of sour cream is its versatility in everything from creamy dips to sauces.
Expert FAQ Solutions
Okay, let’s tackle some common questions . a frequently asked one i hear is, “ is sour cream gluten free? ” the answer is a big yes! most normal, store-bought sour cream has no gluten.
But always check the label to be safe.
What if it doesn’t thicken? It could be the fermentation temperature. No worries! Just give it a few extra hours.
For those looking for success tips —stir well after it thickens. it helps achieve a consistently airy texture. and remember, sour cream uses extend beyond taco toppings—it’s your best friend in baking, too, adding moisture to cakes and muffins.
Wrap-Up
So there you have it! making your homemade gluten-free sour cream is a simple and rewarding adventure in the kitchen.
With these tips, tricks, and ideas, you'll find that not only is it super easy to mix up, but it can also elevate your meals beyond belief.
Whether you’re hosting a taco night or making creamy dips for a movie marathon, this sour cream is gonna be a star on your table.
Now, go experiment and enjoy! You got this!
Homemade Gluten-Free Sour Cream Card
⚖️ Ingredients:
- 1 cup (240 ml) heavy cream
- 1 tablespoon (15 ml) lemon juice or white vinegar
- 1 tablespoon (15 ml) plain yogurt or buttermilk
🥄 Instructions:
- Step 1: In a mixing bowl, whisk together the heavy cream, lemon juice (or vinegar), and yogurt (or buttermilk) until well blended.
- Step 2: Pour the mixture into a clean glass jar or container, ensuring it is loosely covered to allow for fermentation.
- Step 3: Leave the jar at room temperature (about 70°F or 21°C) for 24 hours to allow the mixture to thicken and develop a tangy flavor.
- Step 4: After 24 hours, the sour cream should be thick and slightly tangy. If not, let it sit for a few more hours.
- Step 5: Once thickened, stir the sour cream, cover it tightly, and refrigerate for up to 2 weeks.
Previous Recipe: How to Make Amazing Tropical Banana Seed Pudding Today!
Next Recipe: The Ultimate Otis Spunkmeyer Cookie Dough Cookies: Amazing Homemade Delights