Delicious Gluten-Free Peanut Butter Pop Tarts
Craving a nostalgic treat? Join me in baking gluten-free pop tarts filled with creamy peanut butter! Such a comforting and easy recipe to enjoy.

- Sweet Nostalgia: The Story Behind Homemade Pop Tarts
- A Modern Twist on a Classic Treat
- Cost-Efficient Deliciousness
- Healthy Snacking, The Fun Way
- A Treat for Every Occasion
- Essential Ingredients Guide
- Mastering Professional Cooking Techniques
- Bake Gluten Free Pop Tarts with Peanut Butter: Secrets for the Perfect Treat
- Recipe Card
Sweet Nostalgia: The Story Behind Homemade Pop Tarts
Oh my gosh, do you remember those mornings of rushing to catch the school bus with a pop tart in one hand and a backpack in the other? those sweet, flaky pastries instantly bring me back to the carefree days of childhood.
Now, let's be real, there's something magical about baking your own treats at home. and if you're craving something familiar yet special, let me show you how to bake gluten free pop tarts with peanut butter .
This recipe is not just about nostalgia; it's the perfect blend of comfort food dessert and healthier, homemade goodness.
A Modern Twist on a Classic Treat
The history of pop tarts goes back to the 1960s when they exploded onto the breakfast scene, and honestly, they haven’t left since! fast forward to today, and these bakery-style pop tarts are getting a gluten-free makeover.
Isn’t that exciting? nowadays, people are all about healthier options and dietary needs, so this easy and fun recipe checks the boxes for gluten-free pastries that still deliver joy.
Making these little gems takes about an hour, including prep and bake time. let's be honest, it might feel like a bit of a mission at times—medium difficulty—but trust me, once you get the hang of it, you'll impress everyone with your skills!
Cost-Efficient Deliciousness
Before we dive into the recipe, let’s talk about costs. if you’re like me, you love making quick gluten-free snacks without breaking the bank.
The ingredients for our peanut butter filling and flaky pastry are super simple and affordable. plus, this recipe yields six satisfying servings to share with the fam or keep all to yourself! and hey, homemade is always a more budget-friendly option than the store-bought kind.
Healthy Snacking, The Fun Way
Now to the good stuff—the key benefits of these homemade delights. first off, they pack a protein punch thanks to the creamy peanut butter .
You get a decent dose of energy without the guilt of processed ingredients that store-bought pastries often have. plus, you can control the sweetness and feel good knowing exactly what’s in each bite.
These little pastries are also versatile enough to be a sweet breakfast idea or a decadent snack for after school.
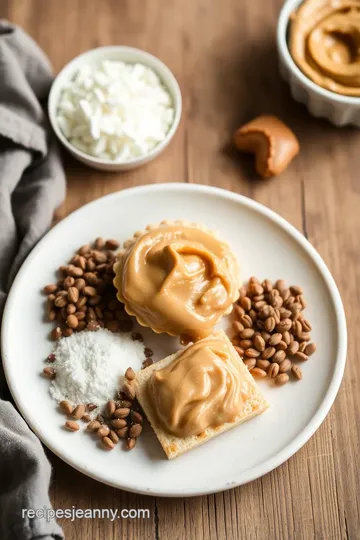
Let’s talk unique selling points. picture this: soft, flaky gluten-free pastry wraps around a luscious peanut butter filling. it’s not just delicious; it’s also a fun baking project you can do with kids or for yourself when you crave a little therapy in the kitchen.
Honestly, there’s nothing quite like the smell of freshly baked goods wafting through the house. and let’s just say, you can impress your friends at brunch with these comfort food desserts while showing off your gluten-free baking techniques .
A Treat for Every Occasion
Whether it’s a lazy saturday morning or a fun bake sale at school, these homemade pop tarts fit right in.
They’re perfect for special occasions or just a random tuesday. you can even get creative and add some chocolate glaze variations or mix up the fillings with different nut butter alternatives.
Imagine a batch with almond butter or even fruit preserves—but i digress!
Anyway, to bring this home, let’s look at the ingredients you need to whip up this delightful recipe. Here’s what you’ll need...
Essential Ingredients Guide
Baking can be a bit like magic, right? you toss a bunch of ingredients together, and voilà – you’ve got something delicious! let’s chat about some premium core components that’ll get you on your way to whipping up amazing treats like homemade gluten-free peanut butter pop tarts .
Premium Core Components
First off, when you're diving into the world of gluten-free baking , it's crucial to know your ingredients . using quality markers like color, texture, and smell can be super helpful.
Honestly, you want to pick flour that looks fresh and feels a bit fluffy. all-purpose gluten-free flour should be light and airy.
Now, let’s cover some specific measurements:
- 1 ½ cups gluten-free all-purpose flour (180g)
- ½ cup unsalted butter , cold and cubed (113g), for flakiness.
Make sure to store your ingredients properly. for flour, keep it in an airtight container in a cool, dry place.
Most gluten-free flours last around 3-6 months . a quick smell test can go a long way – if it smells off, toss it!
When you’re selecting your ingredients, remember that freshness matters . look for non-expired items. if you’re shopping for butter, check if it’s firm, not soft.
And for eggs? give ‘em a little shake – you should hear no sloshing if they're fresh.
Signature Seasoning Blend
Next up: what about flavor? Your pop tarts deserve a little zing! Here’s where signature seasoning blends come in.
For a sweet pastry treat like this, you gotta have sugar and a hint of salt. sugar helps balance the nutty notes of the peanut butter filling .
If you want a spice combo for more classic pop tart flavors, consider cinnamon or a dash of vanilla extract .
Herbs and spices can also enhance your filling when you begin to experiment. as you bring in different flavors, don’t forget the regional variations ! for instance, a dash of maple syrup could give your pop tarts a vermont twist.
Smart Substitutions
Worried you might run out of something? No sweat. Knowing smart substitutions is key when whipping up your favorite easy gluten-free desserts.
If you're out of gluten-free all-purpose flour , try almond or coconut flour (just adjust the water amount). Similarly, if you’re running low on peanut butter, feel free to swap it for almond butter! Those nut butter alternatives can pack a punch, too!
For those of you needing to cater to dietary needs, don’t panic! you can easily make these dairy-free pop tart options by replacing butter with coconut oil.
Or create a vegan pop tart by using a flax egg. trust me, no one will be the wiser!
Kitchen Equipment Essentials
Before you start your baking adventure, let’s talk kitchen gear . You don’t need to break the bank, but having a few must-have tools can make all the difference. You’ll want:
- Mixing bowls for combining all your ingredients.
- A rolling pin to roll out your dough perfectly.
- Parchment paper to prevent sticking – just trust me on this one!
- A pastry brush for that golden glaze.
If you don’t have a fancy rolling pin? no worries; a clean wine bottle works just as good in a pinch! and don’t get lost in fancy storage options.
A simple container works perfectly to store your fresh pop tarts.
Wrapping It Up
So, whether you’re diving into making your first batch of bakery-style pop tarts or you’re a pro at gluten-free baking techniques , knowing the basics helps immensely.
We've covered those essential ingredients , how to use them, and some tricks and tips for substitutions.
Guess what? With all this knowledge, you’re ready to tackle the next steps. Let’s roll out that dough, Bake Gluten Free Pop Tarts with Peanut Butter , and indulge in these sweet breakfast ideas together! Ready? Let’s hit the kitchen!
Mastering Professional Cooking Techniques
Alright, friends! let’s dive into the delicious world of professional cooking techniques. whether you're whipping up a meal for your family or rolling out your favorite homemade pop tarts , a little preparation goes a long way.
So, let’s spritz a bit of joy into our kitchens and talk about how you can nail down those essential steps.
Essential Preparation Steps
First off, if you’re not familiar with mise en place , it’s your best friend. it means everything in its place.
Before you even think about cooking, gather all your ingredients. trust me, there’s nothing worse than realizing you’re out of sugar midway through making your gluten-free pastry dough for those scrumptious peanut butter pop tarts .
Time management is key, too. break down your cooking tasks into chunks and focus on. you know that time you thought would be enough to make a fancy meal? yeah, that went out the window when you forgot to chop the onions first.
Always have a game plan!
Oh, and don’t ignore safety. Keep your workspace clean (we don’t need any surprises when you're rolling out dough), and be cautious with knives—your fingers are not for chopping, folks!
Step-by-Step Process
Now, let’s get into how to actually create something amazing. first, preheat that oven to 350° f ( 175° c) .
This is crucial! you don’t want to throw your pop tarts into a lukewarm oven.
-
Prepare the dough: combine 1 ½ cups of gluten-free all-purpose flour , ¼ teaspoon salt , and 3 tablespoons of sugar in a bowl.
Cut in ½ cup of cold, cubed butter until it's crumbly, then add one large beaten egg and 2 tablespoons of cold water .
Chill your dough for 30 minutes .
-
Make the Filling: Mix ½ cup of creamy peanut butter , ¼ cup of powdered sugar , and 1 teaspoon of vanilla extract until smooth. Voilà! Peanut butter filling is done.
-
Shape the Treats: Roll that chilled dough out to ¼ inch thick . Cut it like you mean it into rectangles.
-
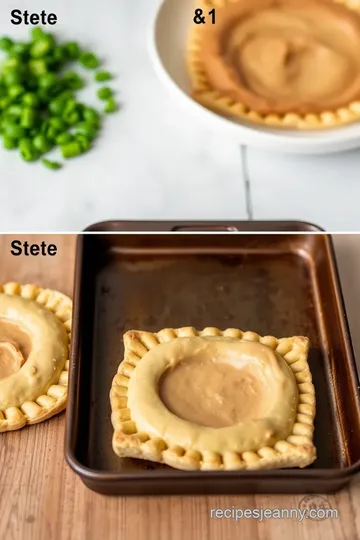
Assembly Line: Dollop peanut butter filling onto half of the rectangles, moisten edges with a splash of water, and top with another rectangle. Use a fork to seal those edges tight.
-
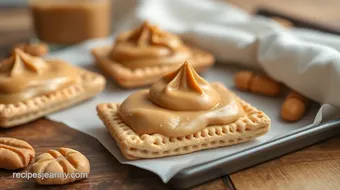
Bake it up: place on a baking sheet (lined with parchment paper to avoid the stick ) and bake for about 20 minutes or until they’re golden brown and calling your name.
-
Optional Glaze: Whisk together some powdered sugar and milk for a glaze, then drizzle it over once they’ve cooled. Extraordinary!
Expert Techniques
Here’s where things get a little fancy, but don’t sweat it. You can totally make bakery-style pop tarts at home!
Critical steps: Always check the temperature while baking. If it's too hot, your flaky pastry recipe might burn. Aim for a golden finish.
Quality checkpoints include those visual cues for doneness—if they look like those pop tarts you remember from childhood, they’re ready! and if you're in a pickle? don’t worry! roll with it.
If the dough seems too sticky, just add a bit more gluten-free flour.
Success Strategies
Now, let’s chat about some common mistakes. don’t overstuff your pop tarts with filling, or they'll burst open. also, be sure you're keeping that butter cold for a flaky texture—nobody likes a soggy pastry.
Quality assurance is all about tasting along the way. and hey, if you want to make ahead - stash those easy gluten-free desserts in the fridge.
They can last a couple of days, or even freeze for later!
Nothing beats nostalgia like baking with your kids, making those sweet breakfast ideas together. Lots of laughs, a little mess, and deliciousness to boot!
Now that you’ve got my ultimate pro cooking tips, go forth and whip up some gluten-free pop tarts with peanut butter .
Can't wait for you to try this fun baking project and indulge in some comfort food desserts you made yourself!
Additional Information
As we wrap up this tasty journey, remember that it’s all about experimentation in the kitchen. sure, things might not turn out perfect every time, but that’s half the fun! so roll up your sleeves, and don’t hesitate to think outside the box.
Whether it’s a vegan pop tart substitution or a chocolate glaze variation, the kitchen is yours to play with. happy baking!
Bake Gluten Free Pop Tarts with Peanut Butter: Secrets for the Perfect Treat
Oh my gosh, who doesn’t love pop tarts ? remember those cozy mornings when we’d snag a frosted pop tart on our way out the door? well, now imagine making your very own, homemade pop tarts —and better yet, gluten-free ! with this gluten-free pastry infused with creamy peanut butter filling, you can bring back that nostalgic vibe while also keeping things yummy and allergy-friendly.
Let's dive into all the juicy tips and tricks for creating these adorable treats!
Pro Tips & Secrets
Chef's personal insights: listen, pastry can be tricky. make sure your butter is super cold —that’s the secret to achieving that perfectly flaky pastry recipe .
My first few attempts ended in a sad, mushy mess because i used room-temperature butter. don’t be like me!
Time-saving techniques: you can whip up the dough ahead of time. just pop it in the fridge for about 30 minutes.
Trust me, this little bit of chilling helps the dough come together beautifully.
Flavor Enhancement Tips: Try adding a dash of cinnamon to your peanut butter filling. It kicks up the flavor and makes it a cozy, comforting treat.
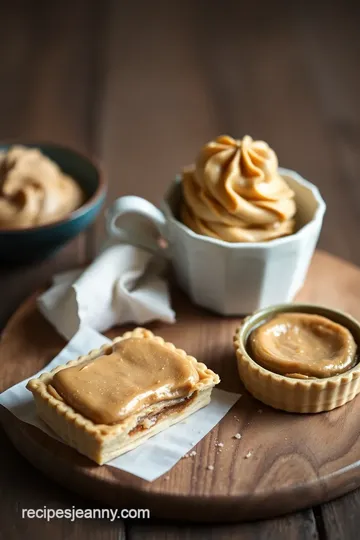
Presentation Advice: Presentation is key! Dust some powdered sugar on top. Not only does it make it look bakery-style, but it also adds to the sweetness.
Perfect Presentation
Let’s be real, the first bite is all about the eyes. For the ultimate sweet pastry treats , follow these tips:
Plating Techniques: Use a simple white plate. The colors will pop! Place your pop tart at an angle; it just looks fancier.
Garnish Ideas: A sprinkle of crushed peanuts on top adds crunch and a visual appeal that screams, “Look at me!”
Color Combinations: If you decide to add a chocolate glaze, the contrast of dark chocolate against the golden pop tart? Chef’s kiss!
Visual Appeal Tips: Don’t forget the styling! A side of fresh berries not only looks cute but adds a burst of color and freshness.
Storage & Make-Ahead
These pop tarts can be a lifesaver during busy mornings. Here’s how to keep them fresh:
Storage Guidelines: After baking, let them cool completely. Store them in an airtight container. They’ll last for about 3 days at room temperature.
Preservation Methods: You can freeze them, too! Just wrap individual tarts in plastic wrap and toss them in a freezer bag. They’ll be good for about a month.
Reheating Instructions: Pop them in a toaster oven for that freshly baked feel. If you're in a hurry, a microwave works, but they won’t have that crispy goodness.
Freshness Duration: Generally, for the best taste and texture, enjoy them within 1-2 days of making.
Creative Variations
Why stop at just peanut butter? Here’s where you can get creative!
Flavor Adaptations: Mix things up with almond butter instead of peanut butter for a nutty twist.
Dietary Modifications: Got a dairy allergy? No problem! Just swap butter for coconut oil, and use almond milk in the glaze.
Seasonal Twists: In the fall, try pumpkin spice filling! It’s a super fun seasonal adaptation that’ll have your taste buds dancing.
Regional Variations: Think of your favorite desserts—what about a s’mores pop tart with chocolate and marshmallow filling? How fun would that be?
Complete Nutrition Guide
Now let’s talk numbers. Knowing what’s in your food helps make all the difference!
Detailed Breakdown: Each pop tart has around 250 calories, packing a punch of peanut buttery goodness. It's a nice treat without going overboard.
Health Benefits: Gluten-free doesn’t have to mean flavor-free! The nut butter options add protein, making them a decent snack or breakfast option.
Dietary Considerations: As a gluten-free snack, these are good for folks with gluten intolerance. Plus, you can easily make them vegan or dairy-free.
Portion Guidance: Serving size is 1 pop tart, but honestly, if you’re feeling cheeky, who’s judging?
Expert FAQ Solutions
Got questions? I’ve got answers!
Common Questions: Can I use regular flour? Nope! Stick to the gluten-free all-purpose flour for this one.
Troubleshooting Guide: If your dough is crumbly, add a tad more cold water. If it’s too sticky, just sprinkle in a little more flour.
Success Tips: Remember to preheat the oven. Nothing worse than forgetting and watching your pop tarts turn into sad blobs.
Variations Explained: If you want a chocolate glaze, equal parts powdered sugar and cocoa powder will do the trick. Just add a little milk until you reach your desired consistency.
Conclusion: look into into Baking!
There you have it—your ticket to deliciously nostalgic gluten-free peanut butter pop tarts! what a fun baking project to tackle, right? with all these tricks up your sleeve, don’t be shy! jump in and create these easy gluten-free desserts that your friends and family will love.
You’ll be amazed at how satisfying it is to bake gluten free pop tarts with peanut butter in your own kitchen.
So grab your apron, rally the kids, and let’s make some memories (and tasty treats) together!
Delicious Gluten-Free Peanut Butter Pop Tarts Card
⚖️ Ingredients:
- 1 ½ cups gluten-free all-purpose flour (180g)
- ¼ teaspoon salt
- 3 tablespoons sugar (36g)
- ½ cup unsalted butter, cold and cubed (113g)
- 1 large egg, beaten
- 2 tablespoons cold water (30ml)
- ½ cup creamy peanut butter (125g)
- ¼ cup powdered sugar (30g)
- 1 teaspoon vanilla extract
- ½ cup powdered sugar (60g)
- 2 tablespoons milk or almond milk (30ml)
- 1 tablespoon cocoa powder (optional for chocolate glaze)
🥄 Instructions:
- Step 1: In a mixing bowl, combine gluten-free flour, salt, and sugar.
- Step 2: Add cold, cubed butter and mix until crumbly (use a pastry cutter or your fingers).
- Step 3: Incorporate the beaten egg and cold water until a dough forms.
- Step 4: Shape into a disc, wrap in plastic, and chill in the fridge for 30 minutes.
- Step 5: In a bowl, mix peanut butter, powdered sugar, and vanilla extract until smooth.
- Step 6: Preheat the oven to 350°F (175°C).
- Step 7: On a floured surface
- Step 8: Cut into rectangles (3x4 inches) with a knife or pizza cutter.
- Step 9: On half of the rectangles, spoon a dollop of peanut butter filling.
- Step 10: Moisten the edges with water and place another rectangle on top.
- Step 11: Press edges with a fork to seal.
- Step 12: Transfer to a lined baking sheet.
- Step 13: Brush the tops with melted butter and poke holes for steam release.
- Step 14: Bake for 20 minutes or until golden brown.
- Step 15: Whisk powdered sugar, milk, and cocoa powder (if using) until smooth and drizzle over cooled pop tarts.
Previous Recipe: Ultimate Baking Oats Smokey Bourbon Toffee Cookies: A Delicious Treat
Next Recipe: How to Bake Vegan Brownies with Irresistible Caramel: A Decadent Delight