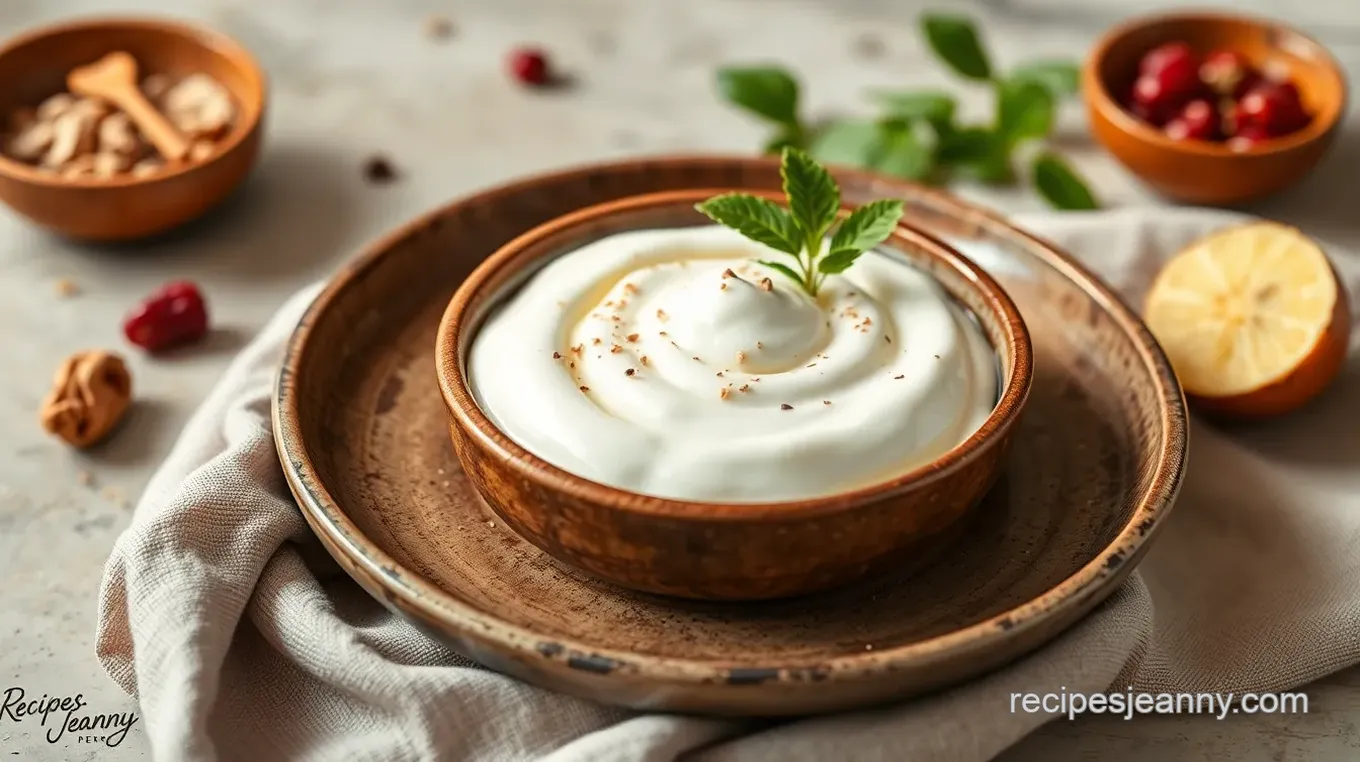
Quick & Easy Homemade Dahi: Delightful Yogurt in Your Own Kitchen
Wondering how to make yogurt at home? This quick & easy dahi recipe is a delicious way to enjoy fresh yogurt, packed with probiotics and flavor. Let's dive in!

Oh my gosh, let me share a little story with you! a few years back, i decided to try making yogurt at home for the first time.
I was scrolling through instagram and saw this amazing post about homemade yogurt recipe and thought, “how hard can it be?” spoiler alert: it turned out to be one of the best kitchen adventures i’ve ever had! so, if you’re wondering how to make yogurt at home - quick & easy dahi , let me tell you, you’re in for a treat! you’re about to discover a wonderful, probiotic-rich world of possibilities.
Now, homemade dahi has been a staple in indian households for centuries, cherished not just for its deliciously creamy texture but also for its numerous health benefits.
These days, everyone’s talking about gut health and incorporating probiotics into their diets, and guess what? dahi fits perfectly into that conversation! so, if you’ve ever thought about trying your hand at easy yogurt-making at home, now’s the time.
Trust me, it will be worth it!
Recipe Overview
Did you know that the roots of yogurt go back thousands of years? it’s believed yogurt originated in the middle east and central asia, but the traditional yogurt in indian cuisine made its way into many homes, creating a beloved food culture.
Now, in the age of health-consciousness, dahi has become super popular in the west too. everyone’s looking for ways to make their meals healthier, and let me tell you, this simple dahi recipe is an absolute game-changer.
Worried about the time involved? no sweat! you’re talking about just 10 minutes of active prep time , followed by a fermentation process that will take 6- 8 hours.
Essentially, you can set it and forget it! the best part? it costs next to nothing to whip up—you’ll yield about 2 cups of fresh yogurt for just a few bucks!
Key Benefits
So, why should you put down the store-bought kind and dive into homemade yogurt? let’s break it down. first off, the health benefits of yogurt are pretty incredible! packed with live cultures, vitamins, and minerals, homemade dahi is an easy probiotic food that can help with digestion and boost your immune system.
Plus, with just two ingredients—whole milk and a bit of plain yogurt—you’re sidestepping all those additives found in most commercial yogurts.
And talk about versatility ! you can cook with dahi , use it in dips, or simply enjoy it with fruits or a drizzle of honey as a healthy snack.
Need a refreshing twist? blend it into smoothies or use it as a base for salad dressings. the options are endless! it's perfect for any occasion, whether you’re having a casual family dinner or hosting a special occasion.
What's more? compared to most yogurt recipes, this one stands out because it lets you control the texture and tanginess to suit your taste.
That means you can keep it simple or mix it up with flavor variations depending on your mood!
Feeling pumped yet? Great! Next, let’s chat about the ingredients you’ll need for this quick yogurt recipe. You'll be amazed at how easy and satisfying it is to make your own creamy yogurt at home !
And there you have it! from a simple personal story to an engaging overview, you're now in the loop about making dahi that's not only delicious but is also a fantastic addition to your kitchen repertoire.
What’s next? let’s dive into the ingredients you’ll need to get started on this delightful journey!

Your Essential Ingredients Guide: Building Blocks for Culinary Success
When diving into the world of homemade yogurt recipes , it’s important to have a grasp on the essential ingredients that not only elevate your dishes but also make the cooking process a breeze.
Let’s break this down into manageable bites – just like a good snack!
Premium Core Components: What You Need
First things first – measurements ! for quick & easy dahi , you’ll need 4 cups of whole milk and 2 tablespoons of plain yogurt with live cultures .
In metric terms, that’s about 960 ml of milk and 30 g of yogurt .
Now, quality matters here . when selecting yogurt to kick off your fermentation process, make sure it’s got live active cultures .
This is the magic we need for our dahi to turn out probiotic-rich and delicious. if it’s loaded with additives, toss it back.
Now, onto storage . fresh milk should live in your fridge for about a week. once you've whipped up your yogurt, it can sit pretty in an airtight container for up to a week .
A freshness tip ? Always check the sell-by dates on your ingredients, and give ‘em a good sniff! Nothing beats the smell of fresh milk, right?
Signature Seasoning Blend: Adding That Zing
Alright, while dahi is a simple recipe, we can jazz it up. think about essential spices, like cumin or black pepper , if you wanna get a lil’ adventurous.
Herb selections like mint and cilantro can take your dahi to new heights!
Did you know different regions have their own spin on yogurt? For Indian cooking, we mix in spices and serve it with everything from rice to parathas.
Smart Substitutions: Flexibility Is Key
So, life happens, and sometimes you run out of ingredients. no worries! if you don’t have whole milk, 2% or even almond milk can do the job.
And if your yogurt starter isn’t available, any plain yogurt should do, as long as it contains those all-important live cultures.
Also, if someone is dairy-free, check out non-dairy yogurt recipes . They can whip up creamy vegan versions, too! It’s all about being adaptable, my friends.
Kitchen Equipment Essentials: The Right Tools
Having the right kitchen tools can make a world of difference in making sure a smooth yogurt-making process. Get yourself a medium saucepan, a cooking thermometer (super handy!), and a whisk.
If you don’t have a thermometer, just remember the good ol' “warm milk” trick—if you can stick your finger in there for a few seconds and it feels warm but not hot, you’re in the right spot!
For fermentation, a glass container with a lid is key. you might also want something to cover it like a kitchen towel.
Keep it cozy while it ferments, kind of like wrapping up on the couch on a chilly day!
The Bottom Line
Now that you’ve got your essential ingredient guide , you’re on the right track to cultivate a creamy, tangy, and downright delightful dahi! with all the tips on freshness, substitutions, and equipment, you’re ready to dive into the dahi preparation steps with confidence.
The health benefits of yogurt are impressive, from gut health to being a great source of protein. and once you've got it down, you can sprinkle some creativity into your yogurt by whipping up interesting flavors or even serving it as part of healthy snacks, smoothies, or dips.
So, ready to jump into those instructions? let’s make yogurt at home – quick & easy dahi! this is where the magic starts, and trust me, you’re gonna love the results.
Cooking at home not only feels good, but it also feeds your soul. get your apron on; let’s make this happen!

Unveiling the Secrets of Professional Cooking
Hey there, kitchen warriors! today, let’s dive into the art of professional cooking and unlock some key techniques that’ll amp up your kitchen game.
Whether you're a seasoned chef or just starting out, mastering these methods will make your cooking feel less daunting and more like a delightful dance.
Think of it as your kitchen boot camp to make incredible dishes, and what better way to kick things off than with a fabulous homemade yogurt recipe? yes, i’m talking about making your own creamy, dreamy dahi !
Essential Preparation Steps
First off, let’s chat about mise en place —a fancy french term that just means “everything in its place.” before you start whisking or chopping, gather all your ingredients and tools.
This step will save you so much time and stress. your future self will thank you!
Time management is crucial, ya know? set timers for stuff like baking or boiling, and always give yourself a little buffer.
Nothing's worse than realizing dinner’s due in five minutes, and you’ve got a pot of boiling water with a frozen block of pasta in it! plan your cooking like a pro; keep a clock by your side.
Organize your workspace. Have a clean cutting board ready, and put your utensils close at hand—like, don’t scramble for that spatula while your sauce is about to boil over! And hey, safety first —use oven mitts, don’t leave knives lying around, and always keep a fire extinguisher nearby, just in case!
Step-by-Step Process
Alright, let’s get into the meat and potatoes (or should I say yogurt and milk?) of the process. Here’s how to whip up that luscious dahi:
-
Heat the Milk:
- Pour 4 cups of whole milk into a saucepan. Heat it up over medium until it reaches 180° F ( 82° C) . Stir occasionally to prevent burning.
-
Cool Down:
- Remove from heat and cool it down to 110° F ( 43° C) . Patience is key here; don't skip this step!
-
Inoculate the Milk:
- Take 2 tablespoons of plain yogurt and mix it with some cooled milk until dissolved. This is where the magic happens!
-
Fermentation:
- Pour it all into a clean glass container and cover it up. Now, find a nice warm spot (the oven with the light on works great) and let it sit for 6- 8 hours . Check at the 6-hour mark for thickness.
-
Refrigerate:
- Once your dahi is thickened to your liking, pop it in the fridge for about 2 hours before you dig in.
And voilà! You’ve just made probiotic-rich dahi right in your own kitchen. How cool is that?
Expert Techniques
When you’re making yogurt, make sure you’re following a few crucial quality checkpoints . use fresh milk and preferably a starter yogurt that’s plain and has live cultures.
And let's not forget to adjust based on the temperature of your environment—cooler spots will require more time for fermentation.
If things don’t work out as planned, crunchy yogurt? bad starter? no worries; it happens to the best of us! just keep experimenting until you've got that perfect yogurt .
Success Strategies
Now, let’s tackle some common mistakes. don’t rush the fermentation process—don’t disturb your yogurt too much! and for those aiming for the crème de la crème of dahi , strain your yogurt using a cheesecloth to thicken it.
Here’s a pro tip: store your homemade yogurt in an airtight container, and it’ll last up to a week.
And hey, if you're ever too busy to whip up fresh yogurt from scratch, there are definitely make-ahead options . You can double the recipe and freeze half the yogurt for later!
So, now that you’ve got the ingridients and techniques down, you are all set to explore the versatility of yogurt in your cooking.
Try using that creamy goodness in smoothies, dips, or even in savory dishes.
You see, making yogurt at home is an adventure —once you dive in, you might just discover a whole new world of cooking opportunities.
Don't forget, yogurt is not just a healthy snack; it’s the secret ingredient that can elevate so many recipes!
And stay tuned, because in the next section, we’ll explore additional information about the nutritional benefits, flavor variations, and even alternatives for making yogurt if you prefer non-dairy options.
So grab your apron and let’s keep this delicious journey going!

Pro Tips & Secrets for Homemade Dahi
Alright, let’s talk about how to make yogurt at home - quick & easy dahi ! if you’re diving into this yummy world of homemade yogurt recipes , i’ve got some killer tips and insights to up your yogurt game.
Chef's Personal Insights
First off, go for the best quality whole milk you can find. honestly, it makes a world of difference. you want that creamy texture? using fresh milk is the way to go.
And when you pick your starter yogurt, make sure it has live cultures . that’s the magic ingredient for great fermentation.
Time-Saving Techniques
Now, check this out—if you’re pressed for time, try heating your milk in smaller batches. it cools faster and cuts down on your wait time! also, once you inoculate the milk with your starter, give it about an hour in a warm spot, then wrap it in a kitchen towel.
This keeps it cozy, and trust me, cozy means creamy dahi!
Flavor Enhancement Tips
Want to jazz it up? a pinch of salt or a drizzle of honey before serving really takes it to the next level.
And don’t be shy—after setting, fold in some fruit purees or spices to experiment with flavors. just think about a flavored dahi with cardamom or vanilla.
Yum!
Presentation Advice
When it comes to serving, a few sprigs of mint on top makes your dahi pop! you can even drizzle it with honey for that sweet touch or toss in some nuts for crunch.
It’s all about that visual appeal, right?
Perfect Presentation
Plating Techniques
After your dahi is all set, you want to serve it up looking just right . use a clean glass bowl—glass is cool because it shows off that creamy texture.
Ladle the yogurt gently, and keep the edges clean to look super fancy.
Garnish Ideas
As mentioned, mint works like a charm. you could also sprinkle some cinnamon or even chili powder for a savory touch.
And guess what? a few slices of fresh fruit or toasted nuts can really add that burst of color we all love in our food!
Color Combinations
Think about those warm earthy tones with your dahi. Pair it with vibrant fruits like berries or pomegranate seeds. It’s not just about taste; it’s about grabbing your attention right from the table!
Visual Appeal Tips
If you want to wow your friends, serve your dahi in a nice bowl with a contrasting color. a bright red plate with white dahi? so striking! it’s a simple way to make your dish look chef-level .
Storage & Make-Ahead
Storage Guidelines
Once you’ve finished making your dahi, it needs to be stored properly. serve fresh or place in an airtight container.
It should be good in the fridge for about a week—if it lasts that long!
Preservation Methods
To keep it fresh, avoid dipping into the container with dirty spoons. Always use clean utensils to scoop out what you need. This keeps those probiotic-rich dahi cultures happy.
Reheating Instructions
Skip the microwave; it’s better enjoyed cold or at room temperature. if you want to warm it up slightly for cooking, stir gently on low heat.
No boiling, please. that’ll ruin the lovely texture.
Freshness Duration
Typically, you should finish it within five to seven days. But after about three, start checking it for taste. Trust your senses!
Creative Variations
Flavor Adaptations
This is where you get to have fun! You can throw in some seasonal twists , like pumpkin puree in the fall or even some berries in the summer. It’s totally versatile.
Dietary Modifications
If you’re looking for non-dairy options, try almond or coconut milk. You can make a pretty fab non-dairy yogurt recipe that hits the spot!
Regional Variations
Dahi is great as it is, but in various cuisines, you can mix it up! Indian yogurt recipes often include spices, making it spicy.
Complete Nutrition Guide
Detailed Breakdown
A serving of your homemade dahi packs about 100 calories. Plus, you're getting protein, good fats, and the goodness of probiotic-rich cultures.
Health Benefits of Yogurt
This stuff is not just good for your taste buds! It's known to improve digestion and boost your immune system. A real power food , if you ask me.
Dietary Considerations
For those watching their carbs, homemade dahi is pretty friendly. And if you need to, adjust your milk fat for your preferred dietary style.
Portion Guidance
Keeping it to about half a cup per serving is typically enough. But if you’re feeling adventurous, feel free to go for more—just remember it’s still yogurt!
In conclusion, making homemade dahi is not just about mixing milk and yogurt. it’s about creating a little bit of magic in your kitchen.
You’ll be surprised how easy it is to make yogurt at home yourself. now get your kitchen tools ready, give it a try, and enjoy those delicious health benefits.
The journey to creamy yogurt is totally worth it! happy yogurt-making, friends!
Frequently Asked Questions
What is the best way to make yogurt at home - quick & easy dahi?
The best way to make yogurt at home - quick & easy dahi is to start with fresh whole milk and a store-bought plain yogurt that contains live cultures. Heat the milk, let it cool, mix in the yogurt, and allow it to ferment in a warm spot for 6-8 hours. Monitoring the temperature during fermentation is key to achieving creamy dahi.
How can I ensure my dahi sets properly during fermentation?
To ensure your dahi sets properly, maintain a warm environment during fermentation, ideally around 110°F (43°C). Avoid opening the container during this process, and check the consistency after 6 hours. If it's too cold, consider wrapping the container in towels or placing it in an insulated cooler.
Can I make yogurt at home - quick & easy dahi with non-dairy milk?
Yes, you can make yogurt at home - quick & easy dahi using non-dairy milk such as almond or coconut milk. However, make sure to add a starter culture with live cultures, as the fermentation process may differ slightly. Keep in mind that the texture and flavor may vary from traditional dairy yogurt.
How should I store leftover homemade dahi?
Store leftover homemade dahi in an airtight container in the refrigerator. It can typically last for up to one week. If you notice any off-smells or mold, it’s best to discard it. You can also freeze dahi for longer storage; just remember to thaw and stir well before using.
Are there any variations I can try for my homemade dahi?
Absolutely! You can create flavored dahi by mixing in ingredients like honey, fruit purees, or even spices like cardamom. For a savory twist, consider stirring in fresh herbs such as mint or cilantro after the dahi has set. Straining the dahi can also provide a thicker Greek-style yogurt texture.
Quick & Easy Homemade Dahi: Delightful Yogurt in Your Own Kitchen Card

⚖️ Ingredients:
- 4 cups whole milk
- 2 tablespoons plain yogurt with live cultures
🥄 Instructions:
- Step 1: Pour the whole milk into a medium saucepan.
- Step 2: Heat over medium until it reaches 180°F (82°C), stirring occasionally to prevent scorching.
- Step 3: Remove from heat and let it cool to about 110°F (43°C).
- Step 4: In a small bowl, combine 2 tablespoons of plain yogurt with a few tablespoons of the cooled milk and whisk until smooth.
- Step 5: Stir this mixture back into the cooled milk until evenly distributed.
- Step 6: Pour the mixture into a clean glass container and cover with a lid or cheesecloth.
- Step 7: Place the container in a warm spot to ferment for approximately 6-8 hours, or until thickened to your liking. Check after 6 hours.
- Step 8: Once set, refrigerate the dahi for about 2 hours before serving.
- Step 9: Store any leftover dahi in an airtight container for up to a week.
Previous Recipe: How to Make a Delicious Tropical Fruit Salad with Lime Honey Dressing
Next Recipe: Easy & Crispy Garlic Bread Strips: A Flavorful Garlic Delight
