Bake Cinnamon Rolls - Soft & Gooey Treats
Craving melt-in-your-mouth cinnamon rolls? These homemade soft & gooey treats bring warmth to your kitchen. Learn my tips for perfecting this classic!

- Get Ready to Indulge in Warm Bliss
- The Lowdown on This Recipe
- Why They’re the Best
- The Sweet Wrap-Up
- Your Go-To Essential Ingredients Guide
- Mastering the Art of Baking: Professional Cooking Method
- Pro Tips & Secrets to Make Amazing Cinnamon Rolls
- Perfect Presentation? Yes, Please!
- Storage & Make-Ahead: Let’s Talk Logistics
- Creative Variations to Spice It Up
- Your Complete Nutrition Guide to Feel Good About It
- Expert FAQ Solutions
- Recipe Card
Get Ready to Indulge in Warm Bliss
So, picture this: it’s a chilly sunday morning, and the smell of something sweet wafts through the air, pulling everyone into the kitchen like a magnet.
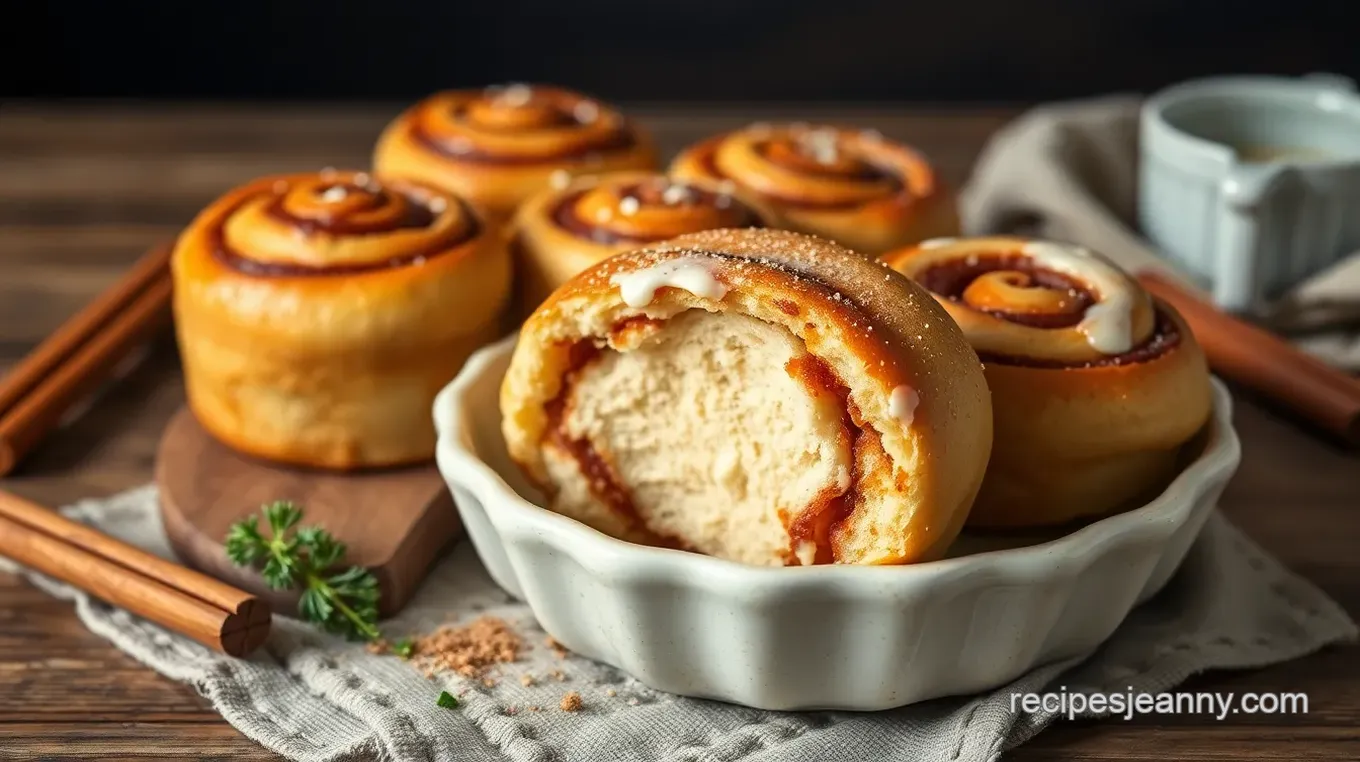
That’s right, it’s time to bake cinnamon rolls - soft & gooey treats ! i’ll never forget the first time i made these rolls.
I was a teenager, on a mission to impress my family. spoiler alert: it worked! as they took their first bites, their eyes lit up like they just found the last slice of pizza at a party.
Yeah, it felt good. who doesn’t want to be the champion of breakfast treats?
Cinnamon rolls come with a history, too. originating from the nordic countries, these sweet pastries made their way across the globe.
They’ve turned into beloved homemade cinnamon rolls here in the u.s., making brunch a little sweeter and mornings a whole lot better.
And let’s be honest, what’s not to love about soft dough swirled with gooey cinnamon roll filling and topped with a rich cream cheese icing? comfort food at its finest!
The Lowdown on This Recipe
Let’s break it down. this recipe isn’t rocket science, but it does fall into the medium difficulty level. you should be ready to tackle some yeast bread recipes , which means getting cozy with activating yeast and kneading dough.
But fear not! if i can pull it off, so can you.
Now, let’s talk time. you’ll spend about 20 minutes prepping , plus a good 1 hour of resting time while the dough gets all fluffy and happy.
Then there’s another 25- 30 minutes for baking , totaling around 1 hour and 50 minutes . totally worth it for those sweet breakfast treats .
And the best part? this recipe makes 12 rolls , so you’ll have plenty to share—or not. no judgment here if you want to keep them all for yourself!
And about costs—homemade is not only tasty but also budget-friendly. With simple ingredients you probably already have, these rolls won’t break the bank.
Why They’re the Best
First off, let’s not kid ourselves; these rolls are nutritional superheroes when it comes to comfort food. they hit the mark on flavor, with the perfect cinnamon sugar combination .
Plus, when you serve these warm, they’re straight up heavenly!
These soft and gooey delights are also perfect for all sorts of occasions. whether it’s thanksgiving brunch, a weekend family breakfast, or even just a wednesday snack, they’re a definite crowd-pleaser.
Trust me, you won’t be able to resist serving them on special occasions—throw in a side of fresh fruit for guilt-free indulgence!
And let’s not forget the cream cheese icing . It’s rich, creamy, and pairs beautifully with the fluffy dough recipe . Honestly, you can’t go wrong with a drizzle or a full pour—it’s a game-changer!
The Sweet Wrap-Up
So, are you ready to dive into these decadent baking treats ? visualize the joy and satisfaction as you pull a pan of warm cinnamon rolls out of the oven and watch your loved ones’ faces light up.
Honestly, the effort you put into baking from scratch and using those rolling pin techniques will be totally worth it.
Gather your ingredients, and let's roll our way to deliciousness! stay tuned as we jump into the ingredient section, where i’ll lay out all the essentials to whip up these roll-shaped treats that practically scream happiness and warmth.
Happy baking, folks!

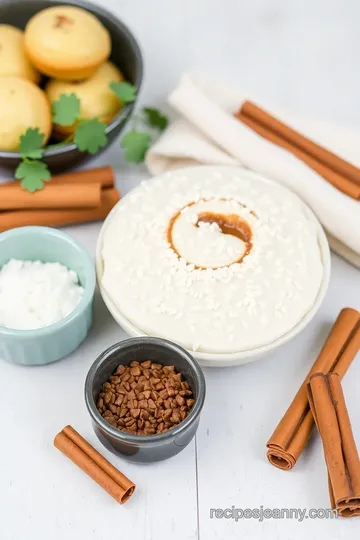
Your Go-To Essential Ingredients Guide
Alright, friends! if you’re diving into the delicious world of baking, it’s time to break down what you need for success.
Let’s chat about the premium core components that will set your baking game up for some real comfort food ideas .
We’re talking about those building blocks that make homemade cinnamon rolls more than just sweet bread; they transform them into sweet breakfast treats, perfect for brunch gatherings or those cozy sunday mornings.
The Basics: Measurements, Quality, and Storage
First off, detailed measurements matter more than you'd think! for our dough, you’ll need about 4 ½ cups of all-purpose flour (550g) .
Don’t accidentally throw in that whole five-pound bag—trust me, i learned the hard way! on the other hand, don’t skimp on the quality indicators .
Look for flour that’s fresh and free of lumps. the fresher the flour, the fluffier your cinnamon rolls will be.
When it comes to storage guidelines , keep your ingredients in a cool, dry place. pantry basics like flour and sugar can hang around for quite a while, roughly 6-12 months .
However, that cream cheese ? use it up within two weeks once opened. keep these tips in mind and you’ll always have the freshest ingredients ready for your next baking adventure.
Spice It Up: The Signature Seasoning Blend
Let’s chat about our favorite part— signature seasoning blends ! for those gooey cinnamon rolls, you’ll need two tablespoons of ground cinnamon .
But don’t stop there! add in a little nutmeg if you’re feeling fancy; it really amps up that flavor. you could think of it as your cinnamon sugar combination that makes everything pop.
My go-to for that perfect filling? a mix of brown sugar and cinnamon . i swear, the smell that wafts through the kitchen is heavenly.
Every family gathering, i make these, and it’s like oven magic. everyone’s around, waiting for those warm cinnamon rolls, and i just know they can’t resist them!
The Art of Substitution: Smart and Savvy
Life happens, and sometimes you find yourself short on ingredients. but fear not! that’s where smart substitutions come into play.
No brown sugar? mix white sugar with a dash of molasses —easy peasy! need a gluten-free option? just swap in some gluten-free all-purpose flour.
Need a quick fix for butter ? you can use greek yogurt instead for a healthier twist. plus, it keeps that dough nice and moist.
Honestly, who knew baking could give you so many options? it’s like being a culinary macgyver!
Your Kitchen Arsenal: Equipment Essentials
Now, let’s talk tools because a baker’s gotta have the right gear. you’ll need a solid rolling pin , a good mixing bowl , and a baking dish .
I personally love using a stand mixer with a dough hook because it saves on those arm workouts. if you're mixing by hand, remember to let that dough breathe; ten minutes of kneading will work wonders.
Don’t overlook storage solutions! an airtight container can be a lifesaver for flour and extras like cinnamon roll filling . just think about those cozy mornings when you wake up and know you’ve got everything ready to go for some pillowy soft bread rolls.
Heaven!
Summing It Up!
So here’s the deal. baking isn’t just about following a recipe; it’s an art. with the right essential ingredients , smart substitutions, and trusty kitchen tools, you can whip up scrumptious treats like bake cinnamon rolls - soft & gooey treats without breaking a sweat.
Get ready! because soon we’ll dive into those step-by-step instructions. trust me, you won’t want to miss making those fluffy, homemade rolls that are perfect for any occasion.
Let’s bake up a storm!
Mastering the Art of Baking: Professional Cooking Method
Ah, baking! whether you're whipping up homemade cinnamon rolls or a classic loaf of bread, understanding a few professional cooking methods will elevate your game in the kitchen.
Plus, you want your baked treats to shine, right? so, let's dive into the nitty-gritty of making those soft and gooey treats that everyone loves.
Essential Preparation Steps
Okay, first things first. mise en place is your best friend. this fancy french term just means "everything in its place.
" before you dive in, gather all your ingredients and tools. trust me; it makes things a whole lot easier.
Then, let’s talk time management . if you’re planning on making those amazing cinnamon roll variations , spend about 20 minutes prepping (you know, gathering, measuring, etc.
), and then you’ll need to wait about one hour" for the dough to rise. use that time to clean up or prepare your icing!
When it comes to organization strategies , I recommend distracting kids (or pets!) with something else while you’re baking. Less chaos means a smoother cooking experience.
Also, don’t forget safety considerations . Always use oven mitts, especially when you're pulling those rolls out at 350° F ( 175° C) . Hot sugar can be a disaster.
Step-by-Step Process
Now that you’ve got your prep down, let’s get to the juicy stuff! Here’s your step-by-step guide for making those irresistible rolls.
-
Prepare the dough: Combine your dry ingredients first, then whisk the wet ones in a separate bowl. Mix them all together until you have a shaggy dough.
-
Knead: You need to knead it. Spend about 5- 10 minutes either on a floured surface or with a stand mixer. Make it smooth and elastic!
-
First rise: cover it up and let it sit in a warm spot for about one hour , until it’s doubled in size.
This is the moment to gauge how committed you are to your baking; can your dough rise to the occasion?
-
Prepare the filling: Mix that buttery goodness of brown sugar, cinnamon, and a bit of nutmeg. Oh my gosh, that combination is pure magic!
-
Shape the rolls: Roll out your dough and spread that gooey filling over it. Roll it up like a burrito and slice it into equal parts.
-
Second rise: These babies need another 30- 40 minutes to puff up in the baking dish. The anticipation is half the fun!
-
Bake: Preheat your oven and pop those rolls in for about 25- 30 minutes . They should come out just golden brown.
-
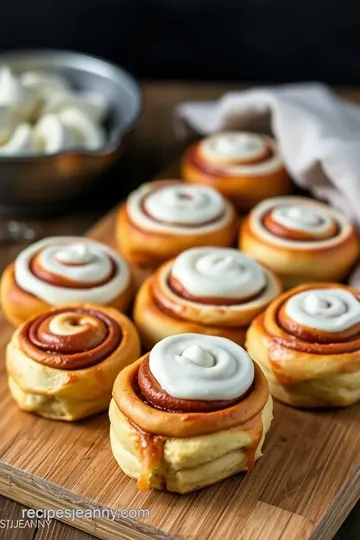
Glaze it: while the rolls are baking, whip up that cream cheese icing. you'll want to drizzle it over the warm rolls when they come out, creating that ooey-gooey deliciousness we all crave.
Expert Techniques
Okay, here’s where you can really impress. one of the critical steps is to make sure your yeast is alive and kicking.
Run a quick test by mixing it with warm milk (around 110° f ( 43° c) ) and a pinch of sugar.
If it bubbles, you’re golden.
As for quality checkpoints , don’t rush that rising time. a well-risen dough will be super fluffy! and if something’s not quite right—maybe the dough didn’t rise? check the yeast or the water temperature.
Success Strategies
Let’s chat mistakes. One classic blunder? Forgetting to cover the dough while it rises! This can lead to a crusty top, and we want fluffy dough here, folks.
For quality assurance , my rule of thumb is this: If it's not rising properly, tweak your environment. Sometimes, all you need is a cozy, warmer spot.
Now, for those busy folks out there, make-ahead options are key. You could go with overnight cinnamon rolls . Just prepare them the night before and pop them in the fridge.
In the world of sweet breakfast treats, mastering these professional methods will help you bake the most delicious cinnamon rolls your family will rave about.
Stay tuned for some more Additional Information on ways to pair these goodies with your morning coffee or afternoon tea! Happy baking, everyone!

Pro Tips & Secrets to Make Amazing Cinnamon Rolls
Alright, friend, let’s dive into the art of baking these homemade cinnamon rolls ! Before you roll up those sleeves, let me share some invaluable pro tips that will transform your baking experience from “meh” to “wow!”
Chef's Personal Insights
First off, trust your gut! If the dough feels too sticky, sprinkle a bit more flour as you knead. This dough is like a shy kid; it needs a little coaxing to open up! And don’t stress if your rolls don’t look perfect; rustic is in, right?
Time-Saving Techniques
We all know life gets busy. to save time, consider making your dough the night before. just cover it with plastic wrap and toss it in the fridge.
In the morning, pull it out and let it come to room temperature while you sip your coffee. you’ll still score major points with your brunch crew without waking up at the crack of dawn.
Flavor Enhancement Tips
Don’t be shy with the flavors! a sprinkle of nutmeg can elevate your gooey cinnamon roll filling , but you could also experiment with some orange zest.
Trust me, that citrus twist will have everyone asking for your secret!
Presentation Advice
We eat with our eyes first! dust a little extra cinnamon sugar on top right before serving for a sweet finish.
➜ and, think about plating : cut those warm rolls in half, drizzle the cream cheese icing across the top, and add a fresh berry or two on the side.
Beautiful and tasty!
Perfect Presentation? Yes, Please!
A great plate can elevate your homemade goodies from good to Instagrammable . Here are some tips to make those cinnamon rolls pop.
Plating Techniques
Go for height! stack a couple of rolls off-center on a plate, and artfully drizzle your glaze over. if you’re feeling fancy, use a piping bag to get a nice swirl of icing on each roll.
Garnish Ideas
Fresh mint leaves or a sprinkle of powdered sugar can elevate any dish. Add a touch of seasonal fruit, like strawberries or raspberries, for color and freshness. 🌈
Color Combinations
Pair those golden-brown rolls with vibrant fruits. The contrast not only looks awesome but tastes great too!
Visual Appeal Tips
A white plate against those rich, warm colors? Perfection! And remember, napkins in a neat fold add an extra oomph.
Storage & Make-Ahead: Let’s Talk Logistics
Here’s the deal: once you get your rolls baked and covered in that rich icing, you’ll want to store them right.
Storage Guidelines
Keep any leftovers in an airtight container at room temperature for about two days. If you live in a super humid climate, fridge it!
Preservation Methods
You can also freeze your rolls before icing! wrap them well and pop them in the freezer for up to two months.
When the mood strikes, just take ’em out, thaw them, and give ’em a warm-up in the oven to melt that delish cream cheese glaze!
Reheating Instructions
Want warm cinnamon rolls in a snap? Microwave the rolls for about 10-15 seconds or pop them in a preheated oven at 350° F for a quick reheat.
Freshness Duration
For the best taste, consume within two days . After that, while still edible, they may lose that glorious texture that makes these sweet breakfast treats so addictive.
Creative Variations to Spice It Up
Ready to switch things up? Here are some flavor-packed variations worth trying!
Flavor Adaptations
How about chocolate chip rolls or a delicious dried fruit filling ? That’s right, get creative! Make different rolls for everyone to enjoy.
Dietary Modifications
Got friends who are gluten-sensitive? Trade regular flour for a good gluten-free flour blend . They’ll love that you considered their dietary restrictions—plus, they’ll still taste scrumptious!
Seasonal Twists
Pumpkin spice cinnamon rolls in the fall? Yes, please! Just toss in some pureed pumpkin and adjust spices.
Regional Variations
You wanna travel? try adding some pecans for a southern twist or use different spices based on your culinary traditions in baking.
A bit of cardamom can give your rolls a scandinavian flair!
Your Complete Nutrition Guide to Feel Good About It
Alright, let’s get real about what we’re eating.
Detailed Breakdown
These beauties clock in at about 320 calories per roll . But let’s be honest, sometimes calories don’t count when it’s a treat!
Health Benefits
A little cinnamon is known to have health benefits like anti-inflammatory properties. So, you’re not just indulging; you’re kinda being healthy, right?
Dietary Considerations
Watch the sugar if you’re keeping tabs on that. Knowing when to indulge versus when to rein it in is key!
Portion Guidance
Try to stick to one per sitting—not an easy task, I know! But remember, sharing the love (and rolls) is part of the fun!
Expert FAQ Solutions
Want more solid advice?
Common Questions
Many ask, “Why did my rolls not rise?” Most often, it’s a yeast issue. Check that it’s fresh and active!
Troubleshooting Guide
If your dough feels too wet, add a sprinkle of flour. Too dry? A splash of milk will do!
Success Tips
A warm kitchen promotes rising. If it's chilly, set your bowl next to a warm stove or oven.
Variations Explained
Don’t hesitate to get creative! You can adapt the ingredients to suit what you have on hand. No brown sugar? White sugar blended with molasses works in a pinch.
So there you have it! you’re now equipped with everything you need to bake cinnamon rolls - soft & gooey treats .
Trust me, once you make these, you’ll want to whip them up time and time again. your kitchen deserves a bit of indulgence, and so do you! happy baking!

Bake Cinnamon Rolls - Soft & Gooey Treats Card

⚖️ Ingredients:
- 4 ½ cups all-purpose flour, plus extra for dusting
- ½ cup granulated sugar
- 2 ¼ teaspoons instant yeast
- 1 teaspoon salt
- 1 cup whole milk, warmed to about 110°F
- ½ cup unsalted butter, melted and cooled
- 2 large eggs
- ½ cup unsalted butter, softened to room temperature
- 1 cup brown sugar, packed
- 2 tablespoons ground cinnamon
- ¼ teaspoon nutmeg (optional)
- 4 oz cream cheese, softened
- 1 cup powdered sugar
- 2 tablespoons milk, or as needed
- 1 teaspoon vanilla extract
🥄 Instructions:
- Step 1: In a large bowl, combine flour, sugar, yeast, and salt.
- Step 2: In a separate bowl, whisk together warm milk, melted butter, and eggs.
- Step 3: Gradually add wet ingredients to dry ingredients, mixing until combined.
- Step 4: Knead dough on a floured surface or using a stand mixer with dough hook until smooth (about 5-10 minutes).
- Step 5: Place dough in a greased bowl. Cover and let rise in a warm spot until doubled in size (about 1 hour).
- Step 6: In a mixing bowl, cream together softened butter, brown sugar, cinnamon, and nutmeg until smooth.
- Step 7: Roll out the risen dough on a floured surface into a large rectangle.
- Step 8: Spread the filling evenly over the dough.
- Step 9: Roll tightly from the long edge and pinch to seal. Cut into 12 equal slices.
- Step 10: Place sliced rolls in a greased baking dish. Cover and let rise until fluffy (30-40 minutes).
- Step 11: Preheat oven to 350°F. Bake rolls for 25-30 minutes, or until golden brown.
- Step 12: In a bowl, beat cream cheese, powdered sugar, milk, and vanilla until smooth.
- Step 13: Drizzle glaze over warm rolls and enjoy!
Previous Recipe: How to Bake Cosmic Brownies with Chocolate Ganache: A Deliciously Nostalgic Treat
Next Recipe: How to Bake Vanilla Cupcakes with Colorful Sprinkles: Delicious Joy!
