Swirled Bliss: Chocolate & Vanilla Marble Cake
Looking for a delightful dessert? This Chocolate & Vanilla Marble Cake is our family favorite! Experience tender layers and a sweet marbled effect. Give it a try!

Hey There, Cake Lovers!
So, let me spill the tea! the first time i tried to bake marble cake with chocolate & vanilla , i literally had a kitchen disaster.
Picture this: flour clouding the air, cocoa powder dusting my countertop like it was a winter wonderland, and me frantically trying to remember how many eggs i needed.
Did i mention i lost half my fight with the electric mixer? yep, it was messy! but man, when that cake finally came out of the oven, oh my gosh—it was like biting into cloud nine.
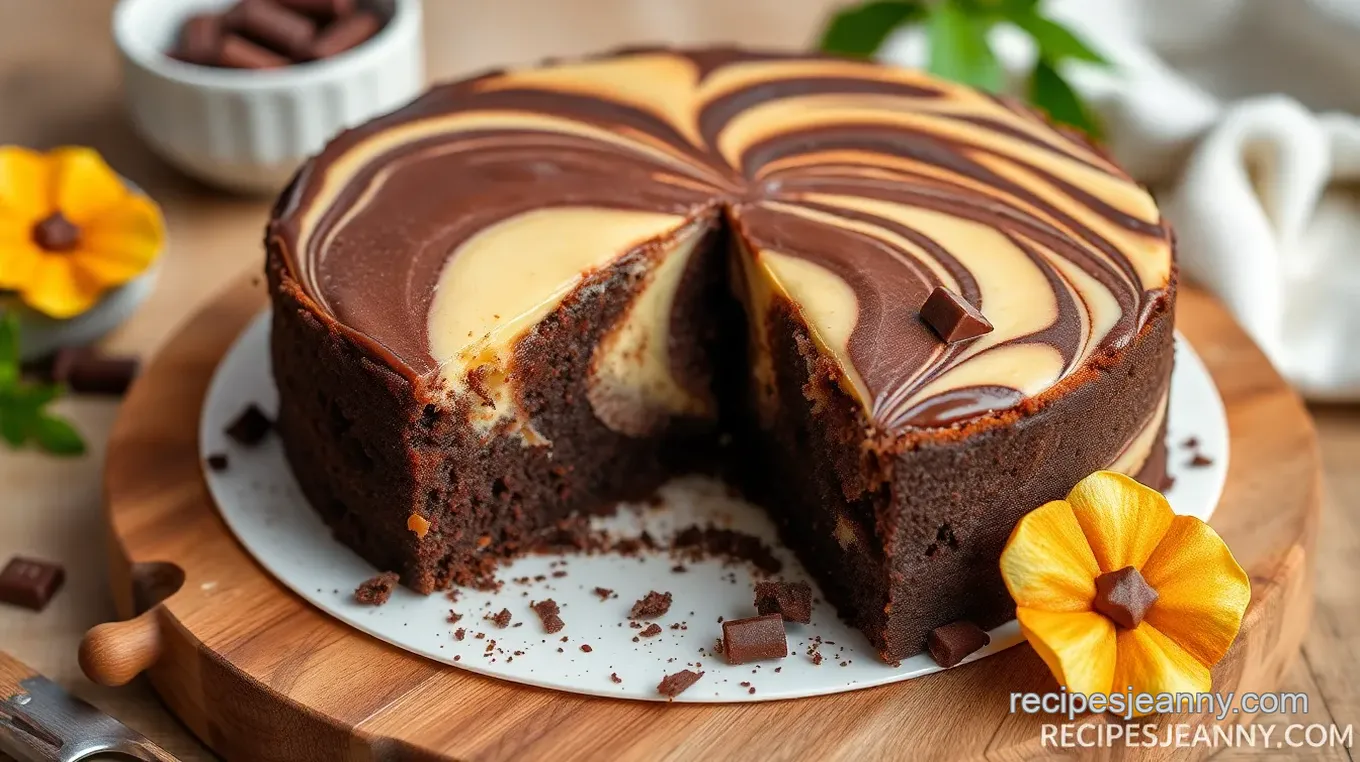
Marble cake has this magical way of mixing the rich flavors of chocolate with the lightness of vanilla, giving you the best of both worlds.
You feel me? the swirls are pretty, the taste is unbeatable, and honestly, it’s the kind of cake that just makes everything better.
Whether you're at a birthday party or having tea in the afternoon, this cake is sure to up the dessert game and satisfy your sweet tooth cravings!
A Slice of History
Let’s backtrack a bit. did you know that marble cake likely came from central europe ? it's like a classic playground; you have rich chocolate and dainty vanilla playing together, creating a treat that’s stood the test of time.
Fast forward to today, and this dessert is everywhere—chances are, you've had it at birthday parties or sunday family gatherings.
It’s sort of become an american staple, right?
Now, here’s the scoop: this recipe is super easy; even if you’re a newbie in the kitchen! you’ll need about 20 minutes to prep and then around 30- 35 minutes to bake.
what’s great is that you’ll end up with 8-10 servings , so you can share—or not, no judgment here!
Why You Should Bake It
Besides the obvious joy that comes from bringing a cake to life, let's chat about some sweet benefits of this marble cake recipe.
First off, it’s a great way to sneak in some delicious flavors. the mix of chocolate and vanilla creates a perfect flavor balance.
Plus, who doesn’t want a slice of that moist marble cake at their next party?
Nutritionally, it’s a bit indulgent but holds its own, especially if you’re using quality ingredients. think about those seasonal gatherings—you can dress it up with a whipped cream topping or a luscious chocolate ganache drizzle and voilà! you just leveled up your dessert game.
It’s perfect for birthdays, picnics, or just when that sweet tooth hits, you know what i mean?
And hey, if you’re into easy baking techniques, this recipe is for you! you don't need to master cake decorating like a pro—just a spoon will do for the marbling effect.
It’s all about that nice swirl, so you don't need to stress about making it look perfect.
Ready to look into In?
So, ready to get your hands doughy? in just a few moments, we’ll be diving into the ingredients so you can unleash your inner baker! trust me, you’re going to want to grab your kitchen equipment and start mixing those batters because this chocolate & vanilla marble cake could easily end up being your new go-to recipe.
Plus, you’ll feel like a superstar when your friends and family taste your homemade creation! let’s get baking, my friends!

Essential Ingredients Guide for Your Marble Cake Adventure
Alright, friends! let’s dive into the essential ingredients guide to whip up a show-stopping chocolate & vanilla marble cake . believe me, you’re gonna love this sweet journey.
Grab your apron, and let’s get cookin'.
Premium Core Components
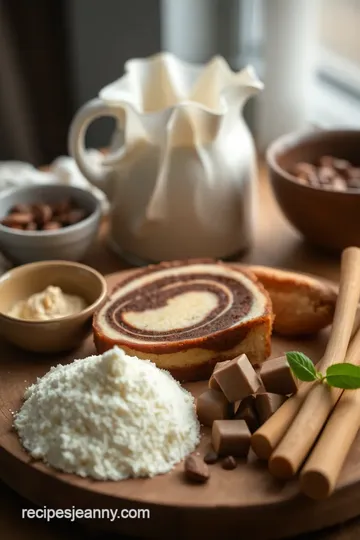
First things first, you want to make sure you're starting off with the right ingredients . Here’s a quick rundown, complete with detailed measurements.
- All-Purpose Flour: You’ll need 1 ½ cups (190 g) . It's your go-to for a tender cake.
- Sugar: 1 cup (200 g) of granulated sugar for that sweet magic.
- Unsalted Butter: Grab ½ cup (115 g) , softened to room temp. It’s creamy goodness!
- Eggs: Get 3 large eggs ; they should be room temperature, which helps them mix better.
- Milk: You’ll need ½ cup (120 ml) — also at room temp.
- Cocoa Powder: Just ¼ cup (30 g) for that chocolatey swirl.
Quality Indicators and Storage Tips
When you’re shopping, look for fresh ingredients . flour should be dust-free and well-sealed. butter should smell like butter, you know what i mean? the shelf life for butter can be around 3–4 months in the freezer.
So, keep those babies wrapped up tightly!
Signature Seasoning Blend
Here’s where the fun kicks in with flavors! For this cake, you don’t need a ton of spices, but let’s jazz it up a little.
- Vanilla Extract: Always choose the pure stuff when you can. About 1 teaspoon will elevate the flavor.
- Salt: Just ½ teaspoon enhances all the sweetness. Don't skip it!
Mixing it all together, creating that signature chocolate vanilla cake experience is key. You know, a chocolate vanilla swirl cake is like a hug in dessert form.
Smart Substitutions
Cooking isn’t about perfection but creativity. Proposed a last-minute dinner and running low on ingredients? Here are some smart substitutions :
- Butter: If you’re out, coconut oil can work wonders.
- Eggs: No eggs? Use ¼ cup applesauce per egg for an egg-free marble cake .
- Gluten-Free? Swap regular flour for a 1:1 gluten-free blend.
Sweet, right? You can totally adjust the recipe to your needs. This flexibility is what makes baking exciting!
Kitchen Equipment Essentials
Let's talk tools. You don’t need a fancy kitchen to bake, but a few essential pieces will make your life easier:
- Mixing Bowls: A couple of medium-sized mixing bowls will do the trick.
- Electric Mixer: If you have one, fantastic! If not, a good ole whisk and some elbow grease work just fine.
- Cake Pan: Grab a 9-inch round cake pan or a loaf pan to create that perfect marble look.
Tips and Tricks for a Successful Bake
- Always preheat your oven to 350° F ( 175° C) . Prepping is half the battle!
- Use room temperature ingredients—they blend better and give you that moist marble cake you’re after.
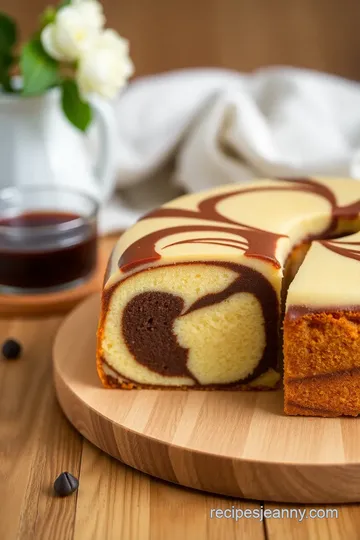
- For that perfect marbling technique, don’t go wild! Gently swirl the batters with a knife, just enough to create a beautiful pattern.
Serving up Sweetness
Now, once you pull that gorgeous layered marble cake out of the oven, let it cool and sit a bit.
This cake is a treat for birthdays or afternoon tea —it’s versatile like that. serve with whipped cream or a drizzle of chocolate ganache for that extra oomph!
Before we roll up our sleeves to follow the step-by-step instructions, remember that baking is all about having fun. it’s your moment to experiment and maybe even stumble into fabulous recipes.
So, get ready to bake marble cake with chocolate & vanilla. you’re in for a delightful experience that’ll impress your family and satisfy your sweet tooth cravings .
Let’s get started!

Mastering the Art of Baking: Bake Marble Cake with Chocolate & Vanilla
Have you ever taken a slice of cake that looks too good to be true? you know the kind—marbled with luscious chocolate swirls wrapping themselves around fluffy vanilla.
This classic chocolate & vanilla marble cake is what i'm talking about! whether you're whipping it up for a birthday party , a cozy afternoon tea, or just to satisfy that pesky sweet tooth craving, this cake is your go-to.
So, let’s dig into the art of creating this easy marble cake masterpiece from scratch!
Essential Preparation Steps
First thing's first—let's get organized. if you've ever found yourself searching for measuring cups halfway through baking, you know how important mise en place is.
Gather all your ingredients and tools before you start. this will save you time and keep you calm. believe me, there’s nothing worse than scrambling to find the cocoa powder when the batter is waiting!
Timing is everything in baking. my tip? use a timer! for this cake, you’re looking at a prep time of 20 minutes and a baking time of about 30- 35 minutes at 350° f ( 175° c) .
Staying on top of time management helps ensure you don’t end up with a moist marble cake or a burnt offering.
Don't forget to consider safety! always use oven mitts when taking your cake out and avoid touching the hot surfaces in your kitchen.
Every pro baker has been there—one moment of distraction can lead to a burned hand!
Step-by-Step Process
Now, let’s get to the good stuff. Here’s how to create your masterpiece:
-
Preheat your oven to 350° F ( 175° C) and grease your cake pan.
-
In a bowl, sift together 1 ½ cups of all-purpose flour , 1 ½ teaspoons of baking powder , and ½ teaspoon of salt .
This step adds air and helps your cake rise perfectly.
-
In another bowl (preferably a large one), cream together ½ cup unsalted butter and 1 cup granulated sugar . You want this to be light and fluffy—feel free to channel your inner cake warrior and beat it good!
-
Add 3 eggs one at a time and incorporate 1 teaspoon of vanilla extract . The smell? Oh my gosh, it’s heavenly!
-
Alternate adding your dry mix and ½ cup of milk . Start and end with the flour mixture. Don’t overmix; just combine until you don’t see flour!
-
Divide the batter in half and stir in ¼ cup unsweetened cocoa powder into one part.
-
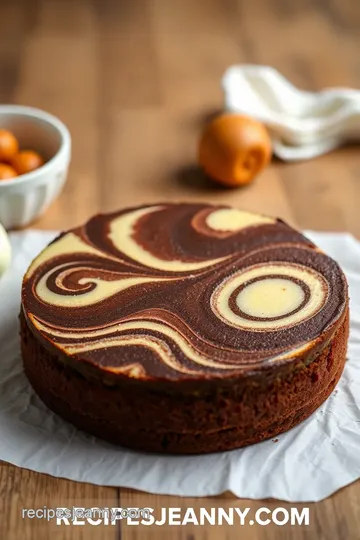
Now the fun part! alternate spoonfuls of chocolate and vanilla batter into your pan. use a knife to swirl them together, but don’t go overboard; we want a beautiful marbled effect, not a blender disaster.
-
Pop it in the oven! bake for 30- 35 minutes . a toothpick inserted into the center should come out clean.
Be sure not to open the door too early—let the cake rise in peace!
-
Give it 10 minutes to cool down in the pan, then let it chill on a wire rack until it's completely cool.
Expert Techniques
Here come the serious baker tips ! always check on the quality of your ingredients. using fresh stuff means a better cake.
For example, try to keep your eggs at room temperature for that fluffy texture.
While embarking on this layered marble cake adventure, remember to check for doneness a few minutes before the timer goes off.
Trust me, pulling a cake too late can result in a dry mess, and we do not want that!
If something feels off with your batter, like it’s too thin or thick, just take a step back and reassess. Baking is chemistry, after all!
Success Strategies
I still remember the first time i burnt the edges of my cake. cringe! to avoid this tragedy, keep an eye on the baking time, and rotate the pan halfway through if your oven has hot spots.
When you let it rest after baking, the flavors deepen and the cake firms up beautifully—a magical transformation, i tell ya! for those baking with dietary restrictions, don’t fret.
You can easily whip up an egg-free marble cake by substituting applesauce for eggs or even try a gluten-free cake alternative !
And let’s not forget about presentation! A simple dusting of powdered sugar or a drizzle of chocolate ganache? Now that’s a showstopper!
Don't you just love the satisfaction of making a delicious dessert that’s as rewarding to look at as it is to eat? grab your forks—your homemade marble cake is ready to take center stage.
Now that you’re set to make your next baking adventure, stay tuned for some additional information to help you level up your baking skills, and of course, learn more tips on flavors, and options to make your cake unique!

Sweet Tips & Tricks for Your Marble Cake Recipe
Let’s be real: baking is like a fun little science experiment. If you want to kick it up a notch while you Bake Marble Cake with Chocolate & Vanilla , here are some pro tips that I’ve learned over the years, and trust me, they change the game!
Pro Tips & Secrets
-
Room temp rule : always make sure your ingredients are at room temperature. this is a game changer for achieving that fluffy goodness.
Cold butter? nah, it just won’t whip up the same way.
-
Mixing Magic : When you’re mixing the dry ingredients, don’t overdo it! Just fold until combined. Overmixing can lead to a tough cake, and nobody wants that!
-
Swirling Technique : When you get to that marbling part, be gentle. Use a knife or a skewer to swirl the batters together. Too aggressive and you’ll lose that pretty pattern!
-
Quick cool down : once the cake is out of the oven, let it rest in the pan for about 10 minutes before moving it to a wire rack.
This helps avoid a crumbly disaster.
Perfect Presentation of Your Marble Cake
After you’ve mastered that beautiful marbling, it’s time to make it look as good as it tastes because we eat with our eyes first, right?
-
Plating : Use a cake stand for that elevated look! If you don't have one, a simple plate will do. Just make sure it’s clean and pretty.
-
Garnishes : A little powdered sugar dusting can do wonders. And if you’re feeling fancy, drizzle some chocolate ganache on top. Honestly, who could resist that?
-
Color Combinations : Think about pairing your cake with bright garnishes like raspberries or mint leaves. The contrast makes it pop!
Storage & Make-Ahead Hacks
Got leftovers? Or want to bake ahead of time? Here’s the lowdown on keeping your cake fresh .
-
Storage : after your delicious cake cools, wrap it tightly in plastic wrap. this locks in moisture. if you want to keep it longer, stick it in the fridge for about a week.
-
Make-Ahead : You can always bake your cake a day or two in advance. Just keep it covered! Trust me; it gets better as it sits.
-
Reheating : For that fresh-outta-the-oven feel, pop your slices in the microwave for about 10-15 seconds . Perfection!
Creative Variations to Spice It Up
Want to play around with your chocolate vanilla cake ? There are so many fun variations!
-
Seasonal Swaps : Add spices like cinnamon or nutmeg for a holiday twist! Or throw in pumpkin puree for that fall flavor.
-
Diet-Friendly Mods : If you’re looking for an egg-free marble cake , swap each egg with a quarter cup of unsweetened applesauce. Boom! Smooth and moist.
-
Nutty Adventure : Toss in some walnuts or pecans for added crunch if you want that extra bite.
Complete Nutrition Guide
Let’s talk about what’s actually in your oh-so-delicious creation.
-
Calories : A slice has about 300 calories , which makes it a delightful, guilt-free treat if you exercise portion control. You can enjoy your dessert without worry!
-
Health benefits : believe it or not, cocoa powder has antioxidants. so, while you’re indulging in that moist marble cake , you’re also getting a bit of a health boost.
Kind of like eating dark chocolate, right?
Expert FAQ Solutions
Got questions? Don’t worry — I’ve got answers!
-
How to marble cake perfectly? : Alternate scoops of chocolate and vanilla batter in the pan, then use a knife to gently swirl. Think of the cake as a blank canvas!
-
What if my cake is too dense? : Overmixing can lead to dense cakes. Next time, be gentle, and just mix until combined!
-
Can I make this gluten-free? : Absolutely! Just swap the all-purpose flour for a good gluten-free blend, and you're set.
Wrap-Up
So, whether you’re baking for a birthday or just to satisfy those sweet tooth cravings, this bake marble cake with chocolate & vanilla recipe is sure to impress.
It’s not just a cake; it’s a conversation starter, an afternoon tea treat, and a slice of perfection that brings people together.
Grab your apron, preheat that oven, and let’s bake up some memories! You got this!
Swirled Bliss: Chocolate & Vanilla Marble Cake Card

⚖️ Ingredients:
- 1 ½ cups (190 g) all-purpose flour
- 1 ½ teaspoons baking powder
- ½ teaspoon salt
- ½ cup (115 g) unsalted butter, softened
- 1 cup (200 g) granulated sugar
- 3 large eggs, at room temperature
- 1 teaspoon vanilla extract
- ½ cup (120 ml) milk, at room temperature
- ¼ cup (30 g) unsweetened cocoa powder
- Powdered sugar for dusting (optional)
- Chocolate ganache or vanilla glaze for drizzling (optional)
🥄 Instructions:
- Step 1: Preheat the oven to 350°F (175°C). Grease and flour the cake pan.
- Step 2: In a bowl, sift together the flour, baking powder, and salt.
- Step 3: In a separate large mixing bowl, cream the softened butter and granulated sugar until light and fluffy.
- Step 4: Add eggs one at a time, mixing well after each addition, followed by the vanilla extract.
- Step 5: Alternately add the dry ingredients and milk to the butter mixture, starting and ending with the flour mixture. Mix until just combined.
- Step 6: Divide the batter into two bowls: stir cocoa powder into one half to make the chocolate batter.
- Step 7: Using a spoon, alternate scooping chocolate and vanilla batter into the prepared pan to create a marbled effect. Swirl gently with a knife.
- Step 8: Bake for 30-35 minutes, or until a toothpick inserted in the center comes out clean.
- Step 9: Allow the cake to cool in the pan for 10 minutes, then transfer to a wire rack to cool completely.
Previous Recipe: How to Bake Banana Bread with Cinnamon Swirl: A Delicious Family Classic
Next Recipe: How to Bake Wholemeal Bread with Nutty Flavor: My Grandma's Secret
