Homemade Paneer Pizza with Fresh Dough
Wondering how to use paneer in your pizza? Join me in baking a Paneer Pizza with Homemade Dough that's perfect for gatherings and bursting with flavor!

A Slice of My Life: Homemade Paneer Pizza with Fresh Dough
Oh my gosh, let me tell you about the first time i tried to bake paneer pizza with homemade dough .
Picture this: i’m in my tiny kitchen, flour is everywhere, and there i am, attempting to channel my inner italian chef (mind you, i am 100% indian).
The idea of putting together an indian-style pizza had me giggling with excitement. i thought, "why not spice things up?" and, truth be told, the end result wasn't just a whim.
It was a warm, cheesy hug in pizza form!
Have you ever had one of those cooking days where everything just clicks? you know, right when you realize, “cooking with paneer is going to be my new jam”? that’s exactly how i felt.
The crunch of that crispy pizza crust , mixed with the tanginess of homemade pizza sauce and the richness of spiced paneer, is a flavor explosion that hits just right.
The Perfect Fusion: What’s in the Pizza?
Let's talk about why this paneer pizza recipe is so awesome. originating from india but with a major nod to classic pizza styles, this dish is a perfect combination of cultures.
It’s becoming increasingly popular at family dinners, casual get-togethers, and even those late-night snack attacks. everyone loves pizza, right? and this one offers a twist that’s hard to resist.
If you’re wondering about the time it’ll take, don’t sweat it! you’re looking at about 30 minutes of active prep , plus an hour for the dough to rise, and then about 20 minutes in the oven.
All in, you’ll have a delicious, homemade pizza in under two hours. pretty neat for a homemade pizza, right? plus, it serves four! so, voilà! you’ve got dinner sorted without breaking the bank.
Why You’ll Love This Recipe
Now, let's break down why you should definitely give this recipe a shot. first off, the health benefits are pretty sweet! paneer is packed with protein and calcium, making this vegetarian pizza option a winner for families wanting something healthier without sacrificing taste.
But wait, there’s more! the unique selling point of this pizza is its spiced toppings. you’ve got garam masala blending in with the gooey mozzarella cheese.
It’s like an explosion of flavors! perfect for those special occasions when you want to show off your cooking skills—this recipe makes for a fantastic centerpiece at gatherings.
The beauty of this dish? It’s also great for leftovers. Trust me; reheating pizza never tasted so good!
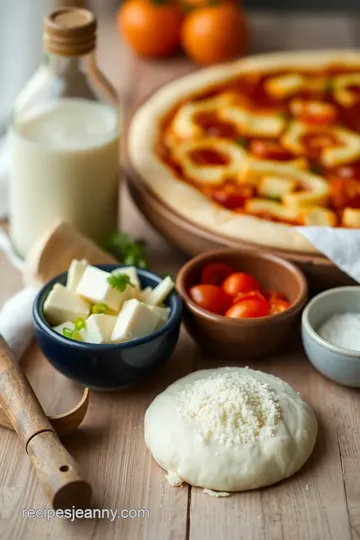
Gather Those Ingredients!
Ready to up your cooking game? Let’s dive into the ingredients you’ll need for this adventure. Before you know it, you'll be whipping up some easy pizza recipes that surprise even your toughest food critics—hint: the kids!
Expect to grab:
- Fresh pantry staples for the crust.
- Simple ingredients for the homemade pizza sauce that pack in tons of flavor.
- Spices and paneer to elevate this dish from ordinary to extraordinary .
Making your dough from scratch might sound daunting, but it’s actually easier than you think, especially with my pizza baking tips! you’ll learn how to create that delectable, crusty pizza base that you simply can’t resist.
So grab your apron and let me guide you through creating an authentic indian pizza experience that is sure to knock your socks off! you’ll impress your friends, feed your family, and enjoy every cheesy bite.
Stay tuned for the ingredients section! let’s knock this pizza out of the park!
Essential Ingredients Guide
Cooking and coming together over good food is part of who we are, especially when it comes to pizza. If you’re looking to Bake Paneer Pizza with Homemade Dough , you're in for a treat! Let’s dive into some essential ingredients that’ll not only enhance your cooking experience but will also make your pizza shine!
Premium Core Components
First things first, let’s talk about the premium core components of your pizza. You’ll want to stick to quality ingredients because they can make or break your dish.
-
Measurements matter! For the dough, you'll need 2 cups (250g) of all-purpose flour . That’s the backbone of your crust. In metric, that’s 250 grams. Use the scale for accuracy, trust me!
-
Check for quality indicators by sniffing your flour. If it smells stale or funky, toss it out. Fresh ingredients are key!
-
Think of storage guidelines : store your flour and spices in a cool, dry place. Most dried ingredients last around 6-12 months , but check their dates!
-
For freshness tips , pick up fresh herbs and veggies like parsley and bell peppers from the market. They should be vibrant, not wilted.
Signature Seasoning Blend
You can’t skip the signature seasoning blend when making homemade pizza!
-
Essential spice combinations kick things up! For your homemade pizza sauce, hit it with a blend of Italian seasoning and garam masala for that unique Indian twist.
-
Herbs really do matter. Fresh basil paired with dried oregano? Yes, please! They complement each other beautifully.
-
Flavor enhancers like garlic and onions are your secret weapons. Just a hint can elevate your dish from blah to wow!
-
Regional variations are fun too! Think about how adding a bit of cumin or coriander can give your pizza that authentic flair.
Smart Substitutions
So, what if you’re missing something? Here’s where the smart substitutions come into play.
-
If you’re out of paneer , no worries! Ricotta or even tofu can do the trick. It’s like a culinary game of mix and match!
-
For dietary modifications, swap that all-purpose flour with whole wheat for a healthier dough option.
-
You can also explore emergency replacements . No tomato sauce? Use pesto or even a bit of barbecue sauce if that’s what you have!
-
And let’s not forget about the seasonal options ! Using summer veggies like zucchini or butternut squash makes your pizza pop with colors!
Kitchen Equipment Essentials
Getting your hands on the right kitchen equipment essentials is key.
-
You’ll need mixing bowls, a rolling pin , and of course, a baking sheet or pizza stone . Got these? You’re good to go!
-
Alternatives? If you don’t have a pizza stone, a cast iron skillet can work wonders too.
-
Preparation tips : Get your oven preheated to 475° F while you roll out that yummy dough!
-
Think about storage solutions for leftovers: an airtight container works magic in keeping that pizza fresh for tomorrow’s breakfast (if it lasts that long!).
Making a delicious vegetarian meal like paneer pizza at home is more than just following a recipe – it’s about engaging with the flavors, the process, and most importantly, sharing it with loved ones.
So now that you’ve prepped with these essential ingredients and equipment, it’s time to roll up your sleeves and get cooking! Grab those fresh ingredients, preheat that oven, and let’s move on to the instructions section to Bake Paneer Pizza with Homemade Dough that’ll knock everyone’s socks off! Are you ready? Let’s do this!
Mastering the Art of Professional Cooking
Cooking is an art, and like any great artist, you need to have the right preparation. if you’re dreaming of creating a bake paneer pizza with homemade dough , you’ve gotta get your game plan on lock.
Let’s break down what that looks like, from essential prep steps to expert techniques, all the way to your final ‘ta-da’!
Essential Preparation Steps
First things first— mise en place . this fancy french term simply means "everything in its place." chop your veggies, measure your flour, and get your ingredients ready before you start.
It’s a total game-changer when you’re knee-deep in dough and sauce.
Time management tips? set your oven timer! seriously, those timers are lifesavers. you’ll need to let your dough rise for about 1 hour , and you can use that time to prep your sauce.
Keep an eye on everything, and you’ll feel like a professional chef.
Next up, organization strategies . take out all the utensils and equipment you need before starting. no one wants to be running around looking for a rolling pin when the dough is ready to roll! and let’s not forget about safety.
Make sure to clean as you go, and keep your work area tidy to avoid slips or accidents—granted, we’re not assembling ikea furniture here, but you get the picture.
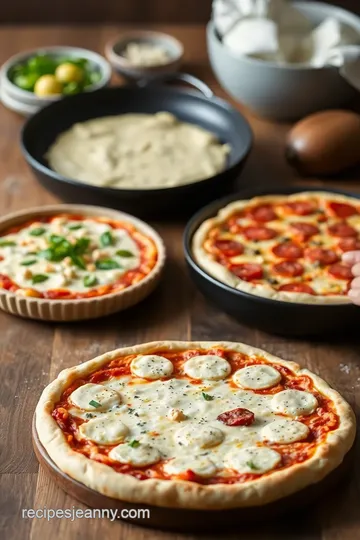
Step-by-Step Process
Now, let’s get into the nitty-gritty. Here’s your roadmap:
-
Prepare the Dough :
- Combine 3/4 cup (180ml) warm water (around 110° F/ 43° C) with sugar and yeast. Let it sit for 5 minutes until frothy.
- Mix 2 cups (250g) flour and 1 teaspoon (5g) salt in a large bowl and create a well.
- Add the yeast mixture and 1 tablespoon (15ml) olive oil . Mix until it all comes together.
- Knead that dough for 8- 10 minutes . It should be smooth and stretchy at this point.
-
Make the Sauce :
- Heat 1 tablespoon (15ml) of olive oil and sauté minced garlic until fragrant (trust me, your kitchen will smell heavenly!).
- Toss in 1 cup (240ml) of crushed tomatoes with a sprinkle of Italian seasoning and let it simmer for 10- 15 minutes . This is pure liquid gold, folks!
-
Prepare Toppings :
- Cube up the 8 oz (225g) of paneer and mix with garam masala—this is where the magic happens!
- Slice up your bell peppers and onions, and get ready for some serious assembly.
-
Assembling Your Masterpiece :
- Preheat your oven to 475° F ( 245° C) —this is crucial for that crispy crust.
- Roll out your dough to your preferred thickness. Place it on your baking sheet or pizza stone lined with parchment paper.
- Smother that dough with your homemade sauce. Add the paneer, veggies, and finish with shredded mozzarella.
-
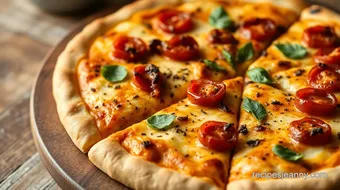
Baking :
- Slide your creation into the oven and bake for 15- 20 minutes . Keep an eye out for that golden, bubbling cheese!
Expert Techniques
Here’s where it gets expert-level. after you put your pizza in, set a timer for 15 minutes . check it regularly.
You want that cheese bubbly and the crust golden. if it’s puffing up too much, gently press it down.
Troubleshooting tips? if your dough’s too sticky, it likely needs a bit more flour. a little sprinkle can go a long way.
And if it feels dry, add a splash of water, okay?
Success Strategies
Lastly, here are a few success strategies for your homemade paneer pizza:
- Avoid common mistakes like rolling thin dough and loading on too many toppings. Go for balance!
- For quality assurance, always taste your sauce and adjust the seasoning; you don’t want bland pizza, do you?
- Want to prep ahead? Make the dough and sauce a day in advance, and keep it in the fridge. Easy-peasy!
Whether you're entertaining friends or just diving into vegetarian pizza options , this recipe for an authentic Indian pizza will not disappoint at your next family dinner.
So grab your ingredients, roll up those sleeves, and get ready to impress with your bake paneer pizza with homemade dough .
Next up, don’t forget to check out some additional information to level up your pizza game!
Additional Recipe Information
Ah, the joy of making pizza! let’s dive deeper into how you can level up your homemade paneer pizza with fresh dough .
Whether you’re a seasoned pro or just starting, i’ve got some pro tips, presentation hacks, storage ideas, and a whole lot of fun variations to make your pizza game strong!
Pro Tips & Secrets
You know, making your own homemade pizza dough is a game-changer. here’s a secret: always let your dough rise. i usually allow it to sit for an hour.
Trust me; it’ll be fluffier and tastier. oh, and sprinkle a bit of salt when you knead it! it enhances the flavor like you wouldn’t believe.
If you’re pressed for time, try quick pizza recipes by using store-bought dough. but hey, if you're feeling adventurous, making dough from scratch can be so rewarding! when you make your pizza sauce , simmer it longer for a richer taste.
Use fresh tomatoes if you can—that’s where the flavor magic happens.
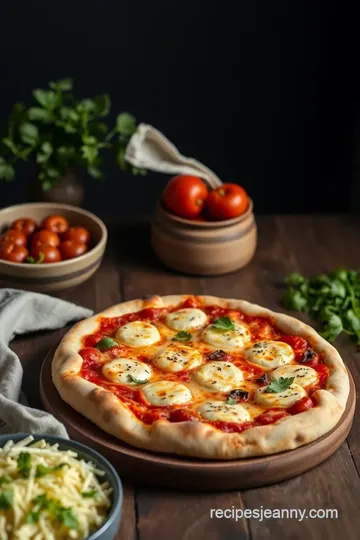
Perfect Presentation
Let’s talk about making that pizza look as good as it tastes. first, when you’re plating your indian style pizza , consider using a colorful background.
A simple wood cutting board can elevate the whole vibe. for garnish, fresh cilantro adds not just a splash of color but also freshness.
Try to keep your toppings balanced. not too heavy on one side, you know? a rainbow of veggies makes for an eye-catching dish.
And here’s a pro tip: sprinkle a little extra cheese on the crust for a crispy edge! nothing beats that cheesy goodness.
Storage & Make-Ahead
So, planning to make your pizza ahead of a gathering? you’re thinking smart! make your homemade pizza sauce and dough a day in advance.
Just store them in airtight containers in the fridge. the dough will still rise and be ready to roll out when you’re set to bake.
Leftover pizza? pop it in an airtight container. it’ll stay fresh for about 3-4 days. to reheat, just toss it back in a hot oven for a few minutes.
That way, you’ll keep that crispy pizza crust you worked so hard for!
Creative Variations
Okay, here’s where the fun kicks in! want to spice things up? try adding jalapeños for a spicy kick or swap the paneer for tofu for a vegan twist.
Maybe sneeze some curry powder on your toppings for an exotic flair. the possibilities are endless!
Think about your seasonings. a sprinkle of garam masala can elevate the whole experience. you can even change it up based on the season—think roasted pumpkin in the fall or fresh basil in the summer.
Tired of your usual toppings? go regional. how about some good ol’ southern bbq sauce instead of traditional?
Complete Nutrition Guide
Now, let’s keep it real. knowing what’s on your plate is key! the calories in your pizza will mainly come from the dough and cheese.
This recipe sits at about 320 calories a slice, not too shabby for a vegetarian pizza option !
Paneer is protein-rich and a great way to satisfy your hunger without the meat. if you're counting carbs, you can experiment with whole wheat flour for the dough.
Health is important too, and balancing flavors is what it’s all about!
Conclusion
So there you have it! making homemade paneer pizza with fresh dough isn’t just about feeding everyone; it's about creativity, fun, and a little bit of flair.
Whether you're cooking for a quiet family dinner or getting ready to impress your friends, this pizza is bound to be a crowd-pleaser.
Remember, cooking should be enjoyable—mess-ups happen, but that’s how you learn! get in there and make it your own. happy pizza-making, friends!
Frequently Asked Questions
What are the key ingredients needed to Bake Paneer Pizza with Homemade Dough?
To bake a delicious Paneer Pizza with homemade dough, you'll need all-purpose flour, sugar, salt, active dry yeast, warm water, olive oil, canned crushed tomatoes, garlic, Italian seasoning, paneer, bell peppers, red onion, garam masala, and mozzarella cheese. These ingredients combine to create a flavorful pizza that embraces both traditional and Indian flavors.
Can I make the dough ahead of time for the Paneer Pizza?
Yes, you can prepare the dough ahead of time. After kneading, cover it with plastic wrap and store it in the refrigerator for up to 24 hours. Just allow it to come back to room temperature and rise for about 30 minutes before using it to assemble your pizza.
How do I store leftover Bake Paneer Pizza with Homemade Dough?
Store any leftover pizza in an airtight container in the refrigerator for up to 3 days. To reheat, you can bake it in the oven at 350°F (175°C) for about 10-15 minutes or until heated through, helping to keep the crust crispy.
What are some variations I can try with my Paneer Pizza?
There are numerous tasty variations to experiment with! You can turn your Paneer Pizza into a spicy version by adding jalapeños or red chili flakes. Alternatively, for a vegan option, substitute paneer with tofu and use vegan cheese. You can also load it with additional veggies like mushrooms, spinach, or zucchini for an even heartier pizza.
What cooking tips should I consider for the perfect Paneer Pizza?
Ensure your dough is well-kneaded and has time to rise for optimal texture. Baking your pizza on parchment paper allows for easy transfer and cleanup. For an extra cheesy melt, consider covering your pizza with foil halfway through baking. Lastly, don't be afraid to modify the spices and herbs in the sauce based on your personal preferences!
Is Paneer Pizza healthy compared to traditional pizza?
Paneer Pizza can be a nutritious option as paneer is a good source of protein, calcium, and healthy fats. You can also make it healthier by using whole wheat flour for the dough and loading it with vegetables. Just keep an eye on the cheese portion, as it's higher in fat and calories compared to other pizza toppings.
Homemade Paneer Pizza with Fresh Dough Card
⚖️ Ingredients:
- 2 cups (250g) all-purpose flour
- 1 teaspoon (5g) sugar
- 1 teaspoon (5g) salt
- 1 teaspoon (5g) active dry yeast
- 3/4 cup (180ml) warm water (110°F/43°C)
- 1 tablespoon (15ml) olive oil
- 1 cup (240ml) canned crushed tomatoes
- 1 tablespoon (15ml) olive oil
- 2 garlic cloves, minced
- 1 teaspoon (5g) Italian seasoning
- Salt and pepper to taste
- 8 oz (225g) paneer, cubed
- 1/2 cup (60g) bell peppers, sliced
- 1/2 cup (60g) red onion, thinly sliced
- 1 teaspoon (5g) garam masala
- 1/2 cup (60g) shredded mozzarella cheese
- Fresh cilantro for garnish (optional)
🥄 Instructions:
- Step 1: Combine warm water, sugar, and yeast in a bowl; let sit for 5 minutes until frothy.
- Step 2: In a large bowl, mix flour and salt. Create a well in the center.
- Step 3: Add yeast mixture and olive oil to the well. Mix until combined.
- Step 4: Knead dough on a floured surface for 8-10 minutes until smooth.
- Step 5: Place dough in an oiled bowl, cover, and let rise for 1 hour.
- Step 6: Heat olive oil in a saucepan over medium heat; add minced garlic and sauté until fragrant.
- Step 7: Stir in crushed tomatoes, Italian seasoning, salt, and pepper. Simmer for 10-15 minutes.
- Step 8: In a bowl, mix cubed paneer with garam masala.
- Step 9: Prepare vegetables (bell peppers and red onion) by slicing thinly.
- Step 10: Preheat oven to 475°F (245°C).
- Step 11: Roll out the risen dough on a floured surface to desired thickness.
- Step 12: Transfer dough to a baking sheet or pizza stone lined with parchment paper.
- Step 13: Spread sauce evenly over dough.
- Step 14: Arrange paneer, bell peppers, and onions over the sauce. Sprinkle mozzarella on top.
- Step 15: Bake in the preheated oven for 15-20 minutes or until golden and cheese is bubbling.
- Step 16: Remove from oven and let cool for a few minutes.
- Step 17: Garnish with fresh cilantro if desired and slice into pieces.
- Step 18: Enjoy hot!
Previous Recipe: How to Mix Unsalted Butter for Creamy Delight: 5 Amazing Recipes!
Next Recipe: How to Make No-Cook Cottage Cheese Delight with Saffron: My Creamy Secret!