Decadent Brown Butter Chocolate Cupcakes
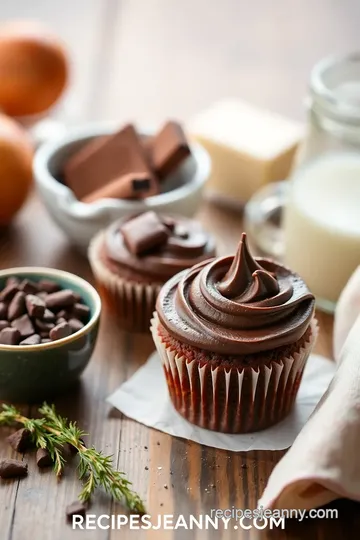
Craving something sweet? Let me show you how to bake brown butter cupcakes with chocolate that are deliciously moist and utterly irresistible. Perfect for any occasion!

look into Into Decadence: The Magic of Brown Butter Chocolate Cupcakes
Oh my gosh! have you ever baked something so good that it made you question your loyalty to all other desserts? that was me the first time i decided to bake brown butter cupcakes with chocolate .
I was standing in my kitchen, apron on, nostalgia washing over me as the familiar nutty aroma danced around the room.
Those warm brown butter vibes mixed with rich chocolate created a symphony i couldn’t help but sing along to. if you’re like me, or if you just love a good treat that doesn't require a culinary degree, stick around.
A Sweet Journey Through Time
Let’s take a step back in time. the humble cupcake has been around since the late 18th century. back then, they were simple but delightful, just like your grandma used to make.
Fast-forward to today, and cupcakes are practically a gourmet sensation. trust me, brown butter cupcakes have taken the spotlight, especially with this chocolate twist.
You’ll see them popping up at fancy parties and bake sales alike.
These little delights are medium in the difficulty department. the trickiest part? browning that butter just right. it sounds fancy, but once you know how to do it, you’ll feel like a total baking pro.
In about 1 hour and 10 minutes total, you’ll be enjoying these moist chocolate cupcakes . plus, they yield 12 standard cupcakes —perfect for sharing or keeping all to yourself (i won’t judge!).
What Makes These Cupcakes Special?
Let’s talk benefits. first up, health benefits . while we can’t exactly call these cupcakes health food, they do offer a better option than store-bought treats loaded with preservatives.
We’re using real ingredients—like unsalted butter and buttermilk —to give you that gourmet feel without any of the fuss.
These cupcakes also shine at special occasions or simply as a weeknight treat. need to impress a date? these bad boys can do the trick.
They take the classic chocolate cupcake and elevate it with that nutty flavor you get from brown butter, making them stand apart from your typical desserts.
Another reason these cupcakes are a go-to? their tender crumb . seriously, once you pull them from the oven, you’ll be pinching yourself wondering if you really made these from scratch.
The rich chocolate frosting adds the perfect finishing touch, giving you that indulgent experience without being overwhelming.
Why You’ll Fall in Love
Everyone has that one dessert they can't resist, right? these decadent chocolate desserts have a way of bringing people together.
You can whip them up for birthday celebrations, holidays, or just a cozy gathering with friends. the best part? they’re family-friendly! even the kiddos can help out—who wouldn’t want to mix chocolate and butter?
When baking cupcakes, you might run into challenges, like overmixing the batter or burning the butter. but don’t stress! i promise, with a few of my baking tips for cupcakes , you’ll nail it.
So, where do we go from here? Well, I suggest we gather our ingredients. Before you know it, you’ll be frosting your very own homemade chocolate cupcakes that will wow everyone around you!
Stay tuned! Next up is the fun part—the ingredients you’ll need to make this delightful treat. You're going to want to grab a pen and paper or just save this piece for reference—you'll want to make these again, trust me!
Essential Ingredients Guide for Decadent Desserts
So, you want to bake brown butter cupcakes with chocolate ? you’ve come to the right place! let’s break down all the essential ingredients you’ll need, the tools to have handy, and some smart substitutions to make your baking experience fun and stress-free.
Premium Core Components
First up, let’s talk ingredients ! The quality of your brown butter cupcakes is really going to depend on the stuff you use. Here’s what you need:
-
Butter : you’ll want to use unsalted butter ; it gives you better control over the saltiness in your mix.
For this recipe, you need 1 cup (227g) , which you’ll melt and brown. seriously, get ready to enjoy that nutty aroma!
-
Sugars : you’ll need 1 cup (200g) of granulated sugar and 1/2 cup (100g) of packed brown sugar. the granulated sugar gives sweetness, while the brown sugar adds moisture and a hint of caramel flavor.
-
Dry goods : grab 1 1/2 cups (180g) of all-purpose flour and 1/2 cup (50g) of unsweetened cocoa powder for that rich chocolate base.
Make sure your cocoa is fresh – it can lose oomph if it’s been sitting in the pantry too long.
Storage Tips : Keep your cocoa powder and flour in an airtight container to prolong their shelf life. About 6-12 months is a good window – just keep an eye (and nose) out for any funky smells!
Signature Seasoning Blend
Oh, and we can't forget the magic of flavoring ! Here’s where we get a little extra fun.
-
Salt : You’ll only need a 1/4 teaspoon . It seems so small, but trust me, it brings everything to life!
-
Baking Essentials : You’ll also need 1 teaspoon baking powder and 1/2 teaspoon of baking soda . These help your cupcakes rise to fluffy perfection.
-
Can’t forget the vanilla! Grab 1 teaspoon for that lovely depth of flavor.
Smart Substitutions
Now, what if you’re missing something? No worries!
-
Butter substitutes : If you want to go dairy-free, use coconut oil instead.
-
Buttermilk : If you don’t have any, just mix 1/2 cup milk with 1 tablespoon of vinegar and let it sit for a few minutes.
-
Gluten-free? No problem! Try a gluten-free flour blend to make these cupcakes work for everyone.
Kitchen Equipment Essentials
Alright, time to grab your gear! Here’s what you'll need:
- Mixing bowls : At least two – one for wet and one for dry ingredients.
- Whisk : Perfect for mixing your dry blends.
- Muffin tin : You’ll need this for those cupcakes! And don’t forget cupcake liners. They make the cleanup a breeze.
- Electric mixer (optional): If you have one, it makes mixing everything super easy.
Storage Tip : Make sure to store your mixing tools in a dry place, away from moisture. No one likes a rusty whisk!
Final Thoughts
Ready to dive into the delicious world of baking? making brown butter chocolate cupcakes is such a fun adventure, mixing those rich, nutty flavors together.
Seriously, it’s like a warm hug in cupcake form!
In a moment, i'm going to walk you through the simple step-by-step instructions to create these delectable treats. from the heavenly aroma of browning butter to licking the bowl of rich chocolate frosting (isn't that the best part?), you’ll want to savor every moment.
You won’t just be baking; you’ll be making memories, too!
Let’s get to the good stuff – grab your ingredients, and let’s start whipping up some magical decadent chocolate desserts that’ll impress everyone at your next gathering. Ready? Here we go!
Mastering Professional Cooking for Delicious Cupcakes
Alright, friends! let me take you on a delightful pastry journey where we dive into the art of professional cooking—particularly how to bake brown butter cupcakes with chocolate .
We’re talking about scrumptious, tender crumb cupcakes that will turn heads at any gathering. but don’t worry! i’ll guide you through every step of the process, and we’ll have a blast!
Essential Preparation Steps
So, first things first: mise en place . it sounds fancy, but it’s just a cool way to say, “get your stuff together!” gather all your ingredients—like that beautiful browned butter and cocoa powder—before you start.
It keeps chaos at bay, trust me!
Now, let’s chat about time management. baking isn’t about rushing. it’s about patience (and a pinch of excitement!). taking 20 minutes for prep and 18- 20 minutes for baking means planning will be your best buddy.
Then, tackle organization strategies . keep your workspace clean, because a cluttered kitchen can totally mess with your vibe. and don’t forget safety considerations ! keep an eye on that butter, or you might end up with a burnt mess rather than a nutty, fragrant base for your cupcakes.
Step-by-Step Process
Ready for the fun part? Here’s your step-by-step process to make those chocolatey wonders:
-
Preheat the Oven: Crank that baby up to 350° F ( 175° C) and line your muffin tin with cupcake liners.
-
Brown the butter: this is where the magic happens! in a saucepan over medium heat, melt 1 cup (227g) of unsalted butter .
Keep swirling until it’s golden brown and smells nutty, usually about 5- 7 minutes .
-
Mix dry ingredients: whisk together 1 ½ cups (180g) all-purpose flour , ½ cup (50g) unsweetened cocoa powder , 1 teaspoon baking powder , ½ teaspoon baking soda , and ¼ teaspoon salt in another bowl.
Set it aside!
-
Combine wet ingredients: in your mixing bowl, blend that gorgeous brown butter with 1 cup (200g) granulated sugar and ½ cup (100g) brown sugar .
Add in 2 large eggs, 1 teaspoon vanilla extract , and ½ cup (120ml) buttermilk.
-
Wet Meets Dry: Slowly fold the dry ingredients into the wet mixture using a rubber spatula until just combined.
-
Fill Muffin Tin: Divide the batter evenly into the muffin tin, filling each cup about 2/3 full .
-
Bake: Time to pop those into your preheated oven for 18- 20 minutes. How do you know when they're ready? A toothpick should come out clean!
-
Cool: Let them chill in the tin for 5 minutes , then transfer to a wire rack to cool completely.
-
Frosting fun: beat ½ cup (113g) softened unsalted butter in a bowl until creamy. gradually mix in 1 ½ cups (190g) powdered sugar and ¼ cup (25g) cocoa powder .
Add in 2-3 tablespoons of heavy cream and that other teaspoon of vanilla.
-
Frost Your Cupcakes: Go wild! Frost those marvelous cupcakes and enjoy the sweet perfection!
Expert Techniques
Let’s get a bit more techy here. To give your cupcakes that pro touch, be mindful of a few quality checkpoints. Watch the butter closely—it should be golden, not burnt.
Also, room-temperature ingredients are a must for that smooth batter. oh, and remember: when testing for doneness, the toothpick test should leave you with a mostly clean pick, just a few crumbs clinging on.
And if you mess up? No worries! If the frosting’s too soft, just toss it in the fridge for a bit. Easy fix!
Success Strategies
Now, let’s talk about those common mistakes to avoid. don’t skip the cooling step before frosting; you'll end up with a gooey mess if you rush it! also, measure your flour correctly to avoid a dense cupcake.
For assurance, keep an eye on the baking time—if you’re unsure, check at the lower end of 18 minutes .
And hey, if you wanna make-ahead options, the batter can be prepped and stored in the fridge for up to 24 hours.
just remember to bring it back to room temperature before baking!
So there you have it—a full-on guide to mastering the art of baking brown butter chocolate cupcakes! these little gems are the perfect mix of decadent and cozy.
Whether it's a birthday bash or just a tuesday night craving, these cupcakes will shine.
Additional Information
This recipe is not just about great flavors; it’s about mastering culinary techniques that will elevate your home baking. Remember to practice patience and enjoy the process! Happy baking!
Additional Recipe Information
Are you ready to bake brown butter cupcakes with chocolate ? let’s dive deeper into making these decadent delights—and trust me, you’ll want to take some notes.
When you’re whipping up these brown butter cupcakes , there are a few pro tips and tricks that could make all the difference.
Pro Tips & Secrets
Oh my gosh, let’s start with the browned butter . here's a little secret: the key to achieving that nutty flavor is to cook it slowly.
You want it to turn a beautiful golden brown — be vigilant, or you’ll end up with burnt butter, which is just sad.
If you can multitask, i recommend prepping your dry ingredients while your butter is browning. it can save some time!
Want to elevate the flavor? toss in a pinch of espresso powder – it’s a game changer! it won’t taste like coffee, but it’ll enhance that chocolate richness like nobody's business.
For presentation, don’t skip the garnish! a sprinkle of sea salt on top of your rich chocolate frosting adds that gorgeous contrast and makes it look like something straight out of a bakery.
Perfect Presentation
Now, let’s talk about plating techniques . use a pretty cake stand or a funky plate for your cupcakes. a contrasting color can really make your treats pop! you can also try using a piping bag for frosting – it sounds fancy, but it’s easier than it looks.
Just pick some good decorative cupcake toppings like sprinkles or colored sugar to jazz things up. and honestly, don’t shy away from adding edible flowers; they can transform your dessert into gourmet cupcake ideas right before your eyes!
Stick with color combinations – think deep chocolate frosting against a light cupcake. it’s all about that visual appeal , right? you want everyone to say, “wow!” the moment they see your decadent chocolate desserts .
Storage & Make-Ahead
Let’s be real – sometimes life happens, and you can’t eat all 12 cupcakes at once. no worries! just let them cool completely and then store them in an airtight container.
They’ll stay fresh at room temperature for about 2-3 days, but if you want them to last longer, pop them in the fridge for about a week.
Just remember, refrigerating can dry them out, so you might need a little frosting revival later!
Thinking ahead? make your batter the night before and store it in the fridge. just bring it to room temperature before baking.
If you have leftovers, reheat your cupcakes in the microwave for about 10-15 seconds to bring back that fresh-baked hit!
Creative Variations
Feeling adventurous? Let's talk cupcake variations like chocolate chip cupcake variations . Toss in some chocolate chips into the batter. It's like making moist chocolate cupcakes with an unexpected surprise! Want something a little seasonal? Try adding pumpkin spice in the fall or swap out the buttermilk for eggnog during the holidays!
If you’re catering to dietary needs, you can swap out all-purpose flour for a gluten-free blend, or use coconut oil instead of butter for that brown butter baking tip to keep it dairy-free.
Complete Nutrition Guide
For those of you counting calories or keeping an eye on nutrition, here’s a quick breakdown. each cupcake has about 290 calories — not too shabby for a special occasion dessert ! plus, don’t forget the health benefits of making your treats from scratch.
You decide the ingredients, which means no weird preservatives or additives!
Portion guidance? Stick to one cupcake per serving — unless, of course, you’re feeling wild and grab a second. Hey, we all deserve a treat sometimes!
Expert FAQ Solutions
Got questions? you’re not alone! one common issue is overmixing. you want to combine the wet and dry ingredients gently; overmixing can lead to tough cupcakes.
If your cupcakes sink in the middle, it could mean they weren’t baked long enough. a toothpick should come out clean!
So, if you’re thinking about how to adjust flavors or troubleshoot, don’t hesitate to tweak the recipe. That's part of the fun of baking cupcakes from scratch!
Conclusion
Now that you’ve got all the inside scoop, it’s time to roll up those sleeves and get baking! whether you’re whipping these up for a gathering or just treating yourself after a long day, i promise these brown butter chocolate cupcakes will not disappoint.
Who knows? they might just become your new go-to recipe for those sweet gatherings with friends or family. happy baking!

Decadent Brown Butter Chocolate Cupcakes Card
⚖️ Ingredients:
- 1 cup (227g) unsalted butter, browned and cooled
- 1 cup (200g) granulated sugar
- 1/2 cup (100g) packed brown sugar
- 2 large eggs
- 1 teaspoon vanilla extract
- 1 ½ cups (180g) all-purpose flour
- 1/2 cup (50g) unsweetened cocoa powder
- 1 teaspoon baking powder
- 1/2 teaspoon baking soda
- 1/4 teaspoon salt
- 1/2 cup (120ml) buttermilk
- 1/2 cup (113g) unsalted butter, softened
- 1 1/2 cups (190g) powdered sugar
- 1/4 cup (25g) unsweetened cocoa powder
- 2-3 tablespoons (30-45ml) heavy cream
- 1 teaspoon vanilla extract
🥄 Instructions:
- Step 1: Preheat the oven to 350°F (175°C) and line a muffin tin with cupcake liners.
- Step 2: In a small saucepan, melt the butter over medium heat, swirling occasionally.
- Step 3: Cook until the butter turns golden brown and develops a nutty aroma (about 5-7 minutes). Remove from heat and let cool slightly.
- Step 4: In a mixing bowl, whisk together the flour, cocoa powder, baking powder, baking soda, and salt. Set aside.
- Step 5: In another bowl, blend the browned butter, granulated sugar, and brown sugar until well combined.
- Step 6: Add the eggs one at a time, mixing well after each addition. Stir in vanilla and buttermilk.
- Step 7: Gradually add the dry mixture to the wet mixture, using a rubber spatula to fold until just combined.
- Step 8: Divide the batter evenly among the prepared cupcake liners, filling each about 2/3 full.
- Step 9: Bake in the preheated oven for 18-20 minutes, or until a toothpick inserted into the center comes out clean.
- Step 10: Let the cupcakes cool in the tin for 5 minutes, then transfer them to a wire rack to cool completely.
- Step 11: In a bowl, beat the softened butter until creamy. Gradually add powdered sugar and cocoa powder, mixing until incorporated.
- Step 12: Add heavy cream and vanilla extract, beating until fluffy and spreadable.
- Step 13: Once the cupcakes are completely cool, frost with the chocolate buttercream using a spatula or piping bag.
Previous Recipe: Why You Need to Bake Blackberry Chocolate Cake Delight Today
Next Recipe: How to Bake Strawberry Cupcakes with Roasted Flavor: A Delicious Twist