Decadent Brownies with Nutty Brown Butter
Craving the best Baking Brownies with Rich Brown Butter? Indulge in these fudgy delights with a deep, nutty flavor. Check out my tips for a perfect bake!

- look into Into the World of Brown Butter Brownies
- Essential Ingredients Guide
- Elevating Your Baking Game: The Professional Cooking Method
- Pro Tips & Secrets for Baking Brownies with Rich Brown Butter
- Perfect Presentation
- Storage & Make-Ahead
- Creative Variations
- Complete Nutrition Guide
- In a Nutshell
- Frequently Asked Questions
- Recipe Card
look into Into the World of Brown Butter Brownies
Oh my gosh, remember that one time i tried to bake brownies for a last-minute potluck? i was totally scrambling through my fridge like a madman, hoping to piece together something that would impress.
Let me tell ya, there’s nothing like the heavenly smell of baking brownies with rich brown butter wafting through your kitchen to revive your spirits.
Seriously—you can’t go wrong with that nutty, caramel-like aroma! if you’ve ever wanted to turn a simple chocolate treat into an experience, this is it.
Recipe Overview: A Brownie Journey
Now, here’s some tasty history for ya. brownies originated in the united states in the late 19th century, and over the years, they’ve evolved beyond just a fudgy chocolate square.
Modern-day brownies, like those made with rich brown butter, have soared in popularity, appearing everywhere from coffee shops to fancy dessert menus.
Honestly, they’re a go-to for any occasion, whether it’s a birthday, a wednesday pick-me-up, or just because.
When it comes to making these bad boys, you’re looking at about 45- 60 minutes total from start to finish.
Sounds easy, right? you’ll need a little patience for browning the butter, but i promise it’s totally worth the effort.
This recipe isn’t just a walk in the park; i’d call it a chilled stroll on a sunny day—totally doable! plus, when it comes to cost, you probably have most of these best brownie ingredients in your pantry already.
The Goodness of Brown Butter Brownies
Now, let’s break down some sweet benefits. first off, these brownies are not only super indulgent but they’re also packed with flavor.
The nutty notes from the brown butter elevate them to that gourmet level. we’re talkin' fudgy brownies that hit all the right spots.
Plus, who can resist those little bursts of chocolate with every bite? it’s like diving into another world of rich chocolate desserts!
And let’s be real, are they perfect for special occasions? you bet! picture this: a rich brownie with a scoop of ice cream for that extra decadent dessert idea .
Add a drizzle of chocolate sauce or maybe even a sprinkle of flaky sea salt, and you’ll have your friends lining up for seconds.
Not only do you get a delectable treat, but they also double as a crowd-pleaser.
Why stop at just good when you can have gourmet brownie variations ? add some caramel swirls, or swap out traditional chocolate chips for white chocolate chunks.
There are even gluten-free brownie options if you’re trying to cater to everyone’s tastes.
Baking Techniques to Keep in Mind
When you’re in the kitchen whipping these brownies together, a couple of chocolate brownie baking tips can save the day.
First, keep an eye on that butter—like, for real. if you leave it unattended for too long, you’ll end up with burnt butter, and that’s just a no-go.
When figuring out the perfect brownie texture, remember: don't overmix. you want to mix those chocolate batters just enough to combine—less is more for that fudgy, gooey center!
As always, let the brownies cool completely before you slice in. that way, you won’t have a crumbly mess on your hands.
And honestly, it’s the waiting that builds all that delicious anticipation. who doesn’t enjoy the thrill of a newly baked dessert cooling on the countertop?
So, if you’re ready to roll up your sleeves and dive into those delightful brownies, let’s get to the ingredients that’ll make this happen!
Essential Ingredients Guide
Hey there, brownie lovers! let’s talk about the essential ingredients you’ll need to bake the perfect brown butter brownies . trust me, nailing down these ingredients is key to getting that rich, fudgy texture everyone craves.
So, pull up a chair and let’s dive in!
Premium Core Components
First things first, when it comes to the best brownie ingredients , quality is everything. you want butter that's creamy and unsalted because we’re all about control here.
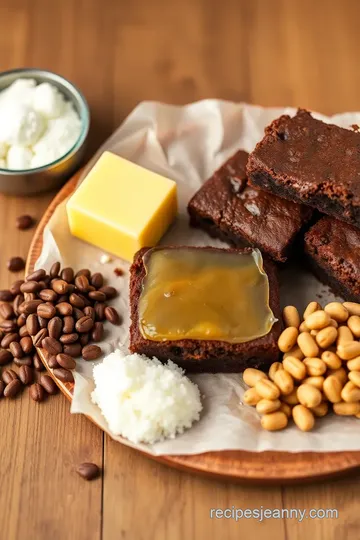
For our brownies, you'll need 1 cup (226 g) of unsalted butter transformed into that nutty goodness called brown butter.
This stuff should smell absolutely incredible when browned—think toasty and slightly caramelized.
Storage tips: brown butter can hang out in your fridge for about a week. just make sure to store it in an airtight container.
Want it to last a bit longer? you can freeze it!
And hey, let’s not forget about chocolate. you’ll need 1 cup (175 g) of quality chocolate chips or chunks . look for dark ones if you want that deep, rich flavor.
That's a must when making rich chocolate desserts!
Signature Seasoning Blend
Now, let’s spice things up! you’ve got your basic spices—like ½ teaspoon (2 g) of salt —which brings out the sweetness beautifully.
No one wants bland brownies, am i right? for those with more adventurous tastes, consider adding a pinch of cinnamon or even a splash of espresso powder to amplify that chocolatey goodness.
Smart Substitutions
Okay, sometimes life happens. maybe you’re out of eggs or gluten isn’t your vibe. never fear! you can use flax eggs (just combine ground flaxseed with water) instead of real eggs for a vegan twist.
If it’s a gluten-free situation, a 1-to-1 flour blend works just fine!
Emergency replacement: running low on sugar? just use some honey or maple syrup instead. it’ll give those fudgy brownies a different yet delicious flavor.
Seriously, don't stress. cooking should be fun, not a race against time!
Kitchen Equipment Essentials
Now, let’s talk gear. you’ll need a medium saucepan for browning the butter. this is crucial for getting that nutty flavor we love! then grab your 9x13-inch baking pan .
If you want those brownies to slide out like a dream, toss in some parchment paper—it's a game changer.
Don't forget your mixing bowls! a large one for the batter and a medium for mixing dry ingredients. oh, and a whisk and spatula will make your life a whole lot easier for mixing and folding in those chocolate chips.
Wrapping It Up
When you’ve gathered all these goodies, you’re prepped and ready to rock! remember, baking brownies with rich brown butter isn’t just about throwing stuff together—it’s an experience.
Whether you’re whipping up a batch for the family or trying to impress at a potluck, these tips will help ensure your brownies turn out totally decadent .
Next up, we’ll dive into the step-by-step instructions for making these remarkable brown butter brownies that absolutely scream perfection. Let’s get baking!

Elevating Your Baking Game: The Professional Cooking Method
Alright, friends! today, we’re diving into the world of professional baking. and what better way to flex your culinary muscle than by baking brownies with rich brown butter ? you might think, “brownies? i know how to make those!” but trust me, brown butter takes these to a whole new level.
So, let’s break it down into manageable steps and techniques.
Essential Preparation Steps
First up, let’s talk about mise en place . this fancy french term just means getting everything ready before you start cooking.
Gather all your ingredients: butter, sugars, cocoa powder, and those luscious chocolate chips. pre-measuring makes things move fast, and you won’t forget anything.
Seriously, i’ve been there, and it leads to a last-minute scramble!
Time management is another key. if you’re a multitasker, this is your moment. while you’re browning the butter, you can sift the dry ingredients or prep your baking pan.
Just keep an eye on that butter!
Now, let’s get organized. Having your kitchen tools ready—mixing bowls, spatula, and a whisk—will make the process smoother. And don’t forget safety considerations . Hot butter can splash, so stir carefully!
Step-by-Step Process
Alright, time for the fun part! Here’s how to whip up those rich brownies:
-
Brown the butter : in a medium saucepan, on medium heat, melt 1 cup (226 g) of unsalted butter. keep stirring until it becomes golden (about 5- 8 minutes ).
You’ll smell that nutty aroma; it’s a game changer!
-
Mix the Sugars : In a large bowl, whisk together 1 ½ cups (300 g) granulated sugar and 1 cup (220 g) brown sugar. Pour that heavenly browned butter in and mix.
-
Add Eggs and Vanilla : Incorporate 4 large eggs one at a time, whisking like a pro. Add in 1 teaspoon (5 g) of vanilla extract for a flavor boost.
-
Add dry ingredients : sift together 1 cup (120 g) flour, ¾ cup (65 g) unsweetened cocoa powder, and ½ teaspoon (2 g) salt in a separate bowl.
Fold this into your wet mix gently.
-
Mix in Chocolate Chips : Gently fold in 1 cup (175 g) chocolate chips for that fudgy goodness.
-
Bake : preheat your oven to 350° f ( 175° c) . spread the batter evenly in a prepared 9x13-inch pan.
Pop it in the oven for 25- 30 minutes . you’ll know it’s ready when a toothpick comes out with moist crumbs—no one likes a dry brownie!
-
Cool and Serve : Let it cool in the pan for a bit before slicing. This helps with the texture—trust me, nobody wants crumbles everywhere!
Expert Techniques
Now, let’s get a little fancy. professional methods we can all learn! one critical step is watching for the butter .
If it starts getting too dark too fast, pull it off the heat! otherwise, you’ll end up with burnt butter instead of that lovely brown butter flavor.
Quality checkpoints are essential, too. During baking, peek in—visual cues like a slight sheen on top or a few cracks means you’re on the right track.
And if something goes wrong (like that pesky overmixing), don’t sweat it! Brownies are forgiving. You might end up with a fudgier batch, which, let’s be real, is never a bad thing!
Success Strategies
What about those common mistakes? One biggie is overbaking. Remember, you want a little gooeyness in the middle. Not too long, just enough time at 25- 30 minutes !
For quality assurance , always taste your batter. Is it too sweet? Too bitter? Adjust as necessary with a pinch more salt or a splash more vanilla. You are the master here!
And let’s talk about make-ahead options . You can actually prepare the batter and stash it in the fridge for a day. Just bring it back to room temp before baking.
So, whether you go for classic chocolate brownie variations or try a fancy caramel swirl brownie, this method sets the stage for success.
Your friends will be begging for the recipe, and they won't even know how easy it was!
Now that we’ve covered the essentials of baking these glorious brownies, you might be wondering what else could elevate your dessert game. Stick around for Additional Information coming up next!

Pro Tips & Secrets for Baking Brownies with Rich Brown Butter
Oh my gosh, !baking brownies with rich brown butter is truly a game changer! it infuses your brownies with a deep, nutty richness that redefines what a brownie can be.
Here are some little secrets i’ve learned along the way to elevate your brownie game.
First off, let’s talk about that brown butter. when you're melting your butter, keep it on medium heat and stir it constantly.
You want it to bubble up and then turn to a gorgeous golden brown (think caramel, but with so much more flavor!).
It usually takes about 5- 8 minutes , but it can go from golden to burnt in the blink of an eye.
So just keep your eyes and nose on it!
A little time-saving tip ? While you wait for that butter, you can already mix your sugars in a bowl. Less time standing around equals more time enjoying those gooey, fudgy brownies.
Now, here’s something that can really amp up your flavors: add a dash of flaky sea salt right before serving.
It creates a beautiful contrast with the richness of the chocolate. trust me, you’ll want to spread the word. “hey, i added sea salt and it made my brownies divine!”
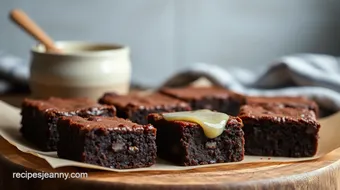
Perfect Presentation
Let’s be honest, we eat with our eyes first. to really make your brownies pop, think about how you plate them.
Take your time slicing them into those perfect 2-inch squares (go on, use a serrated knife for clean cuts!).
Wanna wow your friends? dust powdered sugar on top or drizzle warmed chocolate sauce over them. you can even get fancy with some fresh berries on the side.
Those little bursts of color will really catch the eye!
For that added “wow” factor, consider pairing your brownies with a scoop of vanilla ice cream. It’s like dessert and a show all in one!
Storage & Make-Ahead
Now, if you’re anything like me, these brownies won’t last long. but if you do manage to have some leftover (good luck with that), here’s how to store them properly! store your brownies in an airtight container to keep them fresh for about 3 days at room temperature.
For longer storage, you can throw them in the fridge; they'll stay good for up to a week.
Want to know a neat trick? you can freeze them! just wrap them tightly in plastic wrap and then throw them in a freezer bag.
They’ll last for up to 3 months. when you’re ready to devour, simply let them thaw at room temp or pop them in the microwave for a quick zap.
Creative Variations
Feeling adventurous? there’s a whole world of gourmet brownie variations waiting for you! why not add some chopped nuts like walnuts or pecans to make your brownies a bit crunchier? or you could go all out and swirl in some peanut butter or caramel.
Seasonal twists are also a thing! Try adding a bit of pumpkin spice in the fall or some crushed candy canes during the winter holidays.
And for all my gluten-free or dairy-free friends out there, you can easily adapt this recipe. just swap in a gluten-free blend and use coconut oil instead of butter.
You won’t even miss the regular stuff!
Complete Nutrition Guide
Alright, so here's the nitty-gritty. each brownie will run you about 280 calories . but don’t sweat it too much; like i say, life is about balance! each bite packs about 3 grams of protein , thanks to those mighty eggs, and about 14 grams of fat (that’s mostly from your rich brown butter).
If you're keeping an eye on your sugar intake, these brownies have about 20 grams of sugar per serving . so feel free to indulge once in a while – it’s good for the soul! just remember, the portion size matters.
In a Nutshell
Honestly, baking brownies with rich brown butter is like sending your taste buds on a delicious trip. focus on using the best brownie ingredients , and trust me, these brownies will be a hit.
Whether you're making them for yourself, whipping them up for a potluck, or treating your friends, they’re sure to please.
So roll up those sleeves and get to mixing! And remember, it’s all about having fun in the kitchen. Happy baking!
Frequently Asked Questions
What is the secret to perfecting brownies when Baking Brownies with Rich Brown Butter?
The key lies in carefully browning the butter without burning it. Stir continuously and keep a close eye on the color and aroma; aim for a golden brown that smells nutty. Additionally, avoid overmixing the batter after adding the dry ingredients to ensure a fudgy texture.
How do I store my brownies after Baking Brownies with Rich Brown Butter?
For optimal freshness, store the brownies in an airtight container at room temperature for up to 3 days. If you want to keep them longer, you can refrigerate them for about a week or freeze them wrapped tightly for up to three months. Just make sure to let them cool completely before storing!
Can I substitute ingredients when Baking Brownies with Rich Brown Butter?
Yes! You can replace all-purpose flour with a gluten-free flour blend for a gluten-free version. For a dairy-free option, substitute the brown butter with coconut oil. Additionally, you can use maple syrup in place of some granulated sugar for a unique flavor twist.
What chocolate should I use for Baking Brownies with Rich Brown Butter?
Using high-quality chocolate chips or chunks makes a significantly tasty difference. You can choose between semi-sweet, dark, or even milk chocolate, depending on your preference. For more complexity, consider mixing different types of chocolate!
What are some serving suggestions for brownies made with rich brown butter?
For a delightful treat, serve the brownies warm with a scoop of vanilla ice cream or a drizzle of rich chocolate sauce. You can also enjoy them alongside a strong cup of coffee or milk, or sprinkle some flaky sea salt on top for enhanced flavor.
How do I know when my brownies are done baking?
The best way to check is by inserting a toothpick into the center of the brownies. If it comes out with moist crumbs (and not wet batter), they're done. Keep in mind that they will continue to cook a bit more as they cool in the pan.
Decadent Brownies with Nutty Brown Butter Card
⚖️ Ingredients:
- 1 cup (226 g) unsalted butter (brown butter)
- 1 ½ cups (300 g) granulated sugar
- 1 cup (220 g) packed light brown sugar
- 4 large eggs
- 1 teaspoon (5 g) vanilla extract
- 1 cup (120 g) all-purpose flour
- ¾ cup (65 g) unsweetened cocoa powder
- ½ teaspoon (2 g) salt
- 1 cup (175 g) chocolate chips or chunks
🥄 Instructions:
- Step 1: In a medium saucepan, melt the butter over medium heat. Continuously stir until bubbly, then keep stirring until it turns golden brown and smells nutty. Remove from heat and let cool slightly.
- Step 2: In a large mixing bowl, combine the granulated and brown sugars. Add the browned butter and whisk until well blended.
- Step 3: Add eggs one at a time, whisking until fully incorporated after each addition. Mix in the vanilla extract.
- Step 4: In a separate bowl, sift together flour, cocoa powder, and salt. Gradually fold the dry ingredients into the wet mixture using a spatula until just combined.
- Step 5: Gently incorporate chocolate chips or chunks into the batter.
- Step 6: Preheat the oven to 350°F (175°C). Pour the batter into a prepared baking pan and spread evenly. Bake for 25-30 minutes, or until a toothpick inserted in the center comes out with moist crumbs.
- Step 7: Allow brownies to cool in the pan before slicing into squares.
Previous Recipe: Easy & Zesty Baking Lemon Poppy Seed Cake Delight: A Family Favorite Recipe
Next Recipe: Deliciously Easy Bake Veggie Pizza with Fresh Toppings: A Family Favorite