Gluten-Free Vanilla Cake Recipe
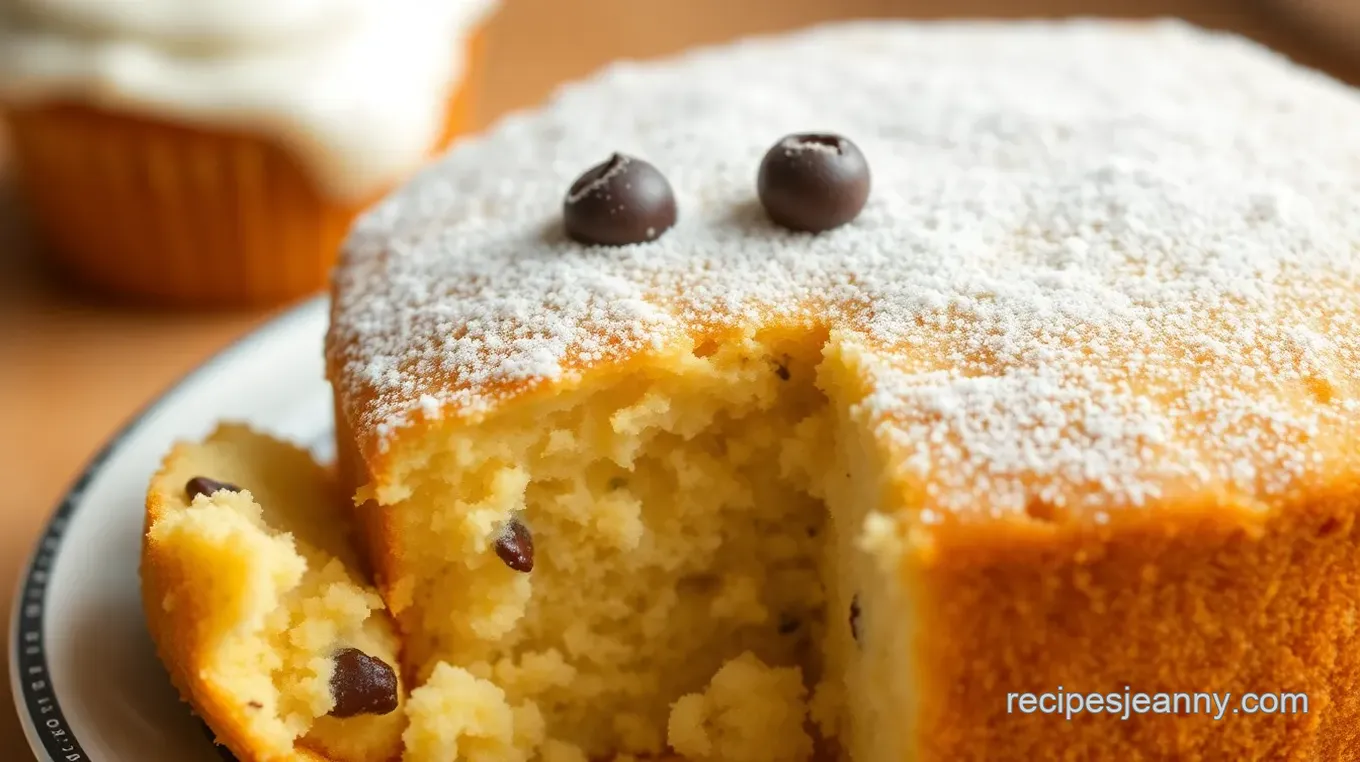
Try this delicious Gluten-Free Vanilla Cake! In just 40 minutes, bake a moist treat using gluten-free cake mix. Perfect for family gatherings or special occasions. Serves 8.

- About Introduction
- Gluten-Free Vanilla Cake: A Culinary Journey
- Why This Recipe Will Amaze You
- Health & Nutrition Highlights
- Recipe at a Glance
- Premium Ingredients Guide
- Kitchen Equipment Essentials
- Pro Ingredient Tips
- Professional Cooking Guide
- Professional Secrets for Baking a Gluten-Free Cake
- Perfect Presentation of Your Gluten-Free Cake
- Storage & Make-Ahead Tips for Gluten-Free Cakes
- Creative Variations on Your Gluten-Free Cake Recipe
- Expert FAQ Solutions About Gluten-Free Cakes
- Complete Nutrition Guide for Your Delicious Dessert
- Recipe Card
About Introduction
Gluten-free diets have gained immense popularity in recent years, driven by both health trends and the growing awareness of celiac disease. This shift has paved the way for gluten-free baking to flourish, allowing countless individuals to enjoy delicious treats without sacrificing flavor or texture. The gluten-free cake mix revolutionized dessert-making, offering convenience and ease for home bakers. With a delightful blend of ingredients, it ensures that everyone can indulge in sweet creations while adhering to their dietary needs.
The Gluten-Free Vanilla Cake Recipe stands out because it combines simplicity with scrumptiousness. Using a boxed gluten-free cake mix as a base means less time spent measuring and mixing ingredients, making this recipe perfect for busy lifestyles. Its versatility allows you to customize flavors and add-ins according to your preferences. Whether you're hosting a party or simply treating yourself, this easy-to-follow recipe guarantees satisfaction.
Gluten-Free Vanilla Cake: A Culinary Journey
The culinary heritage surrounding cakes is rich and diverse, with roots tracing back centuries across various cultures. Cakes symbolize celebration in many societies—birthdays, weddings, holidays—all marked by these sweet confections. The introduction of gluten-free options reflects an evolution within traditional baking practices that honors inclusivity while preserving flavor.
This particular Gluten-Free Vanilla Cake has fascinating origins; inspired by classic vanilla cakes enjoyed worldwide but adapted for those avoiding gluten. It holds cultural significance as more people recognize food allergies and intolerances within their families or communities. As a result, this cake has become increasingly popular today among both those who require gluten-free options and those who simply love great-tasting desserts!
Why This Recipe Will Amaze You
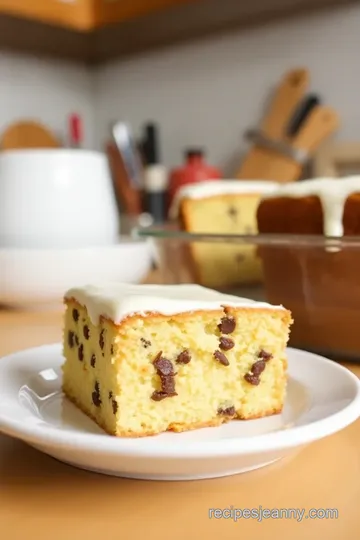
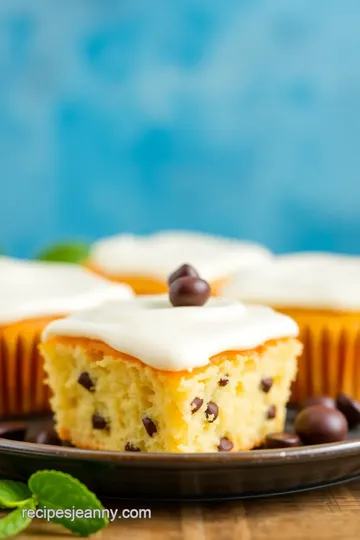
When it comes to flavor combinations, this Gluten-Free Vanilla Cake does not disappoint! Imagine moist layers complemented by rich frosting or fresh fruit toppings—a match made in dessert heaven! With foolproof techniques outlined in our simple instructions, even novice bakers can achieve outstanding results on their first try.
This expert-tested method takes all the guesswork out of baking with gluten-free mixes so you can focus on enjoying your creation rather than worrying about consistency or taste issues often associated with alternative flours. Plus, we include time-saving tips throughout the process—allowing you more opportunity to savor each delightful bite!
Health & Nutrition Highlights
From a nutritional perspective, our Gluten-Free Vanilla Cake offers key benefits worth noting! Made primarily from quality ingredients found within pre-packaged mixes combined with eggs and healthy fats like vegetable oil or coconut oil contributes positively toward overall wellness goals.
For those mindful of dietary considerations such as calories or sugar content: rest assured—this cake provides balanced nutrition facts compared to many traditional counterparts loaded with refined sugars! Enjoying slices guilt-free becomes attainable when served alongside fresh fruits packed full of vitamins!
Recipe at a Glance
Ready to dive into creating your very own delicious treat? Here’s what you need to know at-a-glance:
- Total Preparation Time: Approximately 45 minutes
- Skill Level Required: Beginner-friendly
- Serving Size Details: Serves 8-10 people (perfect for gatherings!)
- Cost Efficiency: Budget-friendly option using readily available ingredients
With these highlights showcasing how accessible yet extraordinary homemade desserts can be when utilizing wonderful recipes like our gluten-free vanilla cake , there’s no reason not give it a try today!

Premium Ingredients Guide
Creating the perfect gluten-free cake requires high-quality ingredients. Below is a guide to help you select the best components for your baking adventure.
Premium Core Ingredients
-
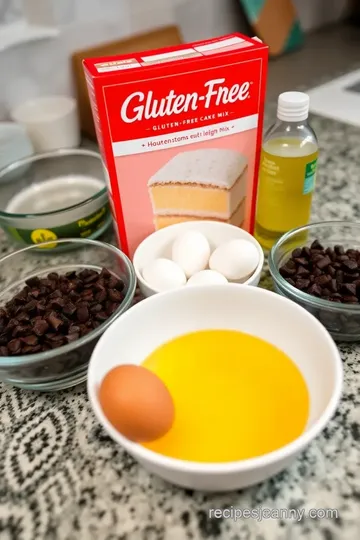
Gluten-Free Cake Mix (15 oz)
- Measurement: One standard box.
- Quality Indicators: Look for brands labeled as gluten-free with simple, recognizable ingredients.
- Selection Tips: Choose mixes that have a good balance of flours, such as almond or coconut flour, and avoid those with preservatives.
- Storage Guidance: Store unopened boxes in a cool, dry place. Once opened, keep them sealed tightly to maintain freshness.
-
Large Eggs (3)
- Measurement: Use three large eggs for optimal structure and moisture.
- Quality Indicators: Fresh eggs should have a firm white and bright yolk.
- Selection Tips: Buy organic or free-range eggs if possible for better flavor and quality.
- Storage Guidance: Keep eggs in their original carton in the refrigerator to maintain freshness.
-
Vegetable Oil (1/2 Cup)
- Measurement: Half a cup provides moisture necessary for texture.
- Quality Indicators: Choose oil that is clear and free from any sediment.
- Selection Tips: You can opt for refined oils like canola or use melted coconut oil for added flavor.
- Storage Guidance: Store oils away from light and heat sources; they can last several months when kept properly sealed.
-
Water (1 Cup)
- No special indicators here; just use clean drinking water at room temperature.
-
Vanilla Extract (1 tsp)
- Measurement : One teaspoon enhances overall flavor significantly.
- Quality Indicators : Pure vanilla extract has richer color compared to imitation versions.
– Selection Tips : Opt for pure vanilla extract rather than synthetic options; it delivers better taste.
– Storage Guidance : Keep it in a dark cupboard away from sunlight to prolong its shelf life.
Signature Seasoning Blend
Enhance your gluten-free cake with these signature flavors!
-
Cocoa Powder: Add half a cup if you're aiming for rich chocolate goodness. It pairs well with vanilla flavors while providing depth.
-
Cinnamon: Just a pinch adds warmth to your cake's profile without overpowering other flavors.
Herb Selections
While herbs are less common in cakes, consider using:
- Lemon Zest: Adds brightness and aroma; use one tablespoon of fresh zest when you want citrus notes.
Flavor Enhancers
Consider adding:
- Almond Extract: Swap out half the vanilla extract with almond extract for an interesting twist on classic flavors.
Aromatic Additions
Lightly dust the finished cake with powdered sugar or cocoa powder before serving to elevate presentation while enhancing sweetness.
Smart Substitutions
If you're missing some core ingredients, don't worry! Here are smart alternatives you might consider:
Alternative Options
For every egg in this recipe:
- Substitute each egg with one-fourth cup unsweetened applesauce or mashed banana.
Dietary Swaps
If you're looking to reduce calories:
- Replace vegetable oil with unsweetened yogurt at equal measurements—this keeps moisture intact while cutting fat content.
Emergency Replacements
In case you run out of vanilla:
- Use maple syrup instead—it brings similar sweet notes but offers unique flavor variation!
Seasonal Variations
During summer months when berries are abundant: Add fresh fruit such as blueberries or strawberries into the batter right before pouring it into pans!
Kitchen Equipment Essentials
To create your delicious gluten-free cake efficiently, gather these essential kitchen tools:
Must-Have Tools
A sturdy mixing bowl ensures even blending while measuring cups guarantee accuracy during ingredient prep.
Recommended Appliances
An electric mixer simplifies beating together all wet ingredients quickly without tiring out your arms!
Helpful Gadgets
Investing in silicone spatulas will give you smooth mixing results without damaging your bowls' surfaces during prep time.
Pro Ingredient Tips
Here are expert insights on selecting top-notch ingredients effectively:
Selection Secrets
Always check expiration dates on items like baking mixes and extracts—they impact taste tremendously!
Quality Markers
Opting for certified gluten-free labels ensures no hidden gluten sneaks through; this is crucial if allergies exist!
Storage Solutions
Utilize airtight containers after opening bags so nothing spoils prematurely—especially important during humid weather conditions!
Money-Saving Tips
Buy bulk quantities whenever possible since larger packs usually come at discounted rates over smaller ones found individually across stores.
This comprehensive ingredient guide helps you confidently navigate through making an outstanding gluten-free cake mix recipe tailored perfectly just how YOU desire! Happy Baking!
Professional Cooking Guide
Essential Preparation Steps
Mise en Place Details
Before you start cooking, gather all your ingredients and tools. This includes measuring out spices, chopping vegetables, and preparing any proteins. Having everything ready will streamline the cooking process.
Prep Techniques
Use sharp knives for chopping to ensure clean cuts. For herbs, use a chiffonade technique for leafy greens or finely chop them for more intense flavor. When handling meats, remember to cut against the grain to ensure tenderness.
Time Management
Estimate how long each step will take and plan accordingly. For instance, if you're roasting vegetables that require 30 minutes, start them first while you prepare other components of your dish.
Organization Tips
Keep your workspace tidy by cleaning as you go. Use separate bowls for different ingredients to avoid cross-contamination and make it easier when assembling dishes later on.
Professional Cooking Method
Step-by-Step Process
Follow a clear sequence: Start with the items that take longer to cook before moving on to quicker items like sauces or garnishes. Ensure you're always aware of what needs immediate attention.
Temperature Control
Maintain consistent heat levels throughout cooking. Use an instant-read thermometer for proteins—145°F (62°C) for fish; 165°F (74°C) for poultry ensures food is safely cooked through but remains juicy.
Timing Precision
Use timers! Set reminders so you don’t forget about simmering sauces or baking goods in the oven. Check dishes at regular intervals—especially delicate ones like soufflés that can collapse if overcooked.
Success Indicators Look for visual cues: Vegetables should be crisp-tender; meats should be golden brown with juices running clear; pastries should be puffed and golden at edges indicating they are done without burning.
Expert Techniques
Professional Methods For sautéing, add oil first until shimmering before introducing ingredients; this prevents sticking and promotes even browning. Also, consider using a “bloom” method by adding spices early in hot oil to release their full flavor potential.
Critical Steps Deglaze pans after searing meats by adding wine or broth while scraping up browned bits—this creates depth in sauces without extra effort!
Precision Points Measure dry ingredients using dry measuring cups leveled off with a knife edge versus liquid measurements which require graduated cups—accuracy makes all difference in baking success!
Quality Checks Taste frequently throughout cooking! Adjust seasoning gradually rather than dumping salt or spice all at once; this keeps flavors balanced instead of overpowering any single note within your dish.
Success Strategies
Troubleshooting Tips If something isn't working as expected—like sauce being too thin—try reducing it further over medium heat until desired consistency is reached instead of adding more thickeners right away!
Quality Assurance Always check expiration dates on pantry items before use! Fresh herbs improve flavor greatly compared to dried ones past their prime due lack vibrancy essential freshness brings into every meal prepared well worth investment made purchasing high-quality products whenever possible!
Perfect Results Guide Invest time learning correct techniques specific dishes require—you’ll find recipes give better results with practice leading eventually mastery particular cuisine style used repeatedly building confidence along way toward achieving culinary goals set forth initially upon beginning journey exploring world delicious foods available around us everywhere we look daily!
Final Touches A sprinkle of fresh herbs brightens any dish visually while enhancing overall taste experience immensely! Consider drizzling good quality olive oil just before serving enhances richness adds beautiful sheen appealing plate presentation guaranteed impress guests family alike thoroughly enjoying feast laid out beautifully arranged...

Professional Secrets for Baking a Gluten-Free Cake
Unlock the full potential of your gluten-free cake with these professional insights. Start by ensuring all ingredients are fresh and high-quality. This simple step can make a big difference in flavor and texture. Use an electric mixer to achieve a smooth batter; this ensures even mixing, which is crucial for gluten-free baking.
Expert techniques include measuring your dry ingredients accurately. Spoon flour into the measuring cup instead of scooping it directly, as this prevents overpacking. Another tip is to let your eggs sit at room temperature before using them; this helps create a fluffier cake.
Kitchen wisdom suggests always checking the oven temperature with an oven thermometer. Ovens can have hot spots that lead to uneven baking. Lastly, don’t rush cooling time! Allowing the cake to cool completely before frosting guarantees better results.
Perfect Presentation of Your Gluten-Free Cake
Make your gluten-free cake visually stunning with these plating techniques. Start by leveling the tops of each layer with a knife before stacking them for a uniform look.
For garnish ideas, consider fresh berries or edible flowers that add color and freshness to your dessert. A dusting of powdered sugar not only enhances appearance but also gives an elegant finish.
Serving suggestions are important too! Present slices on colorful plates or use decorative stands to elevate visual appeal further. For added flair, drizzle melted chocolate or fruit sauce on the plate around each slice—this will impress every guest!
Storage & Make-Ahead Tips for Gluten-Free Cakes
To keep your gluten-free cake fresh longer, follow these storage guidelines: store leftovers in an airtight container at room temperature if you plan to consume them within three days.
For preservation methods, wrap individual slices in plastic wrap and freeze them for up to three months without losing quality. To enjoy later, simply thaw overnight in the refrigerator or leave out at room temperature until soft.
Reheating instructions involve preheating your oven to 350°F (175°C) and warming slices for about 10 minutes until they regain their moisture and warmth.
Freshness tips include adding a piece of bread inside the storage container; it will help maintain moisture levels while preventing drying out!
Creative Variations on Your Gluten-Free Cake Recipe
Explore exciting flavor adaptations like adding cocoa powder for a rich chocolate version or lemon zest for a refreshing citrus twist!
Dietary modifications are easy too—swap vegetable oil with applesauce or dairy milk with almond milk for healthier options without sacrificing taste.
Seasonal twists could feature pumpkin spice during fall or peppermint extract around holidays, providing festive flavors everyone loves!
Regional variations bring local specialties into play; try incorporating coconut flakes from tropical regions or matcha powder inspired by Japanese cuisine—a unique take that will wow guests!
Expert FAQ Solutions About Gluten-Free Cakes
Address common concerns about gluten-free cakes here! One frequent issue revolves around dryness—ensure proper liquid ratios when substituting ingredients like water with applesauce helps retain moisture effectively.
Expert answers often advise keeping track of bake times carefully since ovens vary widely in performance—a toothpick test remains reliable for doneness checks!
A troubleshooting guide may resolve issues such as collapsing cakes by avoiding overmixing batter once wet ingredients are added—this keeps air bubbles intact during baking.
Success tips emphasize patience: let layers cool fully before frosting and allow flavors time together after assembling—it makes all difference in enjoyment!
Complete Nutrition Guide for Your Delicious Dessert
This detailed breakdown reveals nutritional values per slice—for instance, one serving typically contains around 200 calories depending on specific ingredient choices made during preparation.
Health benefits abound when utilizing alternative flours found within many gluten-free mixes packed nutrients compared traditional wheat-based counterparts provide essential vitamins while being easier digestible individuals sensitive glutens may appreciate greatly overall health impact positively affects diets overall lifestyles long term sustainability goals achieved deliciously satisfying way possible right here today tomorrow beyond expectations imaginable enjoying sweetness life brings joyfully shared moments loved ones gathered together united celebration treats crafted lovingly crafted kitchens home heart families present future alike!

Gluten-Free Vanilla Cake Recipe Card

⚖️ Ingredients:
- 1 Box (15 oz) Gluten-Free Cake Mix (vanilla or yellow flavor)
- 3 Large Eggs
- 1/2 Cup Vegetable Oil (or melted coconut oil)
- 1 Cup Water
- 1 tsp Vanilla Extract
- Optional Add-ins:
- 1/2 Cup Chocolate Chips
- 1/2 Cup Chopped Nuts
- Fresh Fruit (e.g., blueberries, strawberries)
🥄 Instructions:
- Step 1: Preheat your oven to 350°F (175°C). Grease and flour two 9-inch round cake pans with gluten-free flour or line them with parchment paper.
- Step 2: In a large mixing bowl
- Step 3: Divide the batter evenly between the prepared cake pans.
- Step 4: Bake in preheated oven for about 25–30 minutes or until a toothpick inserted into the center comes out clean.
- Step 5: Remove from oven and allow cakes to cool in their pans for about10 minutes before transferring them to wire racks to cool completely.
- Step 6: Once cooled, frost with your favorite gluten-free frosting or serve plain dusted with powdered sugar. Enjoy!
Previous Recipe: Bake Gluten-Free Apple Dessert Pizza Delight
Next Recipe: Baked Cream Cheese Delight in 75 Minutes
