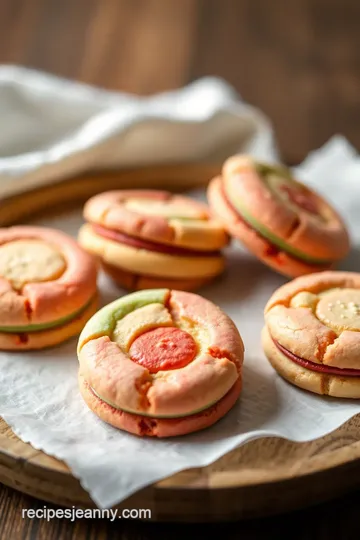
Rainbow Layered Delight Cookies
Bake Colorful Layered Cookies Delightfully with my Rainbow Layered Delight Cookies! These vibrant treats add fun to any celebration. Get the recipe now!

- Let’s look into into Colorful Layered Cookies Delightfully!
- Essential Ingredients Guide
- Bake Colorful Layered Cookies Delightfully
- Pro Tips & Secrets for Baking Success!
- Perfect Presentation: Making Your Cookies Shine
- Storage & Make-Ahead Tips
- Creative Variations: Switch It Up!
- Complete Nutrition Guide: Baking with Benefits
- Conclusion: Happy Baking!
- Frequently Asked Questions
- Recipe Card
Let’s look into into Colorful Layered Cookies Delightfully!
Oh, you guys, let me tell you about the time i decided to bake colorful layered cookies delightfully for a birthday party.
Picture this: me, covered in flour, trying to roll out dough while my dog is underfoot, eyeing my mixing bowl like it’s a treasure chest.
I mean, who doesn’t love cookies? and when they’re as vibrant as a rainbow? total showstopper! seriously, what's better than a batch of colorful treats for parties that also doubles as art? you know?
When i pulled those beauties out of the oven, my heart just soared. they were perfectly layered, and the kids’ faces lit up like it was christmas morning—pure magic! if you're itching to impress your friends with a fun cookie project, you’re in the right place, my friend.
A Taste of Cookie History and Their Vibrant News
Did you know that layered cookies have been a thing in different cultures, from italian rainbow cookies to swedish “kärleksmums”? these delightful bites of joy have traveled the globe! nowadays, they are a hit at birthday parties, holidays, and even casual get-togethers.
It’s like every celebration is calling for these whimsical cookie recipes to step in.
Now, just to give you an idea of what we’re diving into: preparing these cookies does take a bit of time and effort.
We’re talking about roughly 1 hour and 45 minutes until you’re twirling those cookies around your kitchen. but hey, it’s worth it! the process is simple enough for most bakers—medium skill level.
And with about 24 yummy cookies at the end, it’s more than enough to share…or not!
Cookie Benefits? Yes, Please!
Let’s chat about why these cookies sparkle even brighter. first off, health-wise , they’re not just an explosion of sugar.
These cookies can be made with good-quality butter and whole ingredients. plus, you can add in things like almond flour or coconut oil for a healthy twist.
And don't even get me started on the occasions ! serve them at birthday parties, holiday gatherings, or just for yourself when you need a little sweet pick-me-up.
They're basically the celebration cookies that keep on giving!
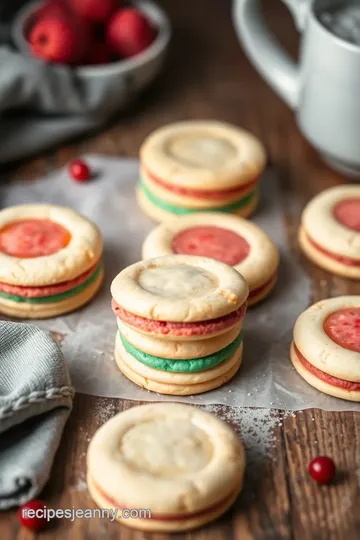
The real kicker? These cookies can be customized to fit any theme. Seriously, think about it! Use different layered cookie ideas for various holidays or celebrations—how about red and green for Christmas or pastel colors for Easter?
What’s Next on the Baking Adventure?
Now that you’ve got your mouth watering and your mind buzzing with all these ideas, you probably want to know how to make these stunning delicious cookie desserts .
Just imagine your kitchen turning into a cookie wonderland!
We’ll tackle everything: from mixing that chilled cookie dough to introducing those brilliant layers with cookie layering techniques —i promise to share my savvy baking tips for beginners throughout! so, roll up your sleeves and get ready to impress your friends with these delicious bites that’ll make your kitchen smell like a dream.
Ready to gather your ingredients and get to work? Let's whip up these layered desserts and turn your baking game into a colorful adventure! Don’t forget—every cookie layer is a step toward joy and laughter, and who doesn’t need more of that in their life?
Essential Ingredients Guide
Baking is all about those core ingredients that drive your kitchen masterpieces. honestly, it’s like magic — mix a few things together, and voilà, you’ve got deliciousness! let’s break down those essentials so you can bake colorful layered cookies delightfully every time.
Premium Core Components
When you grab ingredients, be sure to check your measurements. the classic cookie recipe typically calls for 2 ½ cups (312 g) of all-purpose flour.
If you're weighing it out, remember that a good kitchen scale is an essential tool. for those of us who wing it, eyeballing can sometimes lead to a colorful mistake!
Quality matters. Look for fresh ingredients. For butter, you want it soft but not melted. Check that expiration date on your baking powder, too. Trust me, expired stuff can ruin your treats!
As for storage, a cool, dry place usually keeps your ingredients fresh. flour can last about 6-8 months in the pantry if sealed well.
Spice it up! got old spices? toss 'em. replace them every year, and your cookies will thank you!
Signature Seasoning Blend
Let’s spice things up! have you ever thought about a signature blend of spices? a dash of cinnamon or a pinch of nutmeg can elevate those colorful cookie recipes .
That’s where the fun begins! think of kitchen experiments like a cooking science class but tastier.
Herbs usually don’t make it to the cookie scene, but if you’re feeling adventurous, fresh mint adds a quirky surprise.
Various flavor enhancers like vanilla or almond extract can add depth to your dough. depending on the season or occasion, you can switch things up.
For holiday cheer, sprinkle in a bit of nutmeg or peppermint. yum!
Smart Substitutions
We’ve all been there: recipes calling for ingredients you just don’t have. but worry not, my baking buddy! there are common replacements that can save the day.
Need eggs? replace them with applesauce or mashed bananas. it’s like magic when you’re baking for those with special diets.
For anyone keen on making those layered desserts kid-friendly, swap out regular cookies for gluten-free versions. many families are watching for those dietary modifications, and it’s rockin’ to cater! if you’re in a jam, all-purpose flour often works fine for most cookie recipes, including fun sugar cookies.
Kitchen Equipment Essentials
When it comes to tools, some are just must-haves. a mixing bowl, a rolling pin, and some cookie cutters will do just fine.
Oh, and let’s talk about parchment paper. it’ll save you from chaotic cleanup, trust me.
If you don’t own an electric mixer, don't despair! a good ol’ whisk can do the job, although you might work up a sweat.
Want to step it up? consider a food processor for big batches of cookie dough. it can make your life so much easier, especially when you're whipping up decorative cookie baking sessions!
A Sweet Transition
Ready to take on a cookie adventure? these essential ingredients and tips will gear you up for the fun task ahead.
If you're excited to dive into the rainbow layered delight cookies, knowing your components will help you bake those colorful treats for parties, birthdays, or just because.
Let’s roll up those sleeves and get to mixing and layering! follow the upcoming step-by-step instructions — trust me, you’re gonna love those vibrant baked treats! happy baking!
Bake Colorful Layered Cookies Delightfully
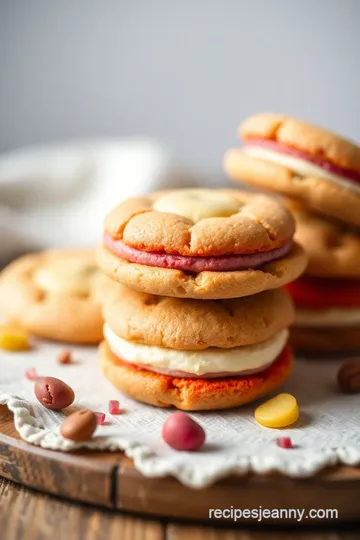
When you step into the world of colorful cookie recipes , it can feel like a magical journey. picture this: cookies layered with bright hues of vanilla and chocolate, making every bite not just a treat for the taste buds but a feast for the eyes.
If you’re looking to impress at your next gathering or just want to make your afternoon a bit more fun, rainbow layered delight cookies are your go-to.
Let’s dive right into the professional cooking methods that’ll have you baking these whimsical cookies like a pro!
Essential Preparation Steps
Mise en place: a fancy term, but it just means having everything ready before you start. measuring out your 2 ½ cups of flour and patiently waiting for that unsalted butter to soften are key steps.
It might seem tedious, but it saves you from the chaos in the mixing stage.
Time Management Tips: You’ll want to set aside about 1 hour for chilling your dough. This is crucial because chilled dough holds its shape better—a little time spent waiting is well worth it!
Organization strategies: follow your recipe, and keep all your tools handy: mixing bowls, rolling pin, and of course, your trusty baking sheets.
It sounds simple, but being organized makes a huge difference—nobody likes running around hunting for a knife while their cookies are on the verge of disaster.
Safety Considerations: Always remember that ovens can be hot! Keep a cool head and use oven mitts. Those burns aren’t a badge of honor; they’re a painful lesson.
Step-by-Step Process
-
Prepare the Dough: Start by whisking together your dry ingredients. Separate mixing bowls keep the chaos at bay. Cream butter and sugar until it's fluffy, get that egg in there, and mix it all up!
-
Divide the Dough: Split the dough evenly for the chocolate layer. You don’t want your chocolate to overpower the vibrant cookie flavors.
-
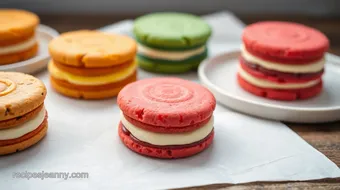
Add Food Coloring: Here comes the fun part! Use a few drops of gel food coloring for each layer until you achieve the brightness that makes your heart sing.
-
Roll and layer: roll out your colored dough to about ¼-inch thickness . stack those layers like you’re building a rainbow! wrap them up and chill for 1 hour .
Trust me, this makes a big difference in the final product.
-
Bake : preheat your oven to 350° f ( 175° c) . slice those beautiful cookie layers and pop them in the oven.
Bake for 12 to 15 minutes until they’re lightly golden. and don’t you dare open that oven too soon!
Expert Techniques
When you’re baking colorful layered cookies , you’ll want to pay attention to details. ensure your layers are even when you're stacking—this way, they bake uniformly, leading to those eye-catching treats many of us lust after.
Keep a close eye on temperature. Overbaking will turn your delightful creation into dry, hard... what’s the word? Boulders! So, that golden edge? Perfect!
If things go awry—perhaps the layers aren't sticking—try a bit of warm water on your fingers and press them together gently.
Success Strategies
Here are a few pitfalls to avoid:
- Common Mistakes: Don’t skip the chilling steps! It’s tempting, but trust the process.
- Quality Assurance Tips: Visually inspect your cookies as they bake. If they’re puffing up too much, your oven might be too hot.
- Perfect Results Guide: For the best flavor, let your cookies cool fully before sampling.
And if you want a head start, make your dough ahead of time and keep it chilled.
Additional Information
So, there you have it—a road map for baking those stunning rainbow layered delight cookies. with a bit of practice, you’ll bake colorful layered cookies delightfully and fill your home with cheerful vibes.
These treats are perfect for birthdays, celebrations, or just because you want to brighten someone’s day. so, go on and make those colorful treats for parties or a fun evening baking with the kids! happy baking, and don’t forget to enjoy the process.
🧡
Pro Tips & Secrets for Baking Success!
Let me tell you, every time i whip up a batch of rainbow layered delight cookies , i learn something new.
Seriously, it's like a mini adventure in my kitchen! here are some of my go-to tips and tricks to help you bake colorful layered cookies delightfully .
First off, chilling the dough is key . i can’t stress this enough! if you skip the chilling step, your cookies might spread out and lose those beautiful layers.
Trust me, you want to keep that eye-catching, layered look. wrap it up and let it chill for at least an hour.
When it comes to adding color, go for gel food coloring . liquid coloring can change the dough’s texture and make it too runny.
If you're looking for vibrant colors, gel is the way to go. mix it in slowly until you achieve that perfect rainbow shade.
Now, here’s a game-changer : when layering, make sure each layer is even. not only does this look pretty, but they also bake more uniformly.
Plus, who doesn't want visually appealing cookies that double as art?
Oh, presentation is everything! once your cookies come out of the oven and cool down, think about how to plate them.
A cute platter or stacking them with a sprinkle of powdered sugar on top can really elevate your cookie game.
Trust me, your friends will think you’re a pro!
Perfect Presentation: Making Your Cookies Shine
Now, let’s chat about plating and garnishes . you can get creative here! try using bright colored plates that contrast with your cookies.
A little sprinkle of edible glitter or a few colorful sprinkles on top can add that whimsical touch we all love.
I once made these for a birthday party and arranged them on a tiered cake stand. talk about eye candy! everyone was snapping pics before they even took a bite.
Always think about color combinations . pair your cookies with something bright, like fresh fruit or whipped cream, for a pop of color!
Storage & Make-Ahead Tips
Feeling ahead of the game? you can make the dough in advance ! just store it wrapped tightly in plastic wrap.
It keeps well in the fridge for about a week, or you can freeze it for up to two months.
When you're ready to bake, just let it thaw in the fridge overnight.
Now, let's talk storage. if you have any leftovers (which, let’s be honest, is rare), keep your cookies in an airtight container to maintain freshness.
They'll last for about a week. if you’re looking for a quick snack, pop them in the microwave for a few seconds to warm them up — oh goodness, it's like they just came out of the oven!
Creative Variations: Switch It Up!
You want to keep things fun? get creative with variations! how about adding a little zesty twist? a kick of lemon or orange zest can brighten up those flavors.
Or swap the usual vanilla for almond extract for a nutty vibe. just imagine those sneaky flavor twists in your layered cookies!
For the adventurous bakers, make seasonal variations! green and red layers for christmas or pastels for easter. get your kids involved too — they’ll love adding their favorite colors! it's a perfect fun baking activity for those rainy afternoons.
Complete Nutrition Guide: Baking with Benefits
Okay, let’s dive into the numbers for a sec. each cookie packs about 130 calories, but don’t let that freak you out! it’s all about moderation.
These delicious cookie desserts can actually have benefits, especially if you swap in whole wheat flour or cut back on sugar.
Kids love these, and with such fun cookie projects , they'll not only get a tasty treat but also a lovely bonding experience with you.
Plus, who knew you could sneak a little nutrition in with a homemade cookie?
Conclusion: Happy Baking!
So there you have it! whether you’re making these for a party or just to enjoy at home, the rainbow layered delight cookies are sure to impress.
They can turn any day into a celebration with their vibrant colors and delightful flavors.
Remember, baking should be fun, and with a dash of creativity and a sprinkle of love, you can create cookies that bring smiles.
Now grab those mixing bowls, get the kiddos involved, and let’s make those cookies! happy baking!
Frequently Asked Questions
How do I Bake Colorful Layered Cookies Delightfully without them falling apart?
To ensure your cookies hold their shape, it's crucial to chill the layered dough well before cutting. This solidifies the layers, preventing them from spreading too much while baking. Aim for at least an hour in the refrigerator for optimal results.
Can I make substitutions in the Rainbow Layered Delight Cookies recipe?
Yes! You can substitute unsalted butter with salted butter (just omit the extra salt) or use coconut oil for a dairy-free option. Also, feel free to experiment with different flavored extracts or food color gels to customize your cookies and suit various occasions.
What can I do if I don't have gel food coloring?
If gel food coloring isn't available, liquid food coloring can be used, but it may alter the dough's consistency. Start with a small amount and mix thoroughly until you achieve the desired color, but be cautious not to make the dough too wet.
How should I store my Rainbow Layered Delight Cookies?
Store your cookies in an airtight container at room temperature for up to one week. For longer storage, you can freeze the cookies by placing them in a freezer-safe bag or container. Just make sure they are completely cooled before freezing to maintain their texture.
Are these layered cookies suitable for dietary restrictions?
Yes, you can make these cookies gluten-free by using a gluten-free all-purpose flour substitute. Additionally, the recipe can be modified to be dairy-free by using plant-based margarine or coconut oil instead of butter. Always check labels to ensure other ingredients meet your dietary needs.
Can I add extra toppings to my Bake Colorful Layered Cookies Delightfully?
Absolutely! Toppings like sprinkles, chocolate chips, or nuts can be added before baking for extra flavor and visual appeal. Just remember that heavier toppings may require you to adjust the baking time slightly to ensure the cookies bake evenly.
Rainbow Layered Delight Cookies Card
⚖️ Ingredients:
- 2 ½ cups (312 g) all-purpose flour
- 1 teaspoon baking powder
- ½ teaspoon salt
- ½ cup (113 g) unsalted butter, softened
- 1 cup (200 g) granulated sugar
- 1 large egg
- 2 teaspoons vanilla extract
- 2 tablespoons milk
- 3-4 drops of food coloring (gel preferred for vibrant color)
- ¼ cup (30 g) unsweetened cocoa powder
🥄 Instructions:
- Step 1: In a bowl, whisk together flour, baking powder, and salt.
- Step 2: In a separate bowl, cream butter and sugar until light and fluffy.
- Step 3: Beat in the egg, vanilla, and milk until well combined.
- Step 4: Gradually mix in dry ingredients until a dough forms.
- Step 5: Split the dough into two equal portions.
- Step 6: In one portion, blend in cocoa powder until fully integrated.
- Step 7: Divide the remaining portion into smaller sections (3-4).
- Step 8: Add food coloring to each section, mixing until the color is even.
- Step 9: On a floured surface, roll out each colored dough and chocolate dough to about ¼-inch thickness.
- Step 10: Stack layers in alternating order (e.g., vanilla, colored, chocolate).
- Step 11: Wrap the layered dough in plastic wrap and chill for 1 hour.
- Step 12: Preheat the oven to 350°F (175°C).
- Step 13: Unwrap the chilled dough and slice it into cookies.
- Step 14: Place cookies on parchment-lined baking sheets.
- Step 15: Bake for 12-15 minutes until lightly golden around the edges.
- Step 16: Allow cookies to cool on a wire rack before serving.
Previous Recipe: Fluffy & Easy Bake Delicious Sesame Buns in 40 Minutes: A Family Favorite!
Next Recipe: Easy & Delicious Bake Gingerbread Cookie Bars with Chocolate